Introduction: Why Air Quality Matters in DIY Craft Studios
When setting up a DIY craft studio, most makers focus on tools, storage, and aesthetics. Yet, one critical aspect often gets overlooked: air quality. Whether you’re painting, gluing, soldering, or working with textiles, the materials and processes you use can release dust, fumes, and volatile organic compounds (VOCs) into the air. Poor indoor air quality isn’t just a comfort issue—it directly impacts your health, creativity, and the longevity of your materials and projects.
Many crafters experience unexplained headaches, allergies, or fatigue after long hours in their studio. These symptoms are often caused by invisible airborne pollutants. From adhesives and paints to fine glitter and fabric fibers, every creative pursuit brings its own air quality challenges. The good news: with some smart planning and a few proven upgrades, you can transform your workspace into a safe and invigorating environment. This comprehensive guide will walk you through practical, actionable solutions—covering material selection, filtration, plants, layout, and low-cost DIY improvements—to ensure your craft studio’s air is as fresh and inspiring as your ideas.
Understanding Air Quality Threats in Craft Studios
Common Pollutants: What’s in the Air?
- Volatile Organic Compounds (VOCs): Emitted by paints, varnishes, adhesives, and some plastics.
- Particulate Matter: Fine dust from sanding, glitter, cutting fabrics, or working with clay and paper.
- Fumes: Soldering, burning, or using hot tools can release metal fumes and other hazardous gases.
- Mold Spores: Can develop if humidity is high or materials are stored improperly.
- Allergens: Fibers from wool, feathers, or plant-based materials.
Health Impacts
Short-term exposure to these pollutants can cause headaches, dizziness, eye/nose/throat irritation, and fatigue. Long-term exposure increases risks of respiratory illnesses, allergies, and even chronic conditions like asthma. For children or pets sharing your workspace, the risks are greater due to their increased sensitivity.
Material Choices: Reducing Emissions at the Source
Low-VOC and Non-Toxic Supplies
- Paints & Finishes: Choose products labeled “low-VOC” or “zero-VOC.” Brands like ECOS Paints or Benjamin Moore Natura offer safer options.
- Adhesives: Water-based glues (such as PVA) emit fewer fumes than solvent-based products. Avoid super glue (cyanoacrylate) in enclosed spaces if possible.
- Solvents & Cleaners: Opt for citrus-based, biodegradable cleaners instead of harsh chemical solvents.
- Craft Materials: When possible, choose natural fibers, untreated woods, and certified non-toxic supplies.
Safe Storage Practices
- Store chemicals, paints, and adhesives in airtight containers, preferably in a ventilated cabinet.
- Keep flammable or volatile materials away from heat sources.
- Label all containers clearly and dispose of expired products promptly.
Studio Layout Strategies to Enhance Airflow
Optimizing Natural Ventilation
- Position your primary workbench near windows that can open.
- If possible, install transom windows or vents at different heights to promote cross-ventilation.
- Use door sweeps and weatherstripping to control unwanted drafts and direct airflow.
Zone Work Areas for Safety
- Designate a “wet zone” for paints, adhesives, and soldering—keep this area well-ventilated and isolated from storage or relaxation spaces.
- Install a partial partition or high shelf to help contain dust and fumes to specific zones.
- Use washable, easy-to-clean surfaces in high-use areas to prevent build-up of dust and chemicals.
Filtration Solutions: Clearing the Air
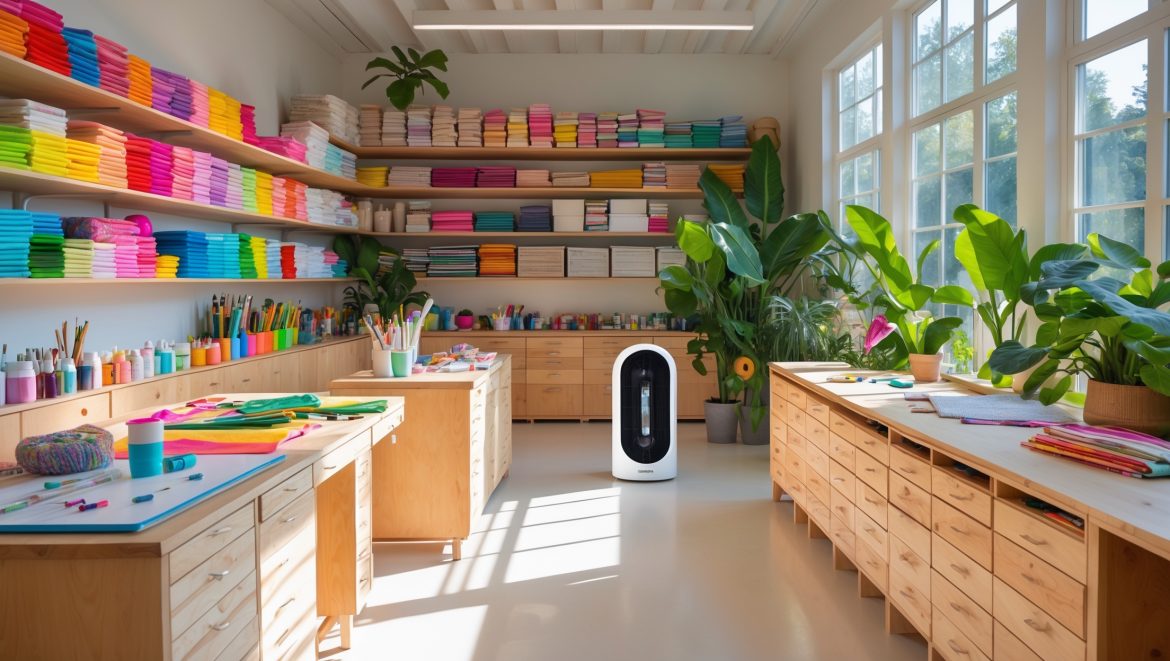
Types of Air Purifiers and Filters
- HEPA Filters: Capture 99.97% of airborne particles 0.3 microns and larger. Essential for dust, pollen, and small fiber removal.
- Activated Carbon Filters: Absorb VOCs, odors, and some chemical fumes. Look for combined HEPA/carbon units for all-around protection.
- DIY Filter Box: Attach a high-quality furnace filter to a standard box fan for a budget-friendly solution. Change filters every 2-3 months.
Placement Tips
- Place air purifiers near your main work area, but not directly beside dusty machines or open windows.
- If your studio is large, consider a second smaller purifier in the opposite corner for balanced coverage.
- Replace filters on schedule—set a calendar reminder to ensure consistent performance.
Supplemental Solutions: Plants, Humidity, and More
Air-Purifying Plants
- Spider Plant (Chlorophytum comosum): Absorbs formaldehyde and xylene; easy to grow.
- Snake Plant (Sansevieria): Removes benzene, formaldehyde, and toluene; thrives in low light.
- Pothos (Epipremnum aureum): Good for VOC absorption; toxic to pets, so keep out of reach.
While plants help, they’re a supplement—not a replacement—for good ventilation and filtration.
Humidity Control
- Maintain relative humidity between 40–60% to minimize dust and prevent mold growth.
- Use a digital hygrometer to monitor levels, especially if your studio is in a basement or attic.
- Dehumidifiers are essential for damp environments; humidifiers help in dry climates.
Dust Management: Keeping Particulates Under Control
Source Capture Techniques
- Use a shop vacuum with HEPA filtration when sanding, sawing, or drilling.
- Install a small, adjustable fume extractor for soldering or painting miniatures.
- Wet-wipe surfaces and mop floors regularly to capture settled dust.
Personal Protective Equipment (PPE)
- Wear a properly fitted N95 mask or higher-grade respirator during high-dust activities.
- Eye protection and gloves can also reduce skin and mucous membrane exposure.
- Change clothes after particularly dusty or fume-heavy projects to avoid tracking pollutants into living spaces.
Smart Cleaning Routines and Maintenance
Regular Cleaning Checklist
- Vacuum floors and rugs with a HEPA-equipped vacuum weekly.
- Wipe down work surfaces, tools, and shelves with a damp microfiber cloth.
- Wash curtains, cushion covers, and other textiles regularly to minimize fibers and allergens.
- Empty trash and recycling bins frequently, especially if they contain paint rags or chemical containers.
Deep Cleaning Tasks
- Every 3–6 months, clean out ventilation ducts and replace HVAC filters if your studio is connected to central air.
- Inspect and clean behind large furniture or storage units where dust collects.
- Check for signs of mold, especially in hidden or damp areas, and remediate promptly.
DIY Upgrades for Better Air Quality
Easy-to-Install Vent Fans
- Install a window-mounted exhaust fan in your paint or glue zone to draw out fumes during use.
- For windowless studios, a through-wall fan with a backdraft damper can be a game-changer.
- Consider a portable fume hood for compact or rented spaces—many models are plug-and-play with HEPA and carbon filters.
Air Quality Monitoring
- Affordable indoor air quality monitors now detect VOCs, particulate matter, and humidity in real time.
- Use monitor readings to adjust ventilation, run purifiers, or identify trouble spots.
- Track data over time to spot seasonal trends or the impact of new materials.
Special Considerations for Shared or Home Studios
Protecting Family, Kids, and Pets
- Keep all chemical supplies and sharp tools in locked cabinets if children or pets have access to the studio.
- Schedule fume-heavy projects when others are out of the house, and air out the space before re-entry.
- Communicate with housemates about your crafting schedule and air out shared spaces after big projects.
Budget-Friendly Tips for Renters
- Use portable air purifiers and window fans that require no permanent installation.
- Seal gaps around doors and windows with removable weatherstripping to control airflow.
- Invest in washable air filters for recurring savings.
Maintaining and Troubleshooting Your Studio’s Air Quality
Routine Inspections
- Check exhaust fans for dust build-up and clean blades as needed.
- Ensure all vents and air intakes are unobstructed by supplies or furniture.
- Monitor for unusual odors—persistent smells often indicate chemical build-up or mold.
Common Problems and Fixes
- Condensation on Windows: Increase ventilation and run a dehumidifier.
- Persistent Dust: Upgrade to a higher-rated air purifier or add a secondary unit.
- Lingering Odors: Double-check chemical storage, switch to low-odor products, and clean surfaces thoroughly.
Conclusion: Building a Healthier, More Inspiring Creative Space
Crafting is about joy, self-expression, and the satisfaction of making something with your own hands. But that joy can quickly fade if your creative space is stuffy, dusty, or filled with lingering chemical odors. Prioritizing air quality in your DIY craft studio isn’t just about health—it’s about creating an environment where your best ideas can thrive, where you can work longer and more comfortably, and where your finished projects reflect the care you put into every detail.
By choosing safer materials, optimizing your studio layout, investing in filtration, and embracing regular cleaning routines, you can dramatically reduce airborne pollutants. Even small changes, like adding a few air-purifying plants or using a simple filter-fan combo, make a tangible difference. For renters and budget-conscious makers, many improvements are portable, affordable, and easy to implement. And by monitoring your air quality over time, you’ll gain confidence that your studio is as safe as it is inspiring.
Don’t let invisible hazards undermine your creativity. Take actionable steps—today—to transform your craft studio into a healthier, more vibrant space. Your body, your mind, and your art will thank you for it.


For people renting their studio space with limited ability to change layouts or install new vents, what quick, renter-friendly upgrades provide the biggest improvement in air quality?
Portable air purifiers with HEPA filters can make a big difference without any installation. Also, try using window fans to increase airflow if possible, and choose low-VOC or non-toxic materials for your projects. Keeping supplies sealed and cleaning frequently are renter-friendly ways to reduce airborne particles and fumes.
I use a lot of glues and paints in my studio—do you have recommendations for affordable air filtration units that are effective at removing VOCs, or is opening windows enough?
Opening windows helps, but for best protection from VOCs, especially if you use glues and paints often, it’s wise to add an air purifier with a true HEPA filter and an activated carbon filter. These filters trap VOCs and fumes effectively. There are budget-friendly brands that offer compact units designed for small studios. Regularly airing out the space alongside a dedicated filter unit gives you the healthiest results.
Regarding craft materials that emit VOCs like paints and adhesives, do you have specific recommendations for brands or product types that are proven to have lower emissions but still perform well for intricate projects?
For low-VOC craft materials, look for water-based paints and adhesives labeled as non-toxic or certified by organizations like GreenGuard or AP. Brands such as Liquitex for acrylic paints and Aleene’s for adhesives are known for lower emissions and good performance. Always check product labels for VOC content, and test on a small project to ensure they meet your needs for detail and durability.
I sometimes feel lightheaded after soldering in my craft room. Are there immediate steps I can take to minimize fumes, or do I need a complete ventilation overhaul?
If you’re feeling lightheaded after soldering, try opening windows or using a fan to improve airflow right away. Work as close as possible to the open window, and consider using a small desk fan to direct fumes outside. Using a portable fume extractor or soldering near a local exhaust vent can also help. If symptoms persist, a more thorough ventilation setup may be needed.