Introduction
Every DIY enthusiast knows the thrill of working with reliable, sharp, and well-maintained tools. Whether you’re crafting intricate jewelry, sewing upcycled textiles, or building custom furniture, your gear is the backbone of your creative pursuits. But even the best tools can lose their edge—literally and figuratively—without proper care. Neglected tools can become unsafe, frustrating to use, and, ultimately, expensive to replace. If you’ve ever been slowed down by a dull rotary cutter, a gummed-up glue gun, or a misfiring drill, you’re not alone. The good news? A well-planned maintenance routine can significantly extend the life of your craft studio tools, save you money, and keep your creative flow uninterrupted.
This guide is your comprehensive companion to craft tool maintenance. We’ll cover the why and how of cleaning, sharpening, lubricating, and storing a wide range of hand and power tools commonly found in DIY studios. You’ll discover troubleshooting tips for common tool issues, learn how to set up an efficient maintenance station, and find out which supplies truly make a difference. Whether you’re a seasoned maker or just establishing your home studio, mastering tool care will empower you to create more safely, efficiently, and joyfully. Let’s dive in and unlock the secrets to gear that lasts a creative lifetime!
Why Tool Maintenance Matters in the Craft Studio
Safety First
Neglected tools are more than just a nuisance—they can be dangerous. Dull blades require more force, increasing the risk of slips and injuries. Frayed cords or sticky mechanisms can cause unpredictable behavior in power tools. Regular maintenance not only preserves your tools but also protects you and anyone else using your studio.
Performance and Precision
Clean, sharp, and lubricated tools work as intended, delivering precise cuts, clean seams, and dependable results. Over time, buildup from adhesives, paint, or fabric fibers can diminish tool accuracy. Routine care ensures your creative vision isn’t compromised by a tool’s decline.
Financial Sense
Well-maintained tools last significantly longer, meaning fewer replacements and lower costs over the years. Investing a small amount of time in maintenance pays off in both savings and creative satisfaction.
Setting Up Your Maintenance Station
Choosing the Right Spot
Dedicate a small area of your studio to tool maintenance. Look for:
- Good lighting—so you can spot wear or damage easily
- Ventilation—for tasks involving oils, solvents, or dust
- Easy-to-clean surfaces
- Access to a sink if you regularly clean paintbrushes or glue applicators
Essential Maintenance Supplies
- Microfiber cloths and soft brushes for dusting and cleaning
- Isopropyl alcohol and mild dish soap
- Lubricating oil (machine oil or specialty oils for sewing machines, etc.)
- Sharpening stones, honing rods, or blade sharpeners
- Compressed air canister
- Small screwdrivers and hex keys for tightening hardware
- Rust remover and metal polish
- Sanding sponges or steel wool
- Protective gloves and safety glasses
Organizing Maintenance Supplies
Use a caddy, toolbox, or wall-mounted organizer to keep your maintenance supplies accessible. Label containers to reduce search time and avoid mix-ups. Regularly check your inventory and replenish consumables.
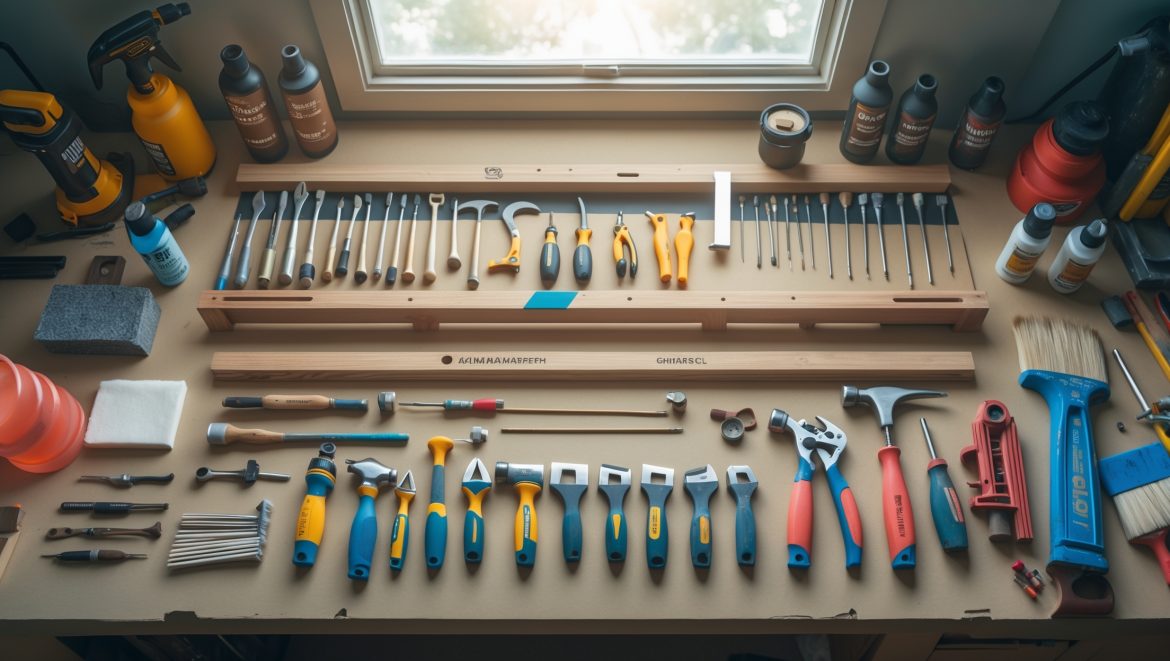
Hand Tool Care: Cleaning, Sharpening, and Storage
Scissors and Shears
- Cleaning: Wipe blades after each use to remove adhesives, fibers, or paint. For stubborn residue, use isopropyl alcohol on a cloth. Avoid soaking, as this can rust the pivot screw.
- Sharpening: Use a dedicated scissor sharpener or a sharpening stone, following the blade angle. Test on scrap fabric or paper after each pass.
- Lubrication: Add a drop of oil to the pivot screw monthly; open and close to distribute.
- Storage: Store in blade covers or a designated rack. Never toss into a drawer unprotected.
Rotary Cutters
- Cleaning: Unscrew the blade and wipe clean; use a soft brush to remove lint from the housing.
- Sharpening: Replace or sharpen blades as soon as you notice skipping or snagging.
- Storage: Always retract the blade when not in use and store upright.
Utility Knives and Craft Blades
- Cleaning: Remove blades and clean handles with soapy water. Dry thoroughly.
- Sharpening: Disposable blades should be replaced; high-quality hobby knives may be honed gently.
- Storage: Use blade guards and a dedicated box for spare blades.
Measuring Tools (Rulers, Squares, Calipers)
- Cleaning: Wipe with a dry cloth; avoid abrasive cleaners on marked surfaces.
- Storage: Hang or store flat to prevent warping.
Pliers and Wire Cutters
- Cleaning: Wipe off adhesives and debris; use a brush for hinges.
- Lubrication: Oil joints every few months.
- Storage: Store in a rack or tool roll to avoid dulling edges.
Power Tool Maintenance in the Craft Studio
Drills and Rotary Tools
- Dust Removal: Use compressed air to clear vents and moving parts after each project.
- Chuck and Bit Care: Remove bits, wipe, and oil lightly to prevent rust.
- Battery Maintenance: Store batteries in a cool, dry place and charge regularly, even off-season.
- Inspection: Regularly check cords for fraying and housings for cracks.
Glue Guns
- Nozzle Cleaning: While warm (but unplugged), wipe the nozzle with foil or a heat-resistant pad.
- Residue Removal: Remove glue sticks between uses to prevent clogging.
- Storage: Store upright to avoid leaking.
Sewing Machines
- Lint Removal: Use a brush to clean bobbin area and feed dogs after every project.
- Oiling: Apply sewing machine oil per your manual’s guidance (usually every 8-10 hours of use).
- Needle Replacement: Change needles regularly to avoid skipped stitches and fabric damage.
- Cord and Pedal Checks: Inspect for wear and replace as needed.
Electric Sanders and Saws
- Dust Extraction: Empty dust bags and clean filters frequently.
- Blade and Pad Inspection: Check for dullness or damage and replace as necessary.
- Lubrication: Oil moving parts according to the manufacturer’s instructions.
Storage Solutions for Power Tools
- Hang tools on a pegboard or wall rack to keep off dusty surfaces.
- Store in original cases when possible, with silica gel packets to absorb moisture.
- Unplug and coil cords neatly to prevent damage.
Brushes, Applicators, and Finishing Tools
Paintbrushes
- Cleaning: Rinse with appropriate solvent (water for acrylic, mineral spirits for oil) immediately after use.
- Reshaping: Gently reshape bristles while damp, then hang or lay flat to dry.
- Deep Cleaning: Occasionally use brush soap for a thorough cleanse.
- Storage: Store bristles-up in a holder or suspended to avoid crushing.
Sponges and Rollers
- Cleaning: Wash thoroughly after each use and squeeze out excess water.
- Drying: Air dry completely before storing to prevent mold.
- Replacement: Replace when they lose firmness or begin to crumble.
Glue and Epoxy Applicators
- Cleaning: Remove excess glue before it sets. Use a solvent for stubborn residue.
- Storage: Keep separate from other tools to prevent cross-contamination.
Preventing and Managing Rust
Why Rust Happens
Rust forms when metal is exposed to moisture and oxygen, a common risk in humid or improperly ventilated studios.
Prevention Strategies
- Wipe metal tools after each use, especially if hands were sweaty or the environment is humid.
- Store tools with silica gel packets or rust-inhibiting paper in toolboxes and drawers.
- Occasionally apply a thin coat of oil or a commercial rust inhibitor to metal surfaces.
- Maintain studio humidity below 55% with a dehumidifier if necessary.
Removing Rust
- For light rust, use fine steel wool or a sanding sponge with a bit of oil.
- For heavier rust, use a commercial rust remover; always wear gloves and ventilate the area.
- After cleaning, dry thoroughly and apply a protective oil layer.
Troubleshooting Common Tool Issues
Sticky or Gummed-Up Mechanisms
Adhesives, paint, or dust can clog moving parts. Disassemble if possible, soak in soapy water (for non-electric parts), scrub gently, rinse, and dry thoroughly before reassembly. Lubricate as needed.
Dull Blades
Persistent dullness after sharpening may mean it’s time for replacement. Always match replacement blades to the tool model for safety and performance.
Frayed Cords or Loose Connections
Cease using any tool with visible cord damage. Replace cords or plugs promptly, and never use electrical tape as a permanent fix.
Unexpected Noises or Reduced Power
For power tools, stop use immediately and inspect for debris, worn parts, or overheating. Clean, lubricate, and test again. If issues persist, consult a professional or the manufacturer.
Creating a Routine Maintenance Schedule
Daily Tasks
- Wipe down tools after use
- Retract or cover sharp blades
- Store tools in their designated places
Weekly Tasks
- Deep clean high-use tools
- Inspect for wear and damage
- Empty dust extraction systems
Monthly Tasks
- Sharpen blades and scissors
- Oil hinges, pivots, and moving parts
- Check and charge batteries
- Inspect cords and plugs
Seasonal or Semi-Annual Tasks
- Full inspection and servicing of power tools
- Deep clean and oil metal tools
- Test and replace worn parts (belts, pads, brushes)
Quick Reference: Maintenance for Popular Craft Specialties
Jewelry Making
- Clean pliers and mandrels after each session
- Inspect files and replace as they wear
- Store in anti-tarnish pouches if working with silver
Textile and Sewing Crafts
- Clean sewing machine and change needles regularly
- Wipe down cutting mats and rotary cutters
- Store pins and needles in magnetic holders
Woodworking and Model Making
- Sharpen chisels and plane blades
- Oil handles and moving parts
- Store in a dry, dust-free cabinet
Painting and Mixed Media
- Clean and reshape brushes after each use
- Keep palettes and knives free of dried paint
- Store solvents in sealed containers away from heat
Upgrading and Replacing Tools: Knowing When It’s Time
Signs a Tool Needs Replacing
- Persistent dullness or chipping after sharpening
- Cracked or warped handles/blades
- Unrepairable electrical faults
- Excessive rust that compromises function
Responsible Disposal
Recycle metal tools where possible. Many local hardware stores offer recycling for hand tools and some power tools. Batteries should be disposed of at designated drop-off points.
Planning for Upgrades
Keep a wish list of replacement or upgraded tools. When possible, invest in higher-quality items known for durability and repairability. Regular maintenance will ensure these new investments pay off for years to come.
Conclusion
Maintaining your craft studio tools is more than just a chore—it’s a creative investment. With every wipe, oil, and sharpen, you’re not only extending the life of your equipment but also cultivating a workspace where creativity thrives and frustration fades. Proper tool care ensures your scissors glide, your machines hum smoothly, and your creative process remains uninterrupted. It’s about respecting your craft, your budget, and your safety.
The routines and tips outlined in this guide aren’t just for professionals—they’re accessible to every DIY creative, no matter the scale of your studio. By setting up a simple maintenance station, staying vigilant for signs of wear, and following a regular care schedule, you’ll empower yourself to tackle any project with confidence. When tools work as intended, you’re free to explore new techniques, push your creative boundaries, and bring your visions to life.
Remember: your tools are your creative partners. Treat them with care, and they’ll return the favor for years to come. Happy crafting—and may your gear always be sharp, clean, and ready for inspiration!


You mention that neglected tools can become unsafe, especially with dull blades or frayed cords. Are there certain safety checks you recommend performing before each crafting session, or is a weekly inspection usually enough?
It’s a good idea to do a quick safety check before each session—look for any obvious damage, loose parts, or frayed cords. For tools with blades, check sharpness and make sure guards are in place. A more thorough inspection and cleaning once a week is usually enough to catch issues before they become serious.