Introduction: Craft Studio Myths That Hold You Back
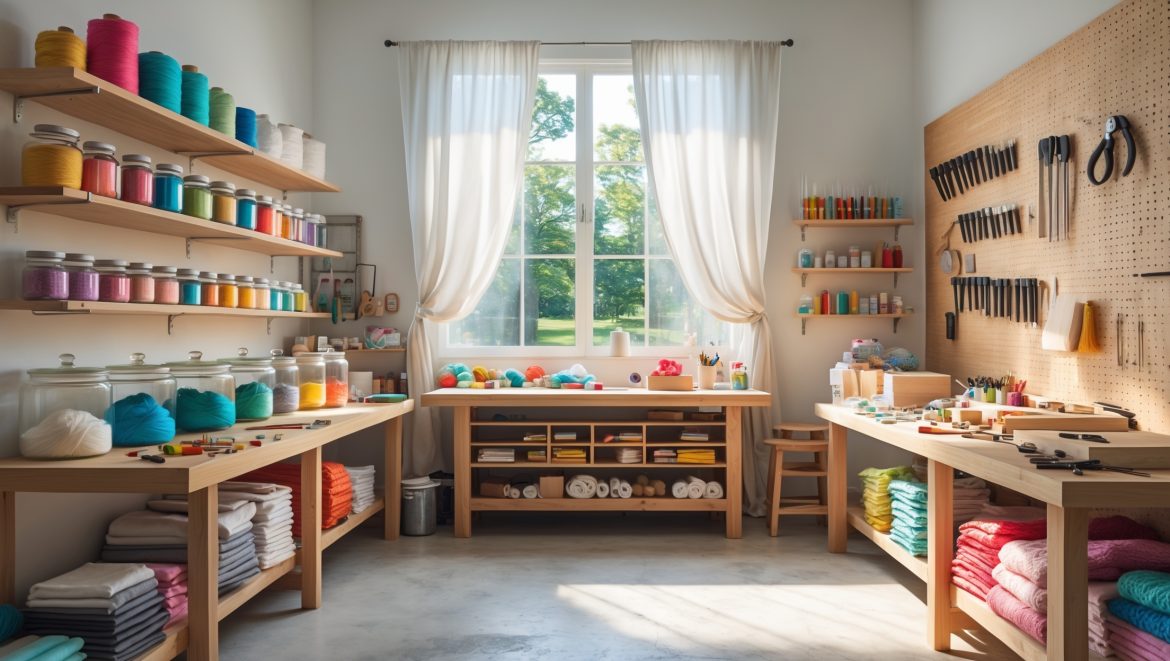
Setting up your own DIY craft studio is one of the most exciting steps you can take as a creative person. But too often, would-be makers and seasoned crafters alike are sidelined by persistent myths—ideas that make the process seem more expensive, risky, or difficult than it really is. Maybe you’ve heard that you need a huge budget, a dedicated room, or even professional training to create a functional workspace. Or perhaps you’ve been led to believe that special permits, fancy tools, or total silence are prerequisites for productivity. These misconceptions can stop you before you even start, or lead you down an expensive, stressful path. It’s time to clear the air! In this post, we’ll bust 10 of the most common DIY craft studio myths, using real-world examples and expert insights. By the end, you’ll be ready to create a safe, inspiring, and practical workspace—on your own terms, no matter your skill level or budget.
Myth 1: You Need a Huge Budget to Set Up a Quality Studio
The belief that crafting requires a big upfront investment is simply untrue. Many crafters launch their studios with thrifted furniture, repurposed household items, and basic tools. The key is to prioritize essentials—like a sturdy surface, safe lighting, and adequate storage. Start small, and upgrade as your needs evolve. Explore local buy-nothing groups, online marketplaces, or community swaps for free or deeply discounted materials. For certain crafts, like papercraft or needlework, the absolute essentials may cost less than a night out. Remember, creativity trumps cost.
Myth 2: Only a Dedicated Room Will Do
While a dedicated studio is nice, it’s not required. Countless makers have carved out a productive craft area in a corner of their living room, a closet, or even a hallway. The trick is to use vertical space, modular storage, and portable solutions (like rolling carts or foldable tables). Room dividers or curtains can define your workspace visually, even in multi-use areas. What matters most is that your setup supports your workflow and can be tidied away as needed. Flexibility is a creative asset!
Myth 3: You Must Have Professional Training to Set Up a Studio
Setting up a craft studio does not require formal education or professional credentials. Most studio layouts and workflows are developed through trial, error, and a willingness to learn from others. Online tutorials, maker forums, and craft blogs are rich sources of advice tailored to every skill level. Community workshops and maker spaces also offer hands-on learning without the pressure or cost of formal training. Focus on safety basics and ergonomic principles, and let your experience guide the rest.
Myth 4: Specialized, Expensive Tools Are Essential
While specialized tools can boost efficiency or precision, they’re rarely required for starting out. Many crafts can be tackled with a few multipurpose basics. For example, a high-quality pair of scissors, a reliable glue gun, and a versatile cutting mat cover a broad range of projects. As you discover your preferences, you can slowly invest in specialized equipment. It’s more sustainable—and satisfying—to grow your toolkit as your skills expand.
Myth 5: Every Craft Studio Must Be Pinterest-Perfect
Social media has created unrealistic expectations for creative spaces. In reality, a working studio is often messy, in flux, and filled with in-progress projects. Function matters far more than aesthetic perfection. Focus on accessibility, comfort, and safety. Personal touches, even if quirky or mismatched, make your space uniquely yours. Let your studio evolve naturally as your projects and storage needs change.
Myth 6: Craft Studios Are Always Noisy and Disruptive
Many believe that crafting inevitably creates noise, dust, or odors that disturb others in the home. This is only true for certain disciplines (like woodworking or resin casting). Countless crafts—such as embroidery, paper art, or beading—are nearly silent and produce minimal mess. For noisier projects, consider time-of-day scheduling, vibration dampeners, or simple sound barriers (rugs, curtains, or foam panels). With thoughtful planning, a studio can coexist peacefully in any home environment.
Myth 7: Permits and Compliance Are Always Required
Most DIY craft studios set up for personal or hobby use do not require permits or special compliance measures beyond basic safety. However, if you plan to operate a business, host workshops, or use hazardous materials, local regulations may apply. Research your city or county’s guidelines—many have simple online tools to check requirements. When in doubt, start small and scale up as your activities grow. Staying informed avoids unnecessary stress and expense.
Myth 8: Crafting Is Inherently Dangerous
While all creative work comes with some risks, most crafts can be practiced safely with a few commonsense precautions. Always read labels on adhesives, paints, or solvents. Maintain good ventilation, use protective gear when needed, and keep sharp tools stored safely. For crafts involving heat, flames, or chemicals, invest in a fire extinguisher and first aid kit. With a little forethought, your studio can be as safe as any other room in your home.
Myth 9: You Need a Lot of Space to Stay Organized
Even the tiniest nook can become an organized craft haven. Use wall-mounted shelves, stackable bins, and multi-use furniture to maximize vertical and hidden space. Magnetic strips, pegboards, and drawer dividers keep tools accessible and visible. Regularly declutter and rotate supplies to prevent overcrowding. Effective organization is about systems, not square footage.
Myth 10: Craft Studios Are a Luxury, Not a Necessity
This myth underestimates the value of a dedicated creative space. Even a small, well-defined area can make your crafting more productive, relaxing, and rewarding. A studio—however modest—signals to yourself and others that your creative time matters. It reduces setup and cleanup time and helps you maintain focus. Investing in your own creativity is never frivolous; it’s an essential part of well-being and self-expression.
Case Study: Busted Myths in Real Life
Case 1: The $50 Studio Makeover
Jane, an enthusiastic paper crafter, believed she needed a major investment to upgrade her workspace. After reading about budget studios, she repurposed an old kitchen table, used shoeboxes for paper storage, and installed a thrifted lamp. Her total cost: $47. Her productivity—and enjoyment—soared, proving that function trumps cost.
Case 2: The Closet-to-Studio Transformation
Sam converted a walk-in closet into a compact sewing nook using wall shelves and a fold-down table. By organizing supplies vertically and keeping floor space clear, he created a clutter-free, accessible work zone. His experience debunked the belief that only a spare room would do.
Case 3: The Multi-Use Family Space
Maria’s family shares a small apartment. She claimed a corner of the living room, defined by a rolling cart and a curtain. Her studio is portable, tidy, and easily packed away, demonstrating that flexibility can coexist with family life.
How to Spot—and Overcome—DIY Craft Studio Myths
- Question the “rules”: Ask whether a piece of advice is truly necessary for your situation. Seek multiple perspectives.
- Start with your needs: Design your space around your projects, habits, and available resources.
- Prioritize safety and comfort: These matter more than aesthetics or expensive gear.
- Learn from others: Reach out to online communities, local makers, or friends for tips and inspiration.
- Experiment and evolve: Let your studio change as you do. There’s no final, perfect setup.
Conclusion: Your Studio, Your Way
Building a craft studio is not about chasing perfection or following arbitrary rules—it’s about supporting your creativity, safely and affordably. By busting these 10 persistent myths, you can approach your setup with clarity and confidence. Whether your studio is a corner, a closet, or a converted shed, what matters most is that it enables you to make, to experiment, and to enjoy the process. Ignore the pressure to spend big, to conform to social media standards, or to wait for the “right” moment. Instead, start where you are, with what you have, and make improvements as your needs and skills grow.
Remember: your workspace reflects your unique journey as a maker. Don’t let myths limit your creativity or stall your progress. Trust your instincts, prioritize your comfort and safety, and celebrate every step you take towards building your dream studio. The best craft spaces aren’t the most expensive or the most beautiful—they’re the ones that truly work for you. Happy crafting!


I’m just starting out and only have a small hallway available for crafting. How do you actually keep things organized and out of the way if you’re using such a tiny or shared space, like the article mentions?
Using a small hallway or shared space for crafting can work well with some smart organization. Try using vertical storage like wall-mounted shelves or pegboards, and keep supplies in clear bins that stack. Foldable tables or rolling carts can be tucked away when not in use. Label everything so you can quickly find and put away materials, keeping your space tidy and functional.
I’ve heard before that you need special permits or approvals for home studios. Does this only apply to certain crafts, or is it mostly a myth? Are there specific regulations I should look into for working with things like paint or glue in an apartment?
Permit requirements for home studios depend a lot on your location and the type of craft. Most simple crafts, like basic painting or using common glues, usually don’t require special permits in an apartment. However, if you use materials that have strong fumes or are flammable, you should check your building rules and local safety regulations to stay compliant and safe.
I like the idea of using a corner or closet as a craft space, but how do you handle mess and clutter in a shared living area?
Using a corner or closet for crafting can work well if you have a system to manage clutter. Consider using storage bins, shelves, or rolling carts to keep supplies organized and easy to tuck away when not in use. Keeping only what you need for your current project in the main area and storing extras elsewhere can also help minimize mess in shared spaces.
I get distracted easily and worry about not having a silent environment. Do you have tips for minimizing noise or staying focused when your studio is set up in a shared living area?
To minimize noise in a shared living area, consider using noise-canceling headphones or playing soft background music to mask distractions. If possible, use rugs, curtains, or fabric panels to absorb sound. Setting clear boundaries with others and scheduling your crafting sessions during quieter times can also help you stay focused.
You mention using thrifted furniture and repurposed items for a studio setup. Can you give some examples of unconventional things you or others have used that worked surprisingly well?
Absolutely! Some creative examples include using an old door placed on two filing cabinets for a spacious work table, vintage suitcases stacked for unique storage, muffin tins for organizing small supplies, and even a repainted bookshelf as a fabric display. Many crafters also repurpose kitchen carts for mobile tool stations. These unconventional finds often add character and functionality to a studio.
I live in a small apartment and only have a hallway corner available. What are some creative ways to make that space feel like a dedicated studio, even if it’s out in the open?
You can use folding screens or tall bookshelves as dividers to create a sense of separation for your craft area in the hallway corner. Adding a small table, some wall-mounted shelves, and good lighting can make the space both functional and inviting. Personal touches like a pinboard, rug, or dedicated storage bins help it feel like a true studio, even in a shared space.
You mention starting with basic tools and adding more over time. For someone totally new to papercraft, which tools should I absolutely prioritize for my initial setup within a small budget?
For a beginner in papercraft on a small budget, focus on a sharp craft knife, a self-healing cutting mat, a metal ruler, good-quality scissors, and a glue stick or double-sided tape. These essentials will let you tackle most beginner projects. As you gain experience, you can gradually add specialty tools like scoring boards or decorative punches.