

Introduction: Why Maintenance Matters in Your DIY Craft Studio
Every DIY enthusiast and craft creator knows that a well-organized, clean, and functional workspace is the secret to enjoyable and productive creative sessions. Yet, many overlook the vital role that regular maintenance routines play in keeping a craft studio running smoothly. Neglecting upkeep can lead to lost tools, wasted supplies, cluttered work surfaces, and even safety hazards—quickly turning your haven of inspiration into a source of frustration. Whether you’re running a side business, teaching workshops, or crafting for joy, building simple, consistent maintenance habits is the key to sustaining creativity and maximizing your investment in your space.
This guide provides a comprehensive breakdown of essential daily, weekly, and monthly maintenance routines designed specifically for DIY craft studios. From tool care and supply management to deep-cleaning and safety checks, you’ll learn actionable steps to preserve your studio’s functionality, aesthetics, and safety. We’ll also share expert tips for tackling common challenges—like managing scraps and keeping equipment in top shape—so you can focus on what you love most: creating.
Daily Maintenance: Small Habits, Big Impact
End-of-Day Cleanup: Resetting for Tomorrow
- Clear Work Surfaces: Remove all projects, scraps, and tools from your primary workbench. Use a handheld vacuum or lint roller to pick up fine debris like glitter, thread, and paper bits.
- Wipe Down Surfaces: Use a damp microfiber cloth to wipe tables, counters, and shelves. For glue or paint spills, keep specialty wipes or a gentle solvent on hand.
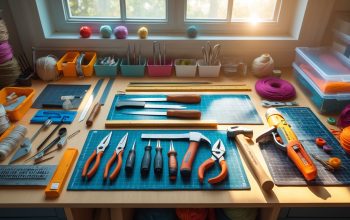
- Return Tools to Designated Spots: Develop a habit of returning scissors, rulers, cutters, and other hand tools to their assigned storage after use. This not only prevents loss but also extends tool life.
- Sweep or Vacuum the Floor: Quickly sweep high-traffic areas, focusing on zones under tables and around cutting mats or easels. If you work with fibers or wood, a stick vacuum helps capture fine dust.
- Sort and Toss Scraps: Keep a small bin for recyclable or reusable scraps, and empty it daily to avoid overflow.
Quick Inventory Check
- Monitor Essentials: Glance at frequently used items—glue, tape, thread, blades, basic paints—and note anything running low. Use a sticky note or a smartphone list for quick restocking.
- Check Tool Condition: Are scissors dull? Is a craft knife blade nicked? Set damaged or worn tools aside for sharpening or replacement.
Weekly Maintenance: Deeper Care for Creative Tools and Space
Tool Maintenance Routine
- Sharpen and Clean: Sharpen scissors, rotary cutters, and utility knives. Wipe blades with an alcohol pad to remove adhesive residue and prevent rust.
- Lubricate Moving Parts: For tools like pliers, sewing machine parts, or paper trimmers, add a drop of sewing machine oil to hinges and moving joints.
- Check Power Tools: Inspect cords for frays, wipe surfaces, and test battery levels on cordless devices. Store batteries in a dry, cool place.
Supply and Material Audit
- Rotate Stock: Move older paint, inks, or adhesives to the front of storage areas for use before expiration. Check dates and discard dried-out or unusable items.
- Organize Materials: Re-sort fabrics, papers, beads, or other supplies by color, type, or project. Label containers clearly for quick access.
- Restock Basics: Add commonly used items to your shopping list based on your daily check.
Studio Deep-Clean Zones
- Dust Shelves and Storage Units: Use a duster or vacuum attachment to clean open shelving. Don’t forget high spaces and the tops of cabinets.
- Clean Windows and Lights: Wipe windows for natural light and remove dust from lamp shades or fixtures to keep your space bright.
- Disinfect High-Touch Areas: Door handles, drawer pulls, and tool handles should be wiped with disinfectant wipes—especially during cold and flu season.
Monthly Maintenance: Long-Term Studio Wellness
Equipment and Workspace Assessment
- Inspect Furniture: Check tables, chairs, and shelving for loose screws or unstable legs. Tighten hardware as needed to prevent accidents.
- Review Workflows: Is your studio layout still working for your current projects? Rearrange tools or supplies for better efficiency if needed.
- Test Safety Equipment: Test smoke alarms, review fire extinguisher expiration dates, and check first-aid supplies. Replace anything expired or used up.
Deep-Clean and Refresh
- Wash Fabric Items: Clean aprons, rags, and soft work mats. If you have washable curtains or rugs, launder them to reduce dust and allergens.
- Clean Behind and Under Furniture: Move shelving or tables (with help if needed) to vacuum or sweep behind and underneath. This helps prevent pests and dust buildup.
- Ventilation Check: Clean or replace air purifier filters and check that fans and vents are dust-free for optimal airflow.
Supply Purge and Reorganization
- Declutter Old or Unused Items: Donate or recycle supplies you haven’t used in six months. Clear out dried paints, cracked tools, or project remnants that are no longer useful.
- Reorganize for Inspiration: Refresh displays or inspiration boards. Rotate featured art, swatches, or idea clippings to spark new creativity.
Pro Tips for Tackling Common Maintenance Challenges
Managing Scraps and Small Parts
- Dedicated Scrap Bins: Use color-coded or project-specific bins for scraps. Empty and sort weekly to prevent overflow.
- Small Parts Storage: Invest in clear drawer organizers or divided boxes for beads, fasteners, and findings. Label each section for immediate identification.
Preventing Supply Waste
- Batch Project Planning: Group projects by material type to use up partial supplies and minimize leftovers.
- Community Swaps: Coordinate with other crafters for regular supply exchanges to keep your stash fresh and reduce excess.
Keeping Equipment in Top Shape
- Scheduled Maintenance Alerts: Set calendar reminders for monthly tool servicing or deep-cleaning tasks.
- Manual Review: Keep digital or printed manuals accessible for troubleshooting and proper care steps.
Seasonal Maintenance Considerations
Spring & Summer: Fresh Air and Deep Clean
- Air Out the Studio: Open windows or run fans to reduce mustiness and circulate fresh air. Clean screens to keep dust and pollen at bay.
- Inspect for Pests: Check for signs of insects or rodents, especially if storing natural fibers or food-based materials. Use airtight containers where possible.
Fall & Winter: Warmth and Moisture Control
- Check for Drafts: Inspect windows and doors for leaks. Add weather stripping if needed to keep the studio comfortable and protect supplies from moisture.
- Humidity Monitoring: Use a hygrometer to track moisture levels. Consider a dehumidifier in damp basements or a humidifier in dry climates to protect papers and fabrics.
Maintenance Checklist Templates
Daily Checklist
- Clear and wipe work surfaces
- Return tools to storage
- Sweep or vacuum floor
- Sort and discard scraps
- Check and note low supplies
Weekly Checklist
- Sharpen and clean tools
- Organize and rotate supplies
- Restock essentials
- Dust and disinfect studio surfaces
- Clean lighting fixtures and windows
Monthly Checklist
- Inspect furniture and hardware
- Test safety equipment
- Deep clean behind furniture
- Wash fabric items
- Declutter and reorganize supplies
- Review studio layout and workflow
Conclusion: Protecting Your Creative Investment
Maintaining a DIY craft studio isn’t just about keeping up appearances—it’s an investment in your creative process, safety, and peace of mind. Regular daily, weekly, and monthly routines ensure that your tools last longer, your supplies stay fresh, and your workspace remains a source of inspiration rather than stress. Over time, these habits become second nature, saving you hours of lost productivity and frustration. By committing to these simple routines, you create a space where creativity flows freely and projects progress smoothly.
Remember, maintenance doesn’t have to be overwhelming. Start with a few small daily habits and build from there. Use the provided checklists as a guide, and customize them to fit your unique studio and crafting style. Encourage family members or studio partners to pitch in, making maintenance a shared responsibility. Most importantly, allow yourself the grace to adapt your routines as your projects, seasons, and creative goals evolve.
Ultimately, a well-cared-for studio reflects the pride and passion you bring to your craft. With a little regular attention, your creative space will continue to empower and inspire you for years to come—so you can focus on what truly matters: bringing your ideas to life and enjoying the process every step of the way.

You mention doing a deeper clean monthly—what tasks should I prioritize if I only have an hour for monthly maintenance in my craft studio?
If you only have an hour for monthly maintenance, focus on clearing out clutter, wiping down surfaces (especially tables and shelves), and organizing your most-used supplies. Quickly check your tools for any that need cleaning or repair, and empty any full trash or recycling bins. These tasks will help keep your studio functional and ready for creativity.
I noticed tool care is a big part of the routines. Are there any affordable ways to organize tools without investing in expensive storage solutions?
Absolutely, you can keep your craft tools organized without spending much. Repurpose items like glass jars, tin cans, or small cardboard boxes for storing brushes, scissors, and pens. Drawer dividers made from recycled materials or DIY wall-mounted pegboards are both affordable and effective ways to keep things tidy and accessible.
You mention doing deep-cleaning and safety checks monthly. Could you give examples of what specific safety checks I should prioritize if I use a lot of electrical tools in my studio?
For studios with lots of electrical tools, prioritize monthly checks like inspecting cords and plugs for fraying or damage, making sure outlets aren’t overloaded, testing circuit breakers or surge protectors, ensuring tools have proper ventilation, and verifying that all safety guards are intact. Also, confirm that fire extinguishers and smoke detectors are accessible and functional.
How long does your typical daily cleanup take? I want to build this habit but am worried about how much time resetting every evening will actually add to my routine.
A typical daily cleanup in a craft studio usually takes about 10 to 20 minutes, depending on the size of your space and how much you create each day. Focusing on quick tasks like wiping surfaces, putting tools away, and clearing clutter makes it manageable. Once it becomes a habit, you’ll likely find it fits easily into your routine.
Could you elaborate on how to best manage those small scraps and leftover materials that accumulate daily, especially for crafters who use a variety of mediums like fabric, paper, and wood?
To handle daily scraps from different materials, set up labeled bins or drawers for fabric, paper, and wood. At the end of each session, quickly sort leftovers into these containers. Every week, review the bins and decide which scraps are worth keeping for future projects or need to be recycled or donated, keeping your workspace tidy and organized.
Do you have any recommendations for organizing and storing smaller, easily lost craft tools like needle threaders or specialty rulers, beyond just returning them to a designated spot as mentioned in your daily maintenance tips?
For small, easy-to-lose craft tools, consider using divided drawer organizers, clear lidded containers, or magnetic strips for metal items. Label individual sections or boxes for each type of tool, and try using stackable trays to maximize space. A pegboard with small baskets or hooks also keeps things visible and easy to reach without clutter.
For managing scraps and leftover supplies, do you have suggestions for storage solutions that work well in small spaces or on a tight budget?
For small spaces or tight budgets, try using clear plastic containers, recycled jars, or stackable bins to sort scraps by type or color. Hanging organizers or shoe racks can be great for vertical storage. Label everything so you can quickly find what you need, and regularly review your stash to keep things manageable.
For the daily maintenance routines, do you have any recommendations for organizing hand tools if you have a very limited amount of storage space in your studio?
If your storage space is limited, consider using wall-mounted pegboards or magnetic strips to keep hand tools visible and accessible without taking up counter space. You can also use small containers or hanging baskets under shelves for extra storage. Rotating the most-used tools to accessible spots and keeping the rest stashed in small bins can also help maintain order daily.
Could you give some tips on organizing craft supplies if you don’t have designated spots for every tool yet? I’m struggling to keep everything together, especially after a busy day. What simple storage solutions work well for small spaces?
Using clear bins, baskets, or drawer organizers can help corral similar supplies, even if you don’t have a set spot for each item. Portable caddies or rolling carts are great for moving tools around and tucking them away after use. Labeling containers makes it easy to find things quickly, and stacking storage helps maximize vertical space in small areas.
I’m curious about deep-cleaning and safety checks for monthly maintenance. What specific tasks should I focus on if I use a lot of cutting tools and adhesives in my studio?
For deep-cleaning, thoroughly wipe down all surfaces, especially where adhesives are used, and clean cutting mats and blades. Inspect all cutting tools monthly for sharpness and damage, and replace worn blades. Check that all adhesives are sealed properly to prevent fumes. Also, test any safety equipment like gloves or goggles for wear and replace them if needed.
For crafters working on multiple projects at once, what habits or routines would you suggest to prevent supplies and work surfaces from getting mixed up or disorganized throughout the week?
Try designating separate bins, trays, or baskets for each project and labeling them clearly. At the end of each session, place all related materials and tools back in their assigned container. Also, reserve specific areas of your work surface for different projects to avoid overlap. Doing a quick daily tidy-up helps maintain order when juggling multiple crafts.
I sometimes struggle to keep specialty wipes or solvents handy for spills. How do you recommend storing them safely but conveniently in the studio for quick access?
A small, clear plastic bin or caddy with a lid works well for storing wipes and solvents. Keep it on a low, accessible shelf or in a drawer near your main workspace. Make sure the lid seals tightly to prevent fumes, and always label the container. This way, supplies are easy to grab but remain safe and organized.
When you mention using a handheld vacuum or lint roller to pick up fine debris like glitter and thread, have you found one method works better than the other for specific types of messes in your studio?
A handheld vacuum is especially effective for picking up fine glitter, dust, and small scraps since it can handle larger areas quickly. Lint rollers work best for threads, fabric lint, and lightweight debris on fabric surfaces or work clothes. Using both together helps keep different surfaces and materials tidy.
When you mention using specialty wipes or gentle solvents for glue or paint spills, do you have any recommendations for brands that are safe for most surfaces and materials commonly found in craft studios?
For most craft studios, brands like Goo Gone or Crafters Pick The Ultimate Cleaner are safe for removing glue and paint spills without damaging surfaces. For specialty wipes, consider Weiman or Method as gentle, non-abrasive options. It’s always a good idea to test any product on a small area first, especially on delicate or painted surfaces.
I usually end up with a ton of small scraps after each project. The article mentions managing scraps as a common challenge, but can you suggest a practical system for organizing or reusing tiny fabric or paper pieces that seem too small to store?
A good way to handle small scraps is to keep a designated scrap bin or clear jar just for tiny pieces. Group fabric and paper by color or type if possible. For reuse, try using them in patchwork, card making, collage, or as accents on new projects. If they’re truly too small, consider donating them to schools or crafters who use scraps for texture and detail work.
I’ve noticed my handheld vacuum isn’t picking up fine glitter well after projects. Do you have tips for more effective debris removal, or is there a specific vacuum model you prefer for craft studio floors?
Fine glitter can be tricky for many handheld vacuums because it often clogs filters or escapes through gaps. Try using a vacuum with a HEPA filter or a shop vac designed for fine particles—these tend to capture glitter better. For quick cleanup, a lint roller or slightly damp microfiber cloth also works well on hard floors and surfaces.
Can you elaborate on how to manage leftover scraps efficiently? I tend to accumulate lots of fabric and paper bits, and I’m unsure whether to store, donate, or discard them after each project.
Managing scraps is all about sorting and setting limits. Keep a small, labeled bin for usable pieces—only save those you’re likely to use soon. For scraps you won’t use but are still good quality, consider donating to local schools or art groups. Anything too small or unusable can be recycled or discarded to keep your workspace clutter-free.
Could you explain what you recommend for cleaning up glue or paint spills without damaging tabletops? Are there any specific gentle solvents or wipes you trust for different surfaces in a craft studio?
For glue spills, gently lift off any excess with a plastic scraper, then use a damp microfiber cloth; for stubborn spots, rubbing alcohol works on most non-porous surfaces like laminate but should be patch-tested first. For water-based paint, wipe up quickly with soap and water. For dried acrylics, a baby wipe often helps. Always avoid harsh chemicals on wood or painted tabletops—stick with mild soap, water, and soft cloths.
I like the idea of using a handheld vacuum or lint roller for cleaning up debris like glitter and thread. Do you have any recommendations for affordable, reliable handheld vacuums that work well in a craft studio setting?
A few reliable and budget-friendly handheld vacuums to consider are the Black+Decker Dustbuster, the BISSELL AeroSlim, and the Shark Wandvac. These models are compact, easy to maneuver, and handle small debris like glitter and thread well. Look for options with washable filters and attachments for tighter spaces, which can be especially helpful in a busy craft studio.
For crafters with limited time, are there any daily maintenance tasks from your list that you’d consider essential versus optional, especially on those days when creative energy is low?
On busy or low-energy days, focus on the essentials: clear your work surface, put away sharp tools, and quickly dispose of trash. These tasks keep your space safe and ready for your next project without taking much time. Other tasks, like organizing supplies or wiping down surfaces, can be done when you have more time or energy.
I sometimes teach workshops in my home studio and need to reset things quickly between groups. Do you have any advice for streamlining daily cleanup routines so the space is ready fast, but nothing gets overlooked?
To make quick cleanups between workshop groups, try creating a checklist of essential tasks—like wiping surfaces, resetting supplies, emptying trash, and sweeping high-traffic areas. Keep cleaning supplies easily accessible. Assign places for all materials so it’s easy to return items to their spots. This way, you can reset your studio efficiently without missing anything.