Introduction: Why Modular Shelving Is a Game-Changer for Craft Studios
Ask any seasoned crafter about their biggest challenge, and chances are “storage” will be at the top of the list. Crafting inherently comes with an ever-growing collection of materials—paint, yarn, fabric, adhesives, specialty tools, and finished projects, to name a few. An inefficient storage system often leads to wasted time searching for supplies, cluttered workspaces that stifle creativity, and even damage to delicate materials. While there are countless pre-made storage solutions on the market, few offer the flexibility and customization that the creative process demands. That’s where a modular shelving system shines.
Modular shelving allows you to adapt your storage as your craft studio—and your projects—evolve. Whether you’re a quilter who needs deep cubbies for fabric bolts, a jewelry maker with small-component organizers, or a mixed-media artist craving adjustable shelves for canvases and paints, a custom modular system lets you tailor every inch of your space. This guide will take you step-by-step through planning, building, and installing a modular shelving system perfectly suited to your needs. We’ll cover material choices, essential tools, design tips, safety considerations, budgeting, and creative add-ons. With practical advice woven throughout, you’ll gain the skills and confidence to transform your craft studio into a hub of organized inspiration.
Planning Your Modular Shelving System
Assessing Your Storage Needs
Before you break out the tape measure, take inventory of your crafting materials. Categorize supplies by type and size—considering both what you use now and what you plan to add in the future. List out:
- Large items (e.g., fabric bolts, cutting mats, paper rolls)
- Small containers (beads, threads, fasteners)
- Tools and machines (sewing machines, die-cutters, glue guns)
- Reference materials (books, patterns, magazines)
- Works-in-progress and finished projects
Estimate the quantity, dimensions, and weight of each category. This information will inform your shelving design—including shelf depth, spacing, and weight-bearing requirements.
Measuring Your Studio Space
Use a measuring tape to record the width, height, and depth of walls where you plan to install shelving. Note the location of windows, doors, electrical outlets, and baseboards. Sketch a basic floor plan, marking immovable features. Leave at least 36 inches of clearance for walkways and workspace access. Consider ceiling height if you want to utilize vertical storage.
Defining Your Modular System’s Scope
Decide how much of your studio will be dedicated to modular shelving. Will you outfit one wall, create a floor-to-ceiling unit, or design freestanding movable sections? Modular systems work best when built around a repeating unit—such as cubbies or adjustable shelves—that can be rearranged or expanded as needed.
Design Choices: Materials, Styles, and Configurations
Material Options: Pros and Cons
- Plywood: Durable, easy to work with, and cost-effective. Look for cabinet-grade plywood for smoothness and stability.
- Solid Wood: Attractive and sturdy, but heavier and more expensive than plywood. Good for visible areas or heavy loads.
- MDF (Medium Density Fiberboard): Smooth and affordable, but susceptible to moisture damage. Seal exposed edges and avoid in damp studios.
- Metal: Offers industrial strength and a sleek look. Prefabricated metal shelving components can be combined with wood for a hybrid system.
Choose materials based on your budget, desired aesthetics, and expected wear-and-tear. For most craft studios, 3/4-inch plywood strikes the best balance between strength and workability.
Modular Configurations
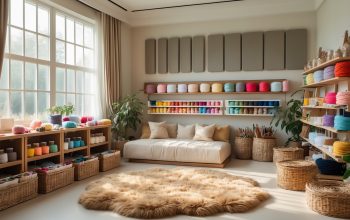
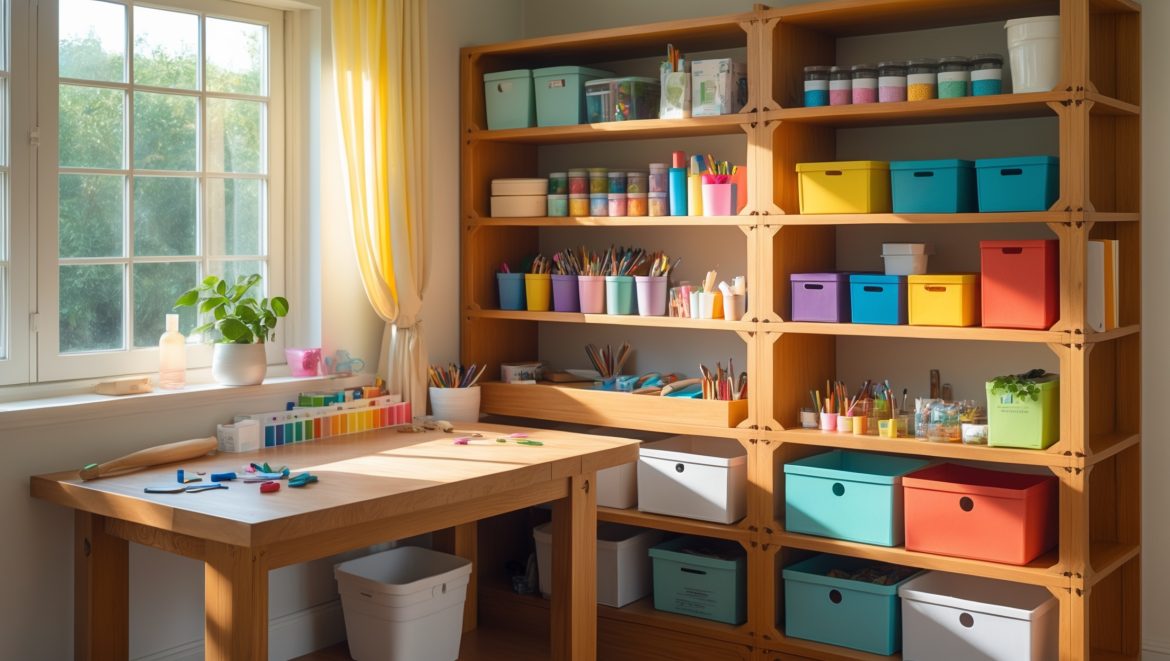
- Cubby Grids: Ideal for storing small bins, fabric, or paper. Units can stack vertically or sit side-by-side.
- Adjustable Shelving: Use shelf pin holes or metal tracks for height flexibility. Great for tools and changing supply sizes.
- Drawers and Pull-Out Trays: Add targeted storage for small tools, notions, or specialty items.
- Integrated Work Surfaces: Include fold-down tables or pull-out work trays within your modular system.
- Freestanding Units: Build mobile shelving on locking casters for reconfigurable layouts.
Sketching and Planning Your System
Draw your design to scale on graph paper or use a free 3D planning tool like SketchUp. Start with your largest components and fill in with smaller units. Leave space for future expansion. Plan shelf spacing to fit your tallest items with a few inches to spare.
Budgeting and Cost Breakdown
Estimating Material Costs
- Plywood: $50–$80 per 4×8 sheet (3/4-inch cabinet grade)
- Solid wood trim: $1–3 per linear foot
- Adjustable shelf hardware: $10–$30 per set
- Screws, glue, finishing supplies: $20–$50 total
- Paint or stain: $15–$50 depending on coverage
- Optional bins/baskets: $5–$20 each
For a wall-sized modular shelving unit (roughly 8’ wide by 7’ high), expect to spend between $300 and $600 on materials, depending on your choices. Budget for at least 10–15% overage for mistakes or extra features.
Tools You’ll Need
- Circular saw or table saw
- Power drill and bits
- Stud finder
- Tape measure and square
- Level
- Clamps
- Sandpaper or power sander
- Paintbrushes or rollers
If you don’t own some of these, consider borrowing or renting from a local hardware store to keep costs down. Always factor in small hardware (brackets, pins, fasteners) when tallying your budget.
Step-by-Step Guide: Building Your Modular Shelving
1. Cut and Prepare Panels
Measure and mark your plywood panels according to your design. Use a straightedge as a guide for clean cuts. Label each piece as you go. Sand edges and surfaces smooth, especially if you plan to paint or stain.
2. Drill Shelf Pin Holes (If Adjustable)
Decide on shelf spacing—typically 1-inch increments. Use a shelf pin jig or a custom template to drill evenly spaced holes along the sides of your vertical panels. This allows for easy height adjustments later.
3. Assemble Cubby Grids or Frames
Lay out your side panels, shelves, and dividers. Use wood glue and screws for strong joints. Assemble each cubby section or frame flat on the ground, then stand upright. Double-check for square alignment with a carpenter’s square.
4. Attach Back Panels (Optional)
Attaching a 1/4-inch plywood or hardboard back panel increases stability and helps prevent items from falling behind the shelves. Secure with finishing nails or screws along the edges.
5. Finish Surfaces
Fill screw holes with wood filler. Sand all surfaces and edges again for a smooth finish. Apply primer, then paint or stain as desired. Let dry fully before moving on to assembly.
6. Install Shelving in Your Studio
Move the assembled units into position. Use a stud finder to locate wall studs, then anchor your shelves securely with long screws or wall brackets. Freestanding units should be leveled and, if tall, anchored with anti-tip hardware for safety.
7. Add Bins, Dividers, and Custom Features
- Insert adjustable shelves and place bins or baskets as planned.
- Install drawer slides or pull-out trays if desired.
- Label cubbies for easy identification.
- Attach hooks, pegboards, or magnetic strips to the sides for tools and accessories.
Creative Add-Ons and Upgrades
Lighting Integration
Add LED strip lights or puck lights under shelves for better visibility. Battery-powered options avoid the need for electrical work and can be stuck with adhesive pads.
Mobile Modules
Attach heavy-duty locking casters to the bottom of smaller units for easy rearrangement. Great for shared studios or multipurpose rooms.
Decorative Finishes
- Use wallpaper or adhesive shelf liners in cubbies for pops of color.
- Paint the backs of open shelves for a custom look.
- Add trim or molding for a finished, built-in appearance.
Specialty Storage Features
- Slanted cubbies for paper or canvases
- Pull-out racks for ribbon, washi tape, or thread spools
- Integrated charging stations for cordless tools
- Hidden compartments for valuables or sensitive materials
Best Practices for Safe and Long-Lasting Shelving
Weight Management
Always check the load capacity of your shelves—especially adjustable or long spans. Reinforce long shelves with center supports or by using thicker materials. Never store heavy items on high shelves where they could fall.
Anchoring and Stability
Secure all tall units to wall studs, especially if your shelving is over 48 inches high. Freestanding units should have wide bases or anti-tip brackets. For mobile modules, always lock casters before loading or accessing contents.
Moisture and Environmental Considerations
If your studio is in a basement or garage, seal all wood surfaces with polyurethane or a moisture-resistant paint. Store sensitive materials in airtight bins on higher shelves to avoid damage from humidity or pests.
Maintenance and Upkeep
- Wipe surfaces regularly to prevent dust buildup.
- Check fasteners and anchors every few months for loosening.
- Repaint or touch up scuffed areas as needed.
- Rotate bins or supplies to avoid forgotten materials and wasted space.
Conclusion: Future-Proofing Your Creative Space
Investing the time and effort to build a custom modular shelving system is one of the smartest moves a DIY crafter can make. Not only does it maximize every square foot of your studio, but it also empowers you to grow and adapt your storage as your creative pursuits expand. Unlike fixed or store-bought shelves, a modular design gives you the freedom to reconfigure, add new modules, and experiment with layouts—ensuring your studio always matches your workflow and inspiration.
Remember, the best craft storage is not just about neatness—it’s about making your materials visible, accessible, and protected. This reduces stress, sparks ideas, and helps you get the most out of every crafting session. By following the detailed steps, budgeting tips, and safety practices in this guide, you’ll create a shelving system that’s both functional and a joy to use. Don’t be afraid to personalize your build with colors, finishes, and features that reflect your unique style. Your studio is your creative sanctuary—let your storage system be a foundation for many years of happy, organized making.
Whether you’re a beginner with a growing stash or a seasoned artisan looking to overhaul your workspace, building your own modular shelves is an empowering project. Take the leap—your future creative self will thank you every time you walk into a studio that truly works the way you do.