
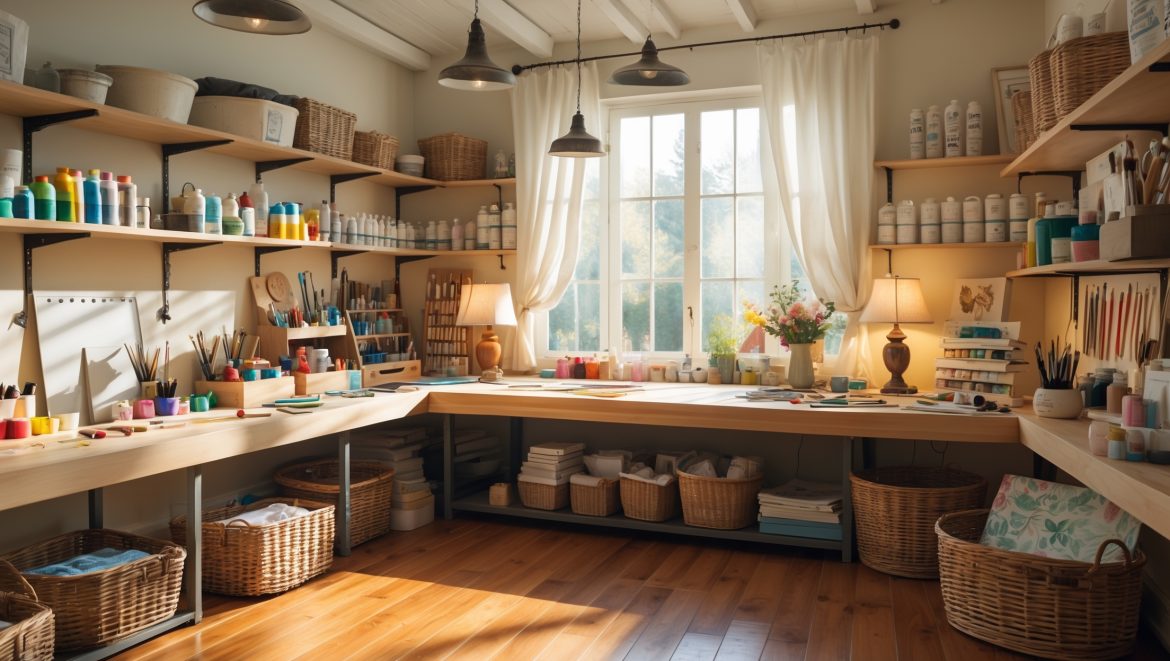
Introduction: Shining a Light on Craft Studio Success
Ask any seasoned crafter—the right lighting can make or break your creative experience. Whether you’re sewing late into the night, painting intricate details, or assembling jewelry, the illumination in your workspace directly affects the quality, safety, and enjoyment of your DIY pursuits. Yet, lighting is often an afterthought in craft studio design, resulting in eye strain, color inaccuracies, or even accidents. In this comprehensive guide, we’ll explore how purposeful lighting elevates your creative process, supports your health, and ensures your workspace is both joyful and functional. From understanding light types and color temperatures to practical installation tips and budget-friendly upgrades, this resource arms you with everything you need to transform any room—from spare bedrooms to converted garages—into a vibrant hub for crafting brilliance. Whether you’re setting up your very first studio or aiming to optimize an existing one, let’s illuminate your path to a brighter, safer, and more inspiring DIY space.
Why Lighting Matters in Your Craft Studio
Enhancing Creativity and Comfort
Optimal lighting isn’t just a practical necessity—it’s a creative catalyst. Bright, well-balanced light makes colors pop, textures stand out, and fine details easier to see. Poor lighting, on the other hand, can lead to mistakes, frustration, and even diminished creative motivation. Think of your lighting as an artistic tool, just like your brushes or scissors.
Ensuring Safety
Crafters work with sharp tools, hot glue, sewing needles, and sometimes power equipment. Dim or uneven lighting increases the risk of accidents. Proper illumination helps you spot hazards, maintain a tidy workspace, and work confidently even during late-night crafting sessions.
Supporting Eye Health
Extended periods of focus on close-up work can strain your eyes, especially in insufficient or harsh lighting. The right combination of natural and artificial light reduces eye fatigue, headaches, and long-term vision problems, allowing you to craft comfortably for hours.
Understanding Lighting Types
Natural Light
Natural sunlight is ideal for craft studios—it’s bright, evenly diffused, and provides true color rendering. If possible, locate your workspace near large windows or skylights. However, remember that sunlight changes throughout the day and seasons, so you’ll still need supplemental artificial lighting for consistency.
Ambient Lighting
This is your studio’s general, overhead lighting—think ceiling fixtures, recessed lights, or wide-beam LED panels. Ambient lighting should provide broad, shadow-free coverage, filling the room with a comfortable base level of brightness. Avoid single, harsh bulbs that create glare or uneven shadows.
Task Lighting
Task lighting delivers concentrated illumination for detailed work. Adjustable desk lamps, swing-arm fixtures, and clip-on LEDs let you direct light exactly where you need it—over your sewing machine, cutting mat, or easel. Task lights often have adjustable color temperatures and dimming features for flexibility.
Accent and Decorative Lighting
Accent lights add personality, highlight specific zones, and contribute to a cozy, inspiring atmosphere. Consider LED strip lights under shelves, fairy lights in jars, or spotlighting for finished projects on display. While not essential for function, these touches boost morale and make your studio uniquely yours.
Choosing the Right Bulbs and Fixtures
Brightness: How Much Is Enough?
Light output is measured in lumens. For craft studios, aim for at least 300–500 lumens per square meter (about 28–46 lumens per square foot). Large studios or spaces with dark walls may need more. Multiple light sources prevent harsh shadows and illuminate every corner.
Color Temperature: Getting Colors Right
- Daylight (5000–6500K): Crisp, white light that reveals true colors—ideal for painting, detailed work, and color matching.
- Neutral White (4000–4500K): Balanced, not too warm or cool—good for general crafting.
- Warm White (2700–3500K): Cozy, yellowish light—best reserved for relaxation areas, not fine detail work.
Choose bulbs labeled “high CRI” (Color Rendering Index of 90+) for the most accurate color reproduction—crucial for artists and crafters working with paints, fabrics, or beads.
LED vs. Fluorescent vs. Incandescent
- LED: Energy-efficient, long-lasting, cool to the touch, and available in many color temperatures and shapes. Dimmable options and smart controls are widely available.
- Fluorescent: Cheap and bright, but can flicker and distort colors. Modern T5 and T8 tubes are better, but LED is usually superior for craft studios.
- Incandescent: Warm but inefficient, short-lived, and often too yellow for craft accuracy.
For most DIYers, LED lighting offers the best mix of efficiency, performance, and flexibility.
Fixture Types to Consider
- Ceiling Panels: LED troffers or flush-mount fixtures provide broad, even lighting.
- Track Lighting: Adjustable heads let you spotlight different zones—great for flexible layouts.
- Desk and Task Lamps: Look for adjustable arms, weighted bases, and dimming features.
- Clamp Lights: Portable and versatile—perfect for renters or small spaces.
- Under-Cabinet/Under-Shelf Strips: Illuminate work surfaces and storage areas.
Designing Your Lighting Plan
Step 1: Assess Your Space and Activities
Make a list of your primary crafting activities—sewing, painting, jewelry making, model building, etc. Note where you need the most precision and where general illumination will suffice. Sketch your room layout, marking windows, existing outlets, and work zones.
Step 2: Layer Your Lighting
Combine ambient, task, and accent lighting for flexibility. For example, use a bright ceiling fixture for overall coverage, adjustable desk lamps for close-up work, and LED strips under shelves to eliminate shadows. Layering ensures you can adapt to different projects and times of day.
Step 3: Minimize Shadows and Glare
- Position lights on both sides of your main work area to avoid casting shadows from your hands.
- Diffused fixtures (with frosted covers or shades) soften harsh light and reduce glare.
- Install dimmers to adjust brightness as needed, especially for sensitive tasks.
Step 4: Plan for Flexibility
Crafting needs change. Use plug-in fixtures or smart bulbs for easy reconfiguration. Modular track lighting, clamp-on lamps, and portable units let you adapt as your projects evolve.
Installation Tips and Tricks
DIY-Friendly Lighting Upgrades
- Replace basic bulbs with high-CRI LEDs in existing fixtures—no rewiring needed.
- Mount battery-operated LED puck lights under shelves for shadow-free storage.
- Use adhesive-backed LED strip lights for accent zones—just peel and stick.
- Add smart plugs or bulbs for voice/app control without new switches.
Safe Electrical Practices
- Never overload outlets or power strips—spread out your lighting load.
- Use extension cords rated for indoor use and the total wattage of your lights.
- Secure cords along walls or under rugs to prevent tripping hazards.
- If hardwiring ceiling lights, always turn off power at the breaker and follow local codes. When in doubt, hire a qualified electrician.
Maximizing Natural Light
- Use sheer curtains or blinds to diffuse harsh midday sun without sacrificing brightness.
- Place mirrors strategically to bounce daylight deeper into the room.
- Paint walls in light, neutral colors to reflect light and make the space feel brighter.
Budgeting for Studio Lighting
Entry-Level: Brightening Up on a Shoestring
Even a tight budget can support functional lighting. Start by replacing existing bulbs with daylight LEDs ($5–$10 each). Add a basic adjustable desk lamp ($15–$30) for task work. Battery-powered puck lights for shelves start at $20 for a multi-pack. With $50–$100, you can significantly upgrade your workspace.
Mid-Range: Versatile and Stylish
Ready to invest more? Modular track lighting kits ($50–$150), high-quality desk lamps with color temperature control ($40–$80), and smart bulbs ($15–$30 each) offer flexibility and style. Under-cabinet LED strips ($30–$60) brighten storage zones. For $200–$400, you can layer your lighting for a truly professional effect.
Premium: The Ultimate Craft Studio Glow
For the serious crafter or creative professional, consider architectural fixtures, custom LED panel installations ($300+), or wireless smart lighting systems with scene controls ($500+). Skylights or sun tunnels provide natural light (installation costs vary widely). The investment pays off in years of comfort, productivity, and creative satisfaction.
Lighting for Specific Crafts: Tailored Tips
Sewing and Quilting
- Use adjustable task lamps with daylight bulbs at your machine and cutting table.
- Install LED strips under shelves to eliminate hand shadows while piecing fabric.
Painting and Drawing
- High-CRI daylight fixtures are essential for accurate color mixing.
- Adjustable easel lamps let you direct light without glare or reflection.
- Consider a combination of natural and artificial light for studio consistency.
Jewelry Making and Beading
- Bright, focused task lighting is critical for fine detail work.
- Magnifying lamps with built-in LEDs help reduce eye strain.
Model Building and Miniatures
- Multiple adjustable task lights minimize shadows on intricate models.
- LED ring lights provide even illumination without hot spots.
Maintenance and Upkeep
- Dust fixtures and bulbs monthly—dirt dramatically reduces brightness.
- Replace burnt-out bulbs promptly to maintain even coverage.
- Check cords and plugs for wear; replace any frayed or damaged components.
- Test dimmers and smart controls periodically to ensure proper function.
Lighting Troubleshooting: Common Problems and Solutions
- Flickering Lights: Check for loose bulbs, faulty switches, or incompatible dimmers. Replace with quality LEDs if needed.
- Harsh Shadows: Add secondary light sources or reposition task lamps.
- Color Mismatch: Use only daylight/neutral bulbs for work surfaces. Avoid mixing warm and cool bulbs in the same area.
- Glare on Screens: Use matte-finish bulbs, diffusers, or reposition screens to minimize direct light reflection.
Future-Proofing: Smart Lighting and Automation
Today’s smart lighting solutions allow you to customize your studio atmosphere with a tap or voice command. Features like adjustable color temperature, scheduled routines, and occupancy sensors add convenience and efficiency. Smart bulbs and plugs are easy to retrofit in existing fixtures and can even sync with music or project timers for an immersive creative experience. As your needs evolve, so can your lighting—no rewiring required.
Conclusion: Illuminate Your Creative Potential
Thoughtful lighting design is one of the best investments you can make in your DIY, crafts, and creative living journey. By understanding the types of light, choosing the right fixtures and bulbs, and layering illumination for flexibility, you’ll create a studio that’s not only brighter and safer but also more inspiring and productive. Remember, your workspace should adapt to you—not the other way around. Whether you’re a weekend hobbyist or a professional maker, the right lighting helps you see every detail, work longer without fatigue, and enjoy the creative process to its fullest.
As you implement these tips, don’t be afraid to experiment. Test different setups, move lamps, and adjust brightness until you find what feels best. Observe how your energy, comfort, and results improve with each upgrade. And finally, let your lighting reflect your personality—add a splash of color, a string of fairy lights, or a statement fixture that makes you smile every time you step into your studio. Bright ideas lead to brilliant creations—so go ahead, light up your imagination, and craft with confidence!
I run my business out of a converted garage and struggle with both glare during the day and shadows at night. Are there specific lighting types or placements you recommend for multifunctional spaces like this?
For a converted garage that’s used day and night, diffused overhead LED panels can help reduce glare and provide even illumination. Combine these with adjustable task lights at workstations to control shadows when needed. Wall-mounted lights or track lighting on dimmers offer flexibility for different tasks and times of day. Position lights above and slightly in front of your work areas to minimize shadows.
Sometimes I get headaches after long crafting sessions, which I think might be from staring at fine details under not-so-great light. What practical tips can you share to support eye health and reduce fatigue in a DIY studio environment?
To support eye health and reduce fatigue, use balanced, flicker-free LED lighting and ensure it’s evenly distributed to minimize harsh shadows. Take regular breaks from close work—try the 20-20-20 rule: every 20 minutes, look at something 20 feet away for 20 seconds. Adjust your workstation so your eyes are level with your project, and keep your workspace well-lit but not overly bright.