

Introduction: Why PPE Matters in Every DIY Craft Studio
Crafting is more than a hobby—it’s a way of life for creative minds. Whether you’re working with textiles, wood, resin, paint, or metal, your craft studio is a haven for artistic exploration. But along with inspiration and innovation comes responsibility: keeping yourself safe while you work. Personal Protective Equipment (PPE) is often overlooked in home studios, especially by passionate DIYers eager to dive into their projects. Yet, the right PPE can mean the difference between a productive session and a preventable accident. This comprehensive guide will walk you through the essential PPE gear for every craft studio, explain when and how to use it, and share practical tips to make safety second nature. You’ll learn how to select, store, and maintain your equipment, why it matters for various craft mediums, and how to foster a culture of safety without sacrificing creativity. Whether you’re a seasoned maker or just starting to build your dream studio, understanding PPE is crucial for protecting your health, your vision, your skin, and even your long-term enjoyment of crafting. Let’s set up your workspace for both inspiration and peace of mind.
Understanding PPE: The Basics for Creative Spaces
What is PPE?
Personal Protective Equipment (PPE) refers to gear designed to minimize exposure to hazards that can cause injuries or illnesses. In a craft studio, PPE shields you from risks like sharp tools, chemicals, dust, fumes, noise, and heat. The right PPE depends on the materials you use and the nature of your projects.
Why Standard Home Precautions Aren’t Enough
While basic safety measures—like keeping tools organized and cleaning spills—are essential, they don’t address direct exposure to airborne particles, skin irritants, or eye injuries. PPE provides a targeted barrier against these studio-specific risks, especially as projects become more complex.
Essential PPE for Common Craft Studio Activities
Not every project requires the same level of protection. Below you’ll find a breakdown of recommended PPE by craft type, along with expert tips for each category.
1. Eye Protection
- Safety Glasses: Suitable for woodwork, metalwork, and any project involving flying debris or splinters. Opt for ANSI Z87.1-rated eyewear.
- Goggles: Use when working with chemicals, solvents, or situations with potential splashing (e.g., resin pouring, dyeing fabrics).
- Face Shields: Best for grinding, sanding, or power carving. Wear in combination with safety glasses for full-face protection.
Tip: Anti-fog coatings and side shields add extra comfort and safety.
2. Respiratory Protection
- Dust Masks (N95 or better): Essential for sanding, sawing, and handling powdered substances. Look for a snug fit and replace regularly.
- Respirators (Half or Full Face): Required for working with volatile organic compounds (VOCs), spray paints, resin, and strong adhesives. Use cartridges rated for the chemicals in use.
Tip: Keep a PPE chart by your workspace listing which mask to use for each material.
3. Hand Protection
- Nitrile Gloves: Chemical-resistant and latex-free, ideal for handling paints, glues, and dyes. Change when contaminated or torn.
- Cut-resistant Gloves: For glasswork, metalwork, or when using rotary cutters and blades. Look for ANSI cut-level ratings appropriate to your tasks.
- Heat-resistant Gloves: Needed for soldering, hot glue, or pyrography. Always check temperature ratings.
Tip: Use snug-fitting gloves for delicate tasks; bulkier gloves for heavy-duty work.
4. Hearing Protection
- Earplugs: Disposable or reusable, suitable for intermittent use when operating loud power tools.
- Earmuffs: Offer more consistent protection for extended tool use (e.g., woodturning, metal grinding).
Tip: Store ear protection near noisy equipment for convenience.
5. Skin and Clothing Protection
- Aprons and Lab Coats: Shield clothing from splashes, stains, and minor cuts. Choose flame-resistant materials for soldering or heat-related crafts.
- Arm Guards: Useful for glasswork, metalwork, and activities involving sharp edges.
- Closed-Toe Shoes: Always wear sturdy footwear to prevent injuries from dropped tools or sharp debris.
Tip: Avoid loose clothing or jewelry that could snag on machinery.
PPE for Specialized Crafting Techniques
Working with Resins and Epoxy
- Full-face respirator with organic vapor cartridges
- Nitrile gloves (never latex)
- Chemical splash goggles
- Protective apron
Always work in a well-ventilated area and have spill cleanup materials nearby.
Textile Dyeing and Fabric Painting
- Gloves (nitrile or chemical resistant)
- Safety glasses or goggles
- Face mask or respirator for powdered dyes
- Apron or old clothing
Wash hands thoroughly after finishing, even if gloves were worn.
Woodworking and Carving
- Safety glasses or face shield
- N95 dust mask or particulate respirator
- Hearing protection (earmuffs or plugs)
- Cut-resistant gloves (for hand carving only, not for power tool use)
Never wear gloves around spinning blades—use push sticks and guards instead.
Ceramics and Pottery
- Dust mask (for mixing dry clay or sanding greenware)
- Protective apron
- Closed-toe shoes
Clean up dust with a wet sponge or HEPA vacuum to minimize inhalation risks.
Maintaining, Storing, and Replacing PPE
Proper Care for Longevity and Effectiveness
- Clean After Each Use: Wipe down goggles, wash reusable masks, and sanitize gloves as instructed by the manufacturer.
- Inspect Regularly: Check for cracks, tears, filters past their service life, and worn straps.
- Replace When Needed: PPE is only effective if it’s in good condition. Replace items that are damaged, dirty beyond cleaning, or expired.
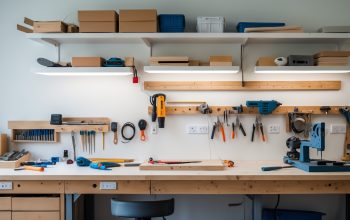
- Store in a Clean, Dry Location: Use labeled bins or hooks to keep PPE organized and away from direct sunlight, dust, or fumes.
Labeling storage areas helps everyone in shared studios find and use the right gear.
Building Safer Habits: Integrating PPE into Your Creative Workflow
Setting Up a PPE Station
Dedicate a space near your studio entrance for PPE. Stock it with spares, cleaning supplies, and a reference chart. Having gear visible and accessible increases the likelihood you’ll use it every time.
Developing a PPE Checklist
Create a project-based checklist to review before starting any new experiment. List all necessary PPE for each material or tool. Laminate the checklist for durability and keep it posted by your desk.
Training and Studio Etiquette
- Learn proper donning and doffing techniques for masks, gloves, and goggles.
- Encourage family or studio visitors to follow your safety practices.
- Model safe behaviors—consistency helps make PPE use a habit, not a chore.
Common Questions and Troubleshooting
“Do I really need PPE for simple projects?”
Yes—minor risks can lead to major injuries. Even basic glue, paint, or cutting tasks carry hazards. PPE is a quick, effective preventative measure.
“What if PPE feels uncomfortable or restrictive?”
Invest in quality, properly sized gear. Many modern PPE options are designed for comfort and breathability. If discomfort persists, try different brands or styles until you find what works.
“Can I share PPE with other crafters?”
Ideally, each person should have their own set, especially for masks and gloves. If sharing, thoroughly clean and disinfect items between uses.
“How do I know when to replace my PPE?”
Look for visible wear, loss of elasticity, discoloration, or expired filters. For respirators, follow cartridge replacement guidelines and maintain a log if possible.
Safety for Special Populations: Kids, Pets, and Sensitive Individuals
If your studio doubles as a family space, extra precautions are needed. Keep PPE and hazardous materials out of reach of children and pets. Consider hypoallergenic gloves and masks for sensitive skin, and always supervise young crafters closely. Use child-sized PPE where available.
Conclusion: Make PPE Your Creative Superpower
Personal Protective Equipment isn’t just for industrial workshops—it’s a powerful ally for every DIY crafter. Embracing PPE ensures that your creativity can flourish safely, allowing you to experiment with new techniques, tackle ambitious projects, and enjoy your studio for years to come. By choosing the right gear, maintaining it diligently, and integrating safety into your daily workflow, you empower yourself to focus on what matters most: creating with confidence. Remember, accidents are rarely planned, but protection always can be. Whether you’re pouring resin, sanding wood, or mixing up a vibrant batch of dye, let PPE be as essential as your favorite tool. Your eyes, lungs, hands, and overall well-being are worth the investment. Equip your studio thoughtfully, share your safety knowledge with others, and make every creative session as safe as it is inspiring. Happy (and safe) crafting!

Could you give some specific examples of PPE that are best suited for working with resin or epoxy in a home craft studio? I always worry about fumes and possible skin contact, so I’m interested in what experienced crafters actually use day-to-day.
For working with resin or epoxy, most experienced crafters use a respirator mask rated for organic vapors to protect against fumes, along with disposable nitrile gloves for skin protection. Safety goggles are also recommended to shield your eyes from splashes. Many also wear a dedicated apron or long sleeves to avoid skin contact and keep clothes safe from spills.
As a parent, how can I make sure my kids use the right PPE when they join me for crafting, especially when we’re working with wood or metal? Are there child-sized options available?
It’s important to get child-sized PPE so that gear like safety goggles, gloves, and dust masks fit your kids properly and actually protect them. Many hardware stores and online retailers offer PPE designed for children. Always supervise your kids to ensure they’re wearing their gear correctly, and explain why each item is necessary for their safety during crafting.
I do a lot of mixed media crafts that involve both resin and paints. How do I know which types of PPE are specific to each material, and are there any combinations of gear that work well for multiple craft mediums?
For resin, you’ll want nitrile gloves, a respirator rated for organic vapors, and protective eyewear to guard against fumes and splashes. For paints, especially sprays or solvent-based types, similar protection is recommended: gloves, safety goggles, and a respirator. Nitrile gloves, safety goggles, and a quality respirator together offer versatile coverage for most mixed media crafts involving chemicals or particulates.
I sometimes craft late at night and worry about accidentally overlooking safety steps. Do you have any practical tips for creating habits or routines so that using PPE becomes automatic, especially when I’m tired?
To make using PPE automatic, try setting up a visible checklist in your workspace and always follow it before starting any project, no matter how tired you feel. Keep your PPE in a dedicated, easily accessible spot so you can’t miss it. Building a habit by making PPE the first and last step of your crafting routine helps reinforce its importance even when you’re tired.
I run a small home craft studio mostly using textiles and some paints. The article mentions that standard home precautions aren’t enough, so could you specify what type of PPE is most important for these materials?
For a craft studio working with textiles and paints, key PPE includes a well-fitted dust mask or respirator to protect from fibers and paint fumes, safety glasses to shield eyes from splashes, and nitrile gloves when handling paints or cleaning chemicals. If you use spray paints, consider extra ventilation and a stronger respirator. Long sleeves and aprons also help keep skin protected from irritants.
When it comes to storing PPE in a home craft studio, do you have any practical tips for keeping equipment clean and accessible without it cluttering up the workspace?
To keep PPE clean and accessible in your craft studio, consider using wall-mounted hooks or shelves to store items like goggles and gloves off your work surface. Clear bins or labeled containers help keep dust away and make it easy to find what you need. Rotating storage racks or a dedicated drawer can also save space and reduce clutter.
I’m setting up a craft area in a small apartment. Are there any space-saving ideas for safely storing PPE so it remains accessible but doesn’t clutter my workspace?
To keep your PPE handy but out of the way, consider using wall-mounted hooks or a pegboard to hang items like goggles, gloves, and masks. Over-the-door organizers with clear pockets can store smaller gear while saving space. A small storage bin or caddy that fits under your table can also help keep everything organized and readily accessible without cluttering your workspace.
The guide talks about fostering a safety culture in the studio. Any suggestions for making PPE use more routine or less of a chore, especially for kids or friends who join me for occasional craft sessions?
To make PPE use feel more natural and less like a chore, try storing equipment in clearly labeled, easily accessible spots. Make it fun for kids by letting them choose colorful gear or putting up playful safety reminders. For friends, lead by example and offer a quick, positive explanation of why PPE matters before starting. Turning safety into a shared routine can help everyone adopt it willingly.