

Introduction: The Excitement—and Pitfalls—of Setting Up Your First DIY Craft Studio
Creating your own DIY craft studio is one of the most exciting steps any creative person can take. Whether you’re passionate about paper crafts, woodworking, fiber arts, or mixed media, having a dedicated space to experiment and express yourself can unlock entirely new levels of productivity and joy. But amid the excitement of sketching layouts and pinning inspiration, it’s easy to overlook practical details that are critical to your studio’s success. Too often, beginners fall into avoidable traps—poor lighting, inadequate storage, a lack of safety planning, or simply overfilling the space—that sap both enthusiasm and efficiency in the long run. In this in-depth guide, we’ll walk through the most common mistakes made by DIYers setting up their first craft studios. You’ll learn how to spot these pitfalls, understand why they matter, and gain actionable strategies for crafting a functional, inspiring, and safe workspace from the very start.
1. Ignoring Workflow and Studio Layout
Why Workflow Matters
One of the most frequent beginner mistakes is jumping straight into decorating or filling a space without considering how you’ll actually use it. Workflow refers to the logical sequence of steps you follow when working on projects. A poorly designed layout can lead to constant interruptions, wasted time, and even injury.
Common Workflow Mistakes
- Placing storage far from your main work area: This leads to extra steps and clutter accumulating on your workspace.
- Blocking natural pathways: Overcrowding with furniture or storage can make it hard to move freely, especially with large projects.
- Neglecting “zones” for different activities: Mixing painting, sewing, and cutting in the same area creates confusion and increases the risk of accidents.
Expert Solutions
- Sketch your workflow before moving in furniture—map the sequence of tasks and group tools/materials accordingly.
- Create dedicated zones (e.g., cutting, assembly, finishing) to keep tools and materials organized and within reach.
- Leave clear walkways of at least 36 inches for safe movement, especially if you’ll be handling large or sharp objects.
2. Underestimating Storage Needs and Solutions
The Storage Trap
At first, your craft supply stash may seem manageable. But most DIYers are shocked by how quickly materials, tools, and finished projects multiply. Inadequate storage leads to piles on every surface, lost supplies, and a stifling sense of chaos.
Storage Mistakes to Avoid
- Relying solely on open shelves: Attractive but quickly become cluttered and dusty if not managed carefully.
- Ignoring vertical space: Wasted wall area means less floor space for working.
- No system for small items: Tiny supplies like beads, threads, or screws get lost without clear containers or labeling.
Expert Solutions
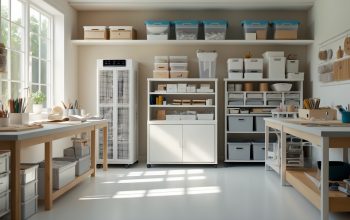
- Mix open and closed storage: Use closed cabinets for bulk materials and open shelves for frequently used items.
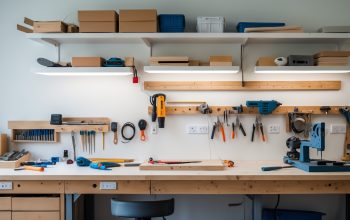
- Install wall-mounted pegboards, magnetic strips, or rails to free up desk space and keep essentials visible.
- Organize small items in transparent, stackable containers with clear labels. Consider drawer dividers for easy access.
3. Poor Lighting Choices
Why Lighting is Critical
Crafting is visual work. Inadequate or poorly placed lighting can cause eye strain, color mismatches, and even safety hazards when working with sharp or hot tools.
Lighting Mistakes
- Relying solely on overhead lighting: Creates shadows on your work surface, making detail work frustrating.
- Ignoring natural light sources: Failing to position work tables near windows wastes valuable daylight.
- Using bulbs with the wrong color temperature: Can distort the perception of colors and materials.
Expert Solutions
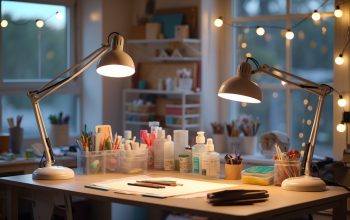
- Combine overhead ambient lighting with targeted task lights (adjustable desk lamps, under-shelf lighting).
- Set up main workstations parallel to windows to maximize even natural light without glare.
- Choose “daylight” bulbs (5000K–6500K) for accurate color representation.
4. Skipping Safety and Ergonomics
Why Safety and Comfort Count
A creative rush can make it tempting to focus solely on aesthetics or productivity. But neglecting safety and ergonomics can cause injuries—from minor cuts to repetitive strain—derailing your creative plans for weeks or months.
Safety and Ergonomics Mistakes
- No first aid kit or fire extinguisher: Essential emergencies are often overlooked.
- Improper work surface height: Causes back, neck, or wrist pain over time.
- Ignoring ventilation needs: Dangerous when working with glues, paints, or solvents.
Expert Solutions
- Keep a stocked first aid kit and suitable fire extinguisher within easy reach. Inspect them regularly.
- Match work table height to your dominant tasks: 28–30 inches for general crafting, 36 inches for standing work.
- If using chemicals, ensure good airflow—install exhaust fans or open windows as needed.
5. Overfilling the Space
The Temptation to Collect
It’s easy to get carried away buying every tool or organizing system you see online. But overstuffing your studio creates stress, limits flexibility, and can even introduce safety hazards.
Overfilling Mistakes
- Buying storage before assessing true needs: Leads to mismatched containers and wasted money.
- Accumulating duplicates: Multiple glue guns, rulers, or scissors accumulate “just in case.”
- Cluttering with rarely-used specialty tools: Takes up valuable space and distracts from your core projects.
Expert Solutions
- Start with the basics; expand storage and tools only as specific needs arise.
- Schedule periodic decluttering sessions—donate or sell tools and supplies you haven’t used in the past year.
- Prioritize multi-functional furniture and modular storage to stay flexible as your interests evolve.
6. Failing to Plan for Power and Technology
Power and Tech Pitfalls
Modern DIY studios often rely on a surprising number of powered tools, chargers, and devices. Overlooking your electrical needs can result in tripping hazards, overloaded outlets, or inconveniently placed power cords.
Common Power Mistakes
- Not enough accessible outlets: Leads to daisy-chained extension cords—a major fire risk.
- Poor placement of outlets: Forcing cords to cross walkways or work surfaces.
- Ignoring surge protection: Sensitive equipment can be ruined by a single power spike.
Expert Solutions
- Map out where each tool or device will live and ensure outlets are nearby.
- Use surge-protected power strips mounted off the floor, and avoid overloading any single circuit.
- If renovating, consider installing extra outlets at counter height for convenience.
7. Neglecting Future Growth and Flexibility
Planning for Change
Your creative interests will evolve—and so will your studio needs. A rigid setup can quickly become frustrating as new hobbies or larger projects demand different tools, layouts, or storage.
Flexibility Mistakes
- Permanently fixing furniture or storage: Limits the ability to rearrange for new projects or collaborators.
- Failing to leave space for new supplies or equipment: Leads to overcrowding and stress.
- No plan for digital crafting needs: Overlooking needs for computers, printers, or digital cutting machines as interests grow.
Expert Solutions
- Choose movable worktables and modular storage units that can be reconfigured.
- Leave at least 20% of your storage unfilled to accommodate future additions.
- Designate a tech-friendly zone with space and outlets for future digital tools.
8. Overlooking Inspiration and Personal Touches
The Importance of Creative Energy
While function is crucial, a studio that feels sterile or impersonal can sap your enthusiasm. Many beginners focus so much on organization that they forget to include elements that spark joy and inspiration.
Inspiration Mistakes
- Bare walls and surfaces: Lack of visual interest or motivation.
- Ignoring comfort: No cozy chair, rug, or favorite mug to make the space inviting.
- Failing to display finished work: Missed opportunity to celebrate progress and fuel new ideas.
Expert Solutions
- Hang a corkboard or wire grid for inspiration images, color palettes, or in-progress pieces.
- Add a personal touch: a plant, artwork, or handmade décor to make the space uniquely yours.
- Dedicate a small shelf or wall for showcasing finished projects to remind yourself of your achievements.
9. Forgetting About Maintenance and Clean-Up Systems
Why Maintenance Systems Matter
Crafting often involves mess—glitter, sawdust, fabric scraps, and more. Without a clear system for cleaning up, clutter quickly spirals out of control, and your studio’s lifespan shortens as dust and debris damage tools and surfaces.
Maintenance Mistakes
- No dedicated cleaning supplies: Leads to procrastination and neglected messes.
- Ignoring tool maintenance: Dull blades or clogged machines slow you down and can be dangerous.
- No clear trash/recycling zones: Results in random piles and lost workspace.
Expert Solutions
- Set up a cleaning station: keep wipes, a handheld vacuum, and surface cleaners within reach.
- Schedule regular tool maintenance—sharpen blades, oil machines, and inspect equipment monthly.
- Provide labeled bins for trash, recycling, and reusable scraps near your main work areas.
10. Not Seeking Community or Advice
The Value of Learning from Others
Finally, many new DIYers try to reinvent the wheel, missing out on the wisdom and shortcuts offered by more experienced crafters. Without input, you’re more likely to repeat avoidable mistakes or miss creative solutions.
Community Mistakes
- Setting up in isolation: Limits exposure to new ideas and best practices.
- Not researching before big purchases: Can result in wasted money on unnecessary or poor-quality tools.
Expert Solutions
- Join online forums, local craft clubs, or social media groups to learn from others’ experiences.
- Read reviews and seek recommendations before investing in major tools or furniture.
- Invite feedback on your setup—sometimes a fresh pair of eyes can spot improvements you missed.
Conclusion: Create a Studio That Grows with You
Designing your first DIY craft studio is a uniquely personal journey—one that should reflect both your creative ambitions and the practical realities of everyday making. By learning from the most common beginner mistakes, you can sidestep frustration and wasted resources, building a workspace that truly supports your artistry. Start with a clear understanding of your workflow, plan for storage and safety from day one, and resist the urge to overfill your space with unnecessary tools or supplies. Prioritize good lighting, ergonomics, and a flexible layout that allows your interests to evolve. Remember that cleaning and maintenance systems will keep your studio a place of inspiration, not stress, and that connecting with the crafting community is an invaluable source of advice and encouragement. Most importantly, infuse your creative space with personal touches that inspire and energize you. A thoughtfully designed DIY craft studio isn’t built overnight—it’s an ongoing process of refinement, discovery, and joyful experimentation. With these expert insights, you’re well on your way to a studio that will nurture your creativity for years to come.
When you mention overcrowding the space with furniture or storage, how do you strike a balance between having enough storage and keeping walkways clear, especially in a small room?
In a small craft studio, try using vertical storage like wall shelves or pegboards to keep supplies organized without taking up floor space. Choose multipurpose furniture, such as a table with built-in drawers. Make sure to leave at least 2–3 feet for main walkways so you can move around comfortably.
You mentioned that inadequate storage is a common pitfall. For someone on a tight budget, are there any DIY storage ideas or materials you’ve found especially effective?
Repurposing everyday items can work wonders for budget-friendly storage. Try using old jars, shoe boxes, or tins to organize small supplies. Wall-mounted shelves made from reclaimed wood or crates save space and keep materials visible. Pegboards are also affordable and let you customize tool and material placement easily as your needs change.
How would you suggest approaching workflow sketches for people who aren’t sure yet which crafts they’ll focus on most? Should the studio be flexible or designed around a primary activity?
If you’re still exploring which crafts you enjoy most, it’s best to keep your studio layout flexible. Use modular furniture and adjustable storage so you can easily reconfigure the space as your preferences develop. Workflow sketches should highlight open space and multipurpose zones rather than focusing too much on any single craft.
When you mention creating zones for different activities, how do you prevent supplies or mess from one zone spilling over into another, especially if you have a really small space?
To keep supplies and mess contained in each zone, use storage bins or baskets for each activity and label them clearly. Stackable or rolling organizers can help maximize vertical space. Try to finish one project before moving to another, and set aside a few minutes at the end of each session to tidy up each zone.
Could you give more detail on mapping out the workflow before moving in furniture? Are there specific tools or methods you use to plan the layout, like software or just sketching by hand?
Mapping out your workflow means visualizing how you’ll move between tasks—like cutting, gluing, and storing materials—before arranging furniture. Many people find it helpful to sketch the room and key zones by hand on graph paper. Others use free online room planners or simple software like SketchUp. The main goal is to test how your space flows and adjust on paper or screen before lifting anything heavy.
When mapping out a studio layout to improve workflow, what are some good examples of zones for different crafts? I’d love some sample layouts or common mistakes to avoid when grouping tools and supplies.
Dividing your studio into zones works really well. Common zones include a cutting area, painting or gluing station, storage for raw materials, and a finishing or drying space. Keep tools and supplies for each craft near their zone to minimize moving around. A common mistake is putting shared tools too far from where you use them most or crowding zones together, making it hard to work comfortably.
I’m curious about workflow mapping. Can you give a real-life example of what a functional workflow looks like for someone who does both painting and fiber arts in a shared studio?
A functional workflow for someone doing both painting and fiber arts might involve designating separate zones for each activity. For example, you could set up a painting area near a window for good light and easy ventilation, and a fiber arts section with organized yarn and fabric storage. Keep shared tools like scissors and rulers accessible in a central spot, and plan cleanup routines so one project doesn’t interfere with the other.
I’m a beginner working with a very tight budget. Are there any affordable storage solutions you’d recommend to avoid clutter and make sure supplies stay accessible in a first-time DIY craft studio?
Absolutely! Try using clear plastic bins or shoe boxes to keep supplies visible and sorted. Stackable drawers or desktop organizers from dollar stores are budget-friendly and help maximize space. Pegboards and hooks on the wall can also keep tools handy without taking up much room. Label everything so you can find what you need quickly.