
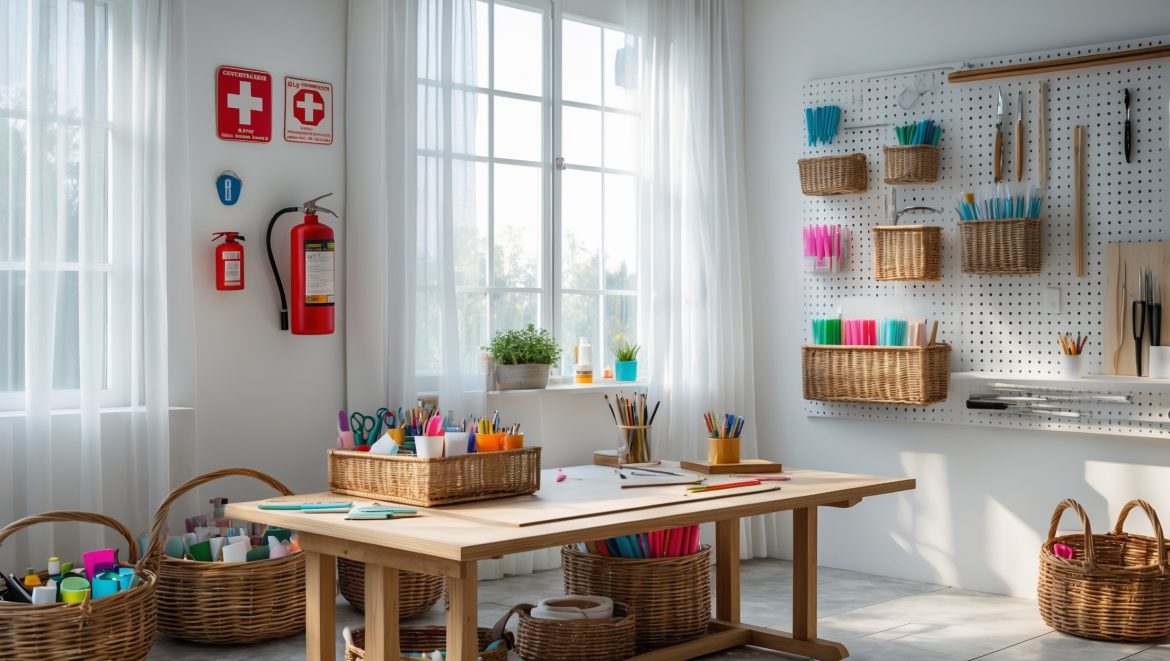
Introduction: Why Emergency Preparedness Matters in Your DIY Craft Studio
For passionate crafters and creative entrepreneurs, a DIY craft studio is more than just a workspace—it’s a sanctuary for inspiration, productivity, and hands-on experimentation. Yet, amidst the joy of making, few consider how vulnerable their creative havens can be to unexpected emergencies. Whether you work from a converted basement, a backyard shed, or a leased commercial space, your studio is at risk from fires, floods, power outages, and other unforeseen events. The loss of materials, tools, or even completed projects can be devastating, both financially and emotionally.
Emergency preparedness isn’t about paranoia—it’s about peace of mind. By proactively crafting a comprehensive emergency action plan tailored to your craft studio, you ensure that your creative process stays resilient no matter what life throws your way. You’ll protect your investment, minimize downtime, and, most importantly, safeguard yourself and anyone who shares the space. This guide walks you step-by-step through assessing risks, assembling emergency kits, establishing protocols, and maintaining readiness—so you can keep creating with confidence.
Assessing Your Craft Studio’s Unique Risks
Understanding Common Hazards
Every DIY craft studio is unique, but certain hazards are more likely depending on your location, building type, and the materials you use. Begin by listing potential emergencies that could affect your studio. Typical risks include:
- Fire: From electrical faults, flammable materials, or heating equipment.
- Flood or Water Damage: Due to plumbing leaks, storms, or poor drainage.
- Power Outages: Affecting lighting, ventilation, and electronic tools.
- Chemical Spills: If you use paints, solvents, adhesives, or dyes.
- Severe Weather: Such as storms, tornadoes, hurricanes, or blizzards.
- Break-ins or Vandalism: Especially in ground-level or detached studios.
- Medical Emergencies: From cuts, burns, or allergic reactions.
Conducting a Studio Risk Audit
Walk through your studio and note:
- Electrical outlets, extension cords, and overloaded circuits.
- Locations of flammable or hazardous materials.
- Water sources and proximity to drains.
- Ventilation and natural light sources.
- Windows and doors for emergency exits.
- Areas prone to clutter or blocked pathways.
Use your findings as the foundation for your emergency action plan.
Building Your Craft Studio Emergency Kit
Core Supplies for Every Studio
No matter your setup, every studio should have a well-stocked emergency kit in an accessible, clearly marked location. Essentials include:
- Fire extinguisher (ABC type for multi-purpose use)
- First aid kit (adhesive bandages, burn cream, antiseptic, gauze, scissors, tweezers, allergy meds, eye wash)
- Flashlight (with extra batteries)
- Battery-powered radio (for weather and news alerts)
- Emergency contact list (printed and laminated)
- Multi-tool or compact toolkit
- Spare phone charger (power bank type)
- Protective gear (dust masks, gloves, goggles)
- Water and non-perishable snacks (for extended emergencies)
Specialized Supplies for Craft Studios
- Chemical spill kit: Absorbent pads, neutralizer, and disposal bags if you use hazardous liquids.
- Fire blanket: For small fires or to wrap a person in case of clothing ignition.
- Plastic sheeting and duct tape: To protect supplies from leaks or for temporary weatherproofing.
- Tool inventory list: For insurance and quick checks after an emergency.
- Spare fuses and bulbs: For fast restoration after power surges.
Craft Studio Emergency Action Plan: Step-by-Step
1. Create Clear Evacuation Routes
Map out at least two escape routes from your studio. Keep these pathways unobstructed at all times. Post a simple evacuation diagram by the main entrance. If you have employees or frequent visitors, review this plan with them regularly.
2. Post Emergency Contacts and Resources
Display a printed list of emergency numbers—fire, police, poison control, and nearby neighbors or friends who can assist. Include your building’s address and any key access codes or instructions for first responders.
3. Assign Responsibilities
If you work with others, assign specific roles in an emergency: who grabs the emergency kit, who calls 911, who assists with evacuation, etc. For solo crafters, commit to regular drills and keep your phone within reach.
4. Shut Down Procedures
Develop a checklist for safely securing your studio at the end of each day or before storms, including:
- Unplugging appliances and power tools.
- Storing flammable materials in sealed containers.
- Securing windows, doors, and outdoor equipment.
- Backing up digital files and inventory photos.
5. Communication Plan
Ensure you have a way to communicate during emergencies—cell phones, walkie-talkies, or a landline. Share your studio’s location and plan with family or trusted contacts, especially if your studio is in a remote area.
Fire Safety Protocols for DIY Craft Studios
Fire Prevention
- Regularly inspect wiring, outlets, and power strips for wear or overload.
- Store flammable liquids away from heat sources and in fire-rated cabinets.
- Clean up dust, lint, and scrap regularly, as they can be flammable.
- Keep heat tools (glue guns, wood burners, irons) unplugged when not in use.
Fire Response
- Know how to use your fire extinguisher—remember PASS: Pull, Aim, Squeeze, Sweep.
- If a fire can’t be suppressed immediately, evacuate and call emergency services.
- Never re-enter the studio until authorities confirm it’s safe.
Flood and Water Damage Preparedness
Preventive Steps
- Store valuable or sensitive materials off the floor, ideally on shelves or in waterproof bins.
- Install water alarms near sinks, water heaters, or basements.
- Inspect for leaks around windows, doors, and pipes regularly.
- Keep a wet/dry vacuum and absorbent materials on-hand for small spills.
Flood Response
- Shut off electrical power before entering a flooded area.
- Evacuate immediately if water is rising quickly.
- Document damage for insurance with photos and a written inventory.
Power Outage Protocols
- Ensure emergency lighting (flashlights, battery lanterns) are always accessible.
- Back up digital files to the cloud or an external drive regularly.
- Unplug sensitive equipment during storms or outages to prevent surge damage.
- Keep a manual logbook for important contacts and inventory, in case electronics are unavailable.
Chemical and Hazardous Materials Incidents
Safe Storage Practices
- Label all chemicals clearly with hazard warnings.
- Keep incompatible chemicals (e.g., bleach and ammonia) separated.
- Store materials in original containers or approved safety cans.
Spill Response
- Ventilate the area immediately.
- Use gloves and goggles before cleaning spills.
- Follow manufacturer instructions for cleanup and disposal.
- In case of inhalation or ingestion, call poison control or emergency services promptly.
Medical Emergency Readiness
- Keep a first aid kit replenished and within easy reach.
- Learn basic first aid skills or take a course in CPR.
- Post allergy information and emergency health details for yourself or regular studio users.
- Have a charged phone available for emergency calls at all times.
Maintaining and Testing Your Emergency Plan
Regular Drills and Reviews
Practice your evacuation and emergency procedures at least twice a year. Update your emergency kit every six months, replacing expired supplies and updating contact lists. Review your plan after any studio renovations, changes in equipment, or new risks arise.
Training for Studio Users
If you teach classes, host workshops, or share your space, provide a short safety briefing to newcomers. Post visual reminders of emergency exits, extinguisher locations, and safety rules in prominent locations.
Recordkeeping and Recovery
Inventory Documentation
Keep a detailed, regularly updated inventory of your tools, equipment, and materials—including serial numbers and photographs. Store a backup copy offsite or in the cloud for insurance purposes.
Post-Emergency Recovery Steps
- Assess and document all damage as soon as it’s safe.
- Contact your insurance provider with your documentation.
- Prioritize restoring critical functions—utilities, ventilation, and safe storage of materials.
- Update your emergency plan based on lessons learned.
Conclusion: Peace of Mind Fuels Creativity
Emergencies are, by nature, unpredictable—but your response doesn’t have to be. A well-crafted emergency action plan is an essential tool for any DIY craft studio owner, whether you’re a hobbyist or a professional. It turns anxiety into action, ensuring you’re never caught off guard by fire, flood, outages, or health crises. Beyond physical safety, it offers a powerful psychological benefit: peace of mind. When you know you’ve taken steps to protect your creative space, you can focus fully on what matters most—exploring new ideas, mastering techniques, and bringing your artistic visions to life.
Don’t wait until disaster strikes to act. Start with a risk assessment, assemble your emergency kit, and establish routines that keep safety top-of-mind. Share your plan with anyone who uses your studio and update it regularly to reflect changes in your space or materials. Remember, preparedness is not a one-time task—it’s an ongoing commitment that ultimately supports your freedom to create without fear. Invest a little time now, and you’ll gain immeasurable security for years of inspired making ahead.


I’m curious about how often you recommend reviewing and updating an emergency plan for a craft studio. Should it be revisited every year, or only when something changes in the space or the materials being used?
It’s best to review and update your emergency plan at least once a year to make sure it stays relevant and effective. However, if you make any significant changes to your studio layout, equipment, or the types of materials you use, it’s a good idea to revisit the plan right away.
How would you recommend balancing emergency preparedness with staying on a budget? Are there steps you suggest prioritizing first for someone just setting up a small home-based studio?
Start by identifying the most likely emergencies for your area, such as fire or power outages. Prioritize basic supplies like a first aid kit, fire extinguisher, and flashlight. Look for multipurpose items that suit your craft needs and safety. Gradually build your emergency kit over time as your budget allows, focusing first on essentials that provide immediate safety and protection.
For craft studios where multiple people work or visit regularly, what strategies would you suggest to ensure everyone knows the emergency protocols and feels confident in responding to potential incidents?
For studios with several people, regular training sessions and emergency drills are key. Post clear, easy-to-read instructions and evacuation maps in visible spots. Assign specific roles to staff, like fire marshal or first aid responder, so everyone knows their responsibilities. Encourage open discussions about safety to boost awareness and confidence in handling emergencies.
I’m curious, how would you prioritize which emergencies to prepare for first if you’re working from a backyard shed that’s prone to both storms and occasional power outages? Is there a particular order of action that makes sense?
Since your shed is prone to storms and power outages, it makes sense to prioritize storm preparedness first, as storms can cause both immediate danger and trigger power outages. Secure the structure, ensure safe exits, and have emergency supplies ready. Afterward, focus on backup power solutions like battery-powered lights or a portable generator to handle outages when they happen.
Since power outages can really disrupt work, could you suggest some affordable backup lighting or power solutions that are effective for a small studio?
For affordable backup lighting, consider battery-powered LED lanterns or rechargeable LED work lights—they’re bright, portable, and last several hours. For basic power needs, a portable power bank or a small battery generator can charge phones and run low-watt devices. Solar-powered chargers are also handy if sunlight is available. These options should help keep your studio functional during outages.
If my craft studio is located in a basement, are there extra precautions I should take for flood and water damage, compared to a ground-level or above-ground workspace?
Yes, basements are more prone to flooding and moisture issues than above-ground spaces. Consider installing a sump pump and using water-resistant storage containers for your supplies. Elevate valuable materials off the floor and check that your basement has proper drainage and ventilation. It’s also wise to keep important documents and electronics in waterproof cases.
You mention assembling emergency kits, but is there a budget-friendly way to put together one that still covers essential needs without overspending? I have a small studio and limited funds.
Absolutely, you can create a budget-friendly emergency kit by focusing on essentials and using what you already have. Start with basics: bottled water, non-perishable snacks, a flashlight, batteries, and a simple first aid kit. Look for sales or dollar-store options for items like blankets and gloves. Repurpose containers or bags for storage, and gradually add items as funds allow.
I’m in a rented commercial space and worried about potential flooding from the neighboring units. Do you have advice on what protocols work best for minimizing water damage in a craft studio?
To minimize water damage risk, keep valuable supplies and equipment on elevated shelves or pallets, away from the floor. Store important documents in waterproof containers. Make sure you know where the water shut-off valves are and keep emergency contact numbers handy. Regularly inspect weatherstripping and door seals, and use sandbags near entry points during severe weather. Have a clear evacuation and salvage plan in place for your studio.
When creating an emergency protocol, how often would you suggest reviewing or running drills in a solo-operated craft studio, and what should those drills typically include?
For a solo-operated craft studio, it’s a good idea to review your emergency protocol and run drills at least twice a year. Drills should cover evacuation procedures, locating and using fire extinguishers, first aid kit checks, and practicing how to quickly secure hazardous supplies. Regular practice helps keep your response automatic and ensures your safety equipment is functional.