Introduction: Why Preventative Maintenance Matters in Your DIY Craft Studio
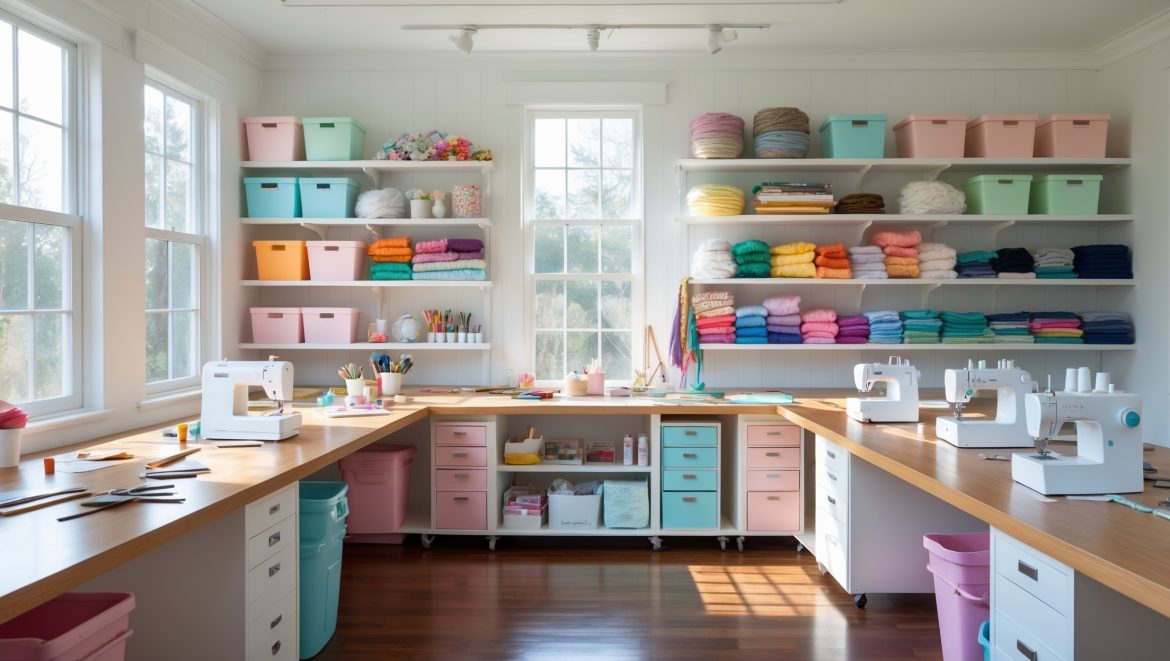
If you’ve poured your heart (and budget) into building a DIY craft studio, you know how quickly a creative space can become cluttered, worn, or even unsafe. But what if you could extend the life of your tools, materials, and workspace simply by adopting a few preventative maintenance routines? Regular, thoughtful care makes your craft studio not only more pleasant to use but also protects your investment, helps avoid costly repairs, and keeps your inspiration flowing. Whether you specialize in textiles, woodworking, paper crafts, or mixed media, a well-maintained studio is the foundation for productivity and creative joy. In this comprehensive guide, you’ll discover practical, actionable routines for every area—from work surfaces and storage to studio equipment and specialty supplies. Let’s dive into the expert strategies that will help you preserve your studio’s magic for years to come.
Establishing a Maintenance Mindset: The Benefits of Being Proactive
Preventative maintenance isn’t just about cleaning; it’s about cultivating habits that keep your studio in peak condition. By regularly inspecting and caring for your space, you can:
- Prevent accidents and injuries by ensuring equipment is safe and surfaces are hazard-free
- Save money by addressing small issues before they turn into costly repairs or replacements
- Reduce creative downtime by keeping tools and materials ready for use
- Maintain inspiration by working in a tidy, efficient environment
- Protect your health by minimizing dust, mold, and chemical exposure
With these benefits in mind, let’s break down the preventative care routines that will keep your studio running smoothly.
Weekly Maintenance Routines: Keeping Up with the Basics
1. Surfaces and Workbenches
Wipe down all work surfaces with a gentle, appropriate cleaner after each major crafting session. Pay special attention to glue, paint, or ink spills that can harden and damage surfaces. For wood benches, use a slightly damp microfiber cloth followed by a dry one, and treat with a wood conditioner every few months.
2. Tool Check and Cleaning
- Hand tools: Remove debris and dust. Wipe metal parts lightly with machine oil to prevent rust (especially after using water-based products).
- Scissors and blades: Wipe clean after use. Check for sticky residue from adhesives—remove with a cotton swab and rubbing alcohol.
- Power tools: Unplug, then use a soft brush or compressed air to remove sawdust or lint from vents and moving parts.
3. Floor Care
Vacuum or sweep floors to remove dust, thread, and small debris. For hard flooring, mop with a suitable cleaner once a week, ensuring no water seeps into seams or under equipment.
4. Material Management
- Return all materials to clearly labeled bins or shelves after each session.
- Rotate materials—move older supplies to the front to use them before they expire or degrade.
Monthly Maintenance: Deep Dives for Long-Term Studio Health
1. Storage Systems Inspection
Check shelving, drawers, and bins for damage or instability. Tighten loose screws or brackets. Wipe out storage containers to remove dust and prevent mold or pests, especially if you store fabric or paper.
2. Inventory Assessment
- Audit your materials and supplies. Discard anything that’s expired, dried out, or compromised by pests.
- Note low stock for restocking and avoid overbuying items you already have.
3. Ventilation and Air Quality
Clean or replace filters in air purifiers, fans, or HVAC vents. Wipe down vent covers and inspect for signs of mold or dust buildup. Open windows for fresh air when weather permits.
4. Lighting Check
- Dust light fixtures and replace any burnt-out bulbs.
- Check for flickering or dimming that could indicate electrical issues.
Quarterly Maintenance: Seasonal Studio Tune-Ups
1. Tool Sharpening and Calibration
- Sharpen blades on scissors, rotary cutters, and craft knives. For power tools, consult manufacturer guidelines or hire a professional for complex sharpening.
- Calibrate cutting mats and rulers to ensure precise measurements for quilting or papercraft.
2. Studio Layout Review
Take a step back and evaluate your studio’s layout. Is it still serving your workflow? Rearrange furniture or storage for better ergonomics and accessibility. Reassess frequently used paths to eliminate tripping hazards or bottlenecks.
3. Deep Clean Specialty Equipment
- Clean sewing machine bobbin cases and oil moving parts.
- Wipe down glue guns, heat tools, and other specialty electronics—check manufacturer instructions for safe cleaning.
4. Seasonal Material Check
- Store temperature- or humidity-sensitive materials (like specialty glues, resins, or paints) according to seasonal changes.
- Inspect for signs of warping, mildew, or chemical separation.
Annual Deep Maintenance: Preserving Your Studio’s Value
1. Full Equipment Audit
- Test all electrical outlets and cords for wear, fraying, or overheating. Replace or repair as needed.
- Check tool warranties and schedule professional servicing if required.
2. Major Storage Overhaul
Empty all cabinets, drawers, and bins. Clean thoroughly before reorganizing. Donate or recycle items you haven’t used in the past year to free up valuable space.
3. Deep Clean Walls, Ceilings, and Fixtures
- Wipe walls and ceilings to remove accumulated dust, cobwebs, and any residue from crafting activities.
- Clean light switches, electrical panels, and baseboards.
4. Safety Systems Review
- Inspect smoke and carbon monoxide detectors; replace batteries and test operation.
- Check fire extinguishers for expiration and replace if necessary.
- Restock first aid kits and confirm all safety equipment is accessible and functional.
Specialty Maintenance for Different Types of Craft Studios
Textile and Fiber Arts Studios
- Vacuum fabric scraps and lint from sewing machines and sergers regularly.
- Store natural fibers in airtight containers to prevent moths and mold.
- Wash or air out fabrics before long-term storage to prevent odors.
Paper Craft Studios
- Keep paper away from direct sunlight to prevent fading.
- Store cardstock and specialty papers flat to avoid warping.
- Organize ink pads and markers with lids tightly closed to preserve freshness.
Woodworking and Mixed Media Studios
- Regularly clean sawdust and debris from equipment to prevent fire hazards.
- Store paints, solvents, and adhesives according to safety guidelines.
- Oil wooden handles and surfaces to prevent cracking and drying out.
Preventative Maintenance Checklist: Keep It Simple
To stay consistent, post a maintenance checklist in your studio. Here’s a sample:
- Wipe work surfaces and tools after each session
- Sweep/vacuum floors weekly
- Inspect and restock materials monthly
- Sharpen and oil tools quarterly
- Test safety equipment annually
Smart Storage Solutions for Easier Maintenance
One of the best ways to simplify studio maintenance is to invest in storage solutions that encourage tidiness and organization. Consider:
- Clear bins for easy visibility of contents
- Modular shelving that can be rearranged as your needs change
- Label makers or color-coded labels to quickly identify supplies
- Magnetic strips or pegboards for hanging tools within arm’s reach
- Vertical storage to maximize floor space
These choices not only help you maintain order but also make your weekly and monthly routines much faster and more effective.
Addressing Common Maintenance Challenges
What if I’m Short on Time?
Break tasks into bite-sized chunks. Set a timer for 10–15 minutes at the end of each session to tidy up. Choose one maintenance focus area per day or week—for example, Monday for tools, Friday for materials.
Dealing with Shared or Multi-Use Spaces
If your studio doubles as a guest room or home office, use portable storage carts or stackable bins. Store hazardous items (scissors, blades, chemicals) out of reach of children or pets. Regularly reset the space to your craft setup after other uses.
Managing Humidity and Temperature Fluctuations
Use a hygrometer to monitor conditions. Employ dehumidifiers or small space heaters as needed. Store sensitive supplies in airtight containers with silica gel packs.
Tools and Products for Efficient Maintenance
- Microfiber cloths for lint-free dusting
- Label maker for organizing bins and shelves
- Small vacuum or shop vac for quick cleanups
- Compressed air cans for electronics and hard-to-reach places
- Non-toxic, craft-safe cleaners for surfaces and tools
- Basic toolkit for repairs (screwdrivers, pliers, hex keys)
- First aid kit for minor cuts and scrapes
Conclusion: Your Creative Investment, Protected
Maintaining your DIY craft studio isn’t just a chore—it’s an investment in your creative well-being and your ability to make art that matters. By setting up smart preventative routines, you prevent small issues from becoming big headaches, reduce waste, and foster an environment that supports inspiration and productivity. Remember that maintenance is a continual process; the more consistently you tackle these routines, the less time and effort each one takes. Over time, you’ll notice fewer interruptions, a safer space, and a studio that feels as fresh as the day you first set it up. So, make a date with your studio maintenance checklist—your future creative self will thank you, and your studio will remain a wellspring of ideas, achievement, and joy for many projects to come.


Could you provide some examples of gentle, appropriate cleaners that are safe for different types of work surfaces, especially for mixed media studios with both wood and laminate tables?
For mixed media studios with both wood and laminate tables, consider using a mild dish soap diluted in warm water, or a gentle all-purpose cleaner labeled as safe for multiple surfaces. For wood, avoid harsh chemicals and opt for a slightly damp microfiber cloth. For laminate, a vinegar and water solution also works well, but make sure to wipe surfaces dry after cleaning.
What are some effective ways to manage dust and chemical exposure in a small craft studio, especially if there are limited windows or ventilation options?
Managing dust and chemical exposure in a small studio with limited ventilation can be challenging. Use an air purifier with a HEPA filter to help trap fine dust and fumes. Always wear a good-quality mask or respirator when working with chemicals. Clean surfaces frequently with a damp cloth to prevent dust buildup, and store chemicals in airtight containers when not in use.