Introduction: The Overlooked Power of a Clean Craft Studio
Every creative knows the thrill of a freshly started project—colors pop, inspiration flows, and your workspace buzzes with possibility. But what happens when that same space becomes cluttered, dusty, or even hazardous from neglect? Many DIYers and craft enthusiasts underestimate the impact of a well-maintained studio. Cleanliness is more than aesthetics: it’s about protecting your health, ensuring your tools last, preventing accidents, and keeping creativity alive. In this guide, we’ll unveil pro-level maintenance routines—daily, weekly, and seasonal—specifically for craft studios. Whether you’re a hobbyist or a small-batch seller, these practical systems will help you maintain a spotless, organized, and inspiring workspace, so you can focus on what you do best: creating.
Why Routine Cleaning Matters in Craft Studios
Health and Safety First
Crafting often involves materials like glues, solvents, fibers, and paints that can shed dust or emit fumes. Regular cleaning minimizes inhalation risks, reduces allergens, and prevents slips and injuries from stray debris or spills.
Protecting Your Investments
Tools, machines, and raw materials aren’t cheap. Dust buildup in sewing machines, glue residue on scissors, or spilled liquids on electronics can shorten their lifespan. Proper maintenance saves money and frustration.
Boosting Creativity
Clutter and grime stifle inspiration. A clean, organized studio helps you find materials quickly, reduces distractions, and maintains a positive creative flow.
Daily Cleaning Routines: 15 Minutes to a Fresh Start
1. Clear and Wipe Down Your Work Surface
At the end of your crafting session, remove all tools, scraps, and materials from your main work area. Wipe down the surface with a slightly damp microfiber cloth to pick up dust, glue spots, and paint splatters. For stubborn residue, use the appropriate cleaner for your surface (wood, laminate, etc.).
2. Sweep or Vacuum the Floor
Glitter, thread, paper snippets, and sawdust collect quickly. A handheld vacuum or a quick sweep keeps debris under control and prevents it from being tracked elsewhere.
3. Put Away Tools and Supplies
Return scissors, brushes, rulers, and materials to their designated spots. This daily habit prevents tool loss, accidental damage, and saves time searching for items later.
4. Dispose of Trash and Recyclables
Empty the trash and recycling bins if they’re full. For hazardous waste like paint water, solvents, or sharp objects, use separate containers and follow local disposal regulations.
5. Quick Air Refresh
Open a window or run an air purifier for a few minutes to remove fumes and freshen the space, especially after working with adhesives, paints, or solvents.
- Pro Tip: Set a timer for 15 minutes at the end of each session. You’ll be amazed at what you can accomplish and how much smoother your next project will start.
Weekly Cleaning Routines: Deep Care for Tools and Surfaces
1. Deep Clean Tools and Equipment
- Scissors & Blades: Wipe down with a cloth and rubbing alcohol. Remove glue or tape residue with a cotton swab and mineral oil.
- Paintbrushes: Wash thoroughly with soap and water (or appropriate solvent). Reshape bristles and let dry completely.
- Sewing Machines & Electronics: Unplug, then dust vents and surfaces with a soft brush or compressed air. Clean touch screens and keypads with a gentle electronics wipe.
- Cutting Mats: Scrub with a soapy sponge, rinse, and air dry. Remove embedded fibers with a lint roller or eraser.
2. Dust Shelves and Storage Units
Shelves and bins collect fine dust and fibers. Remove items, wipe down surfaces, and reorganize as needed. Pay special attention to areas near fabric, yarn, or paper storage.
3. Sanitize High-Touch Areas
Clean doorknobs, drawer pulls, light switches, and shared tools with disinfecting wipes or spray.
4. Mop or Wet-Clean the Floor
After sweeping, mop hard floors with a mild, non-abrasive cleaner. For carpeted areas, use a vacuum with a HEPA filter and spot-clean any stains.
- Pro Tip: Make a checklist or assign a specific day each week (e.g., Sunday evenings) for your deep-clean routine. Consistency is key.
Seasonal and Monthly Cleaning: Long-Term Studio Wellness
1. Clean and Inspect Ventilation Systems
Check exhaust fans, air purifiers, and window screens for dust buildup. Clean or replace filters as needed to maintain good air quality.
2. Review and Rotate Supplies
Go through your inventory. Dispose of expired paints, dried-out markers, unusable glues, or warped materials. Rotate older supplies to the front so they’re used first.
3. Deep Clean Furniture and Upholstery
Vacuum chairs, sofas, and cushions. Spot-clean fabric surfaces. Wipe down tables, stools, and shelves with a suitable cleaner.
4. Check for Pests
Inspect corners, storage boxes, and behind furniture for signs of insects or rodents, especially if you work with natural fibers or food-based materials (e.g., wheat paste, dried flowers). Address any issues promptly with safe, studio-friendly remedies.
5. Organize and Declutter
Sort through finished projects, unfinished pieces, and scrap materials. Donate, recycle, or repurpose items you no longer need. This prevents overcrowding and keeps your workspace efficient.
- Pro Tip: Schedule a “studio reset” at the start of each season or every three months. Set aside a half-day for a thorough clean and reorganization.
Specialty Cleaning: Handling Craft-Specific Messes
1. Glitter, Beads, and Small Items
Use a lint roller or a piece of tape to pick up scattered glitter or beads from surfaces and floors. Small handheld vacuums with fine filters work well for confetti and seed beads.
2. Fabric and Yarn Fibers
Run a lint roller over work surfaces and chairs. Static dusters help with lightweight fibers. Vacuum regularly to prevent clogging machines and air vents.
3. Paint, Ink, and Adhesive Spills
- Water-Based: Blot immediately with a damp cloth, then clean with mild soap.
- Solvent-Based: Ventilate the area, use the correct solvent (acetone, mineral spirits), and avoid mixing chemicals.
- Hot Glue: Let it cool, then peel off gently. For residue, use rubbing alcohol.
4. Paper Dust and Scraps
Place a small trash bin or paper bag at your cutting station. Use a handheld vacuum or a soft brush to sweep off fine paper dust.
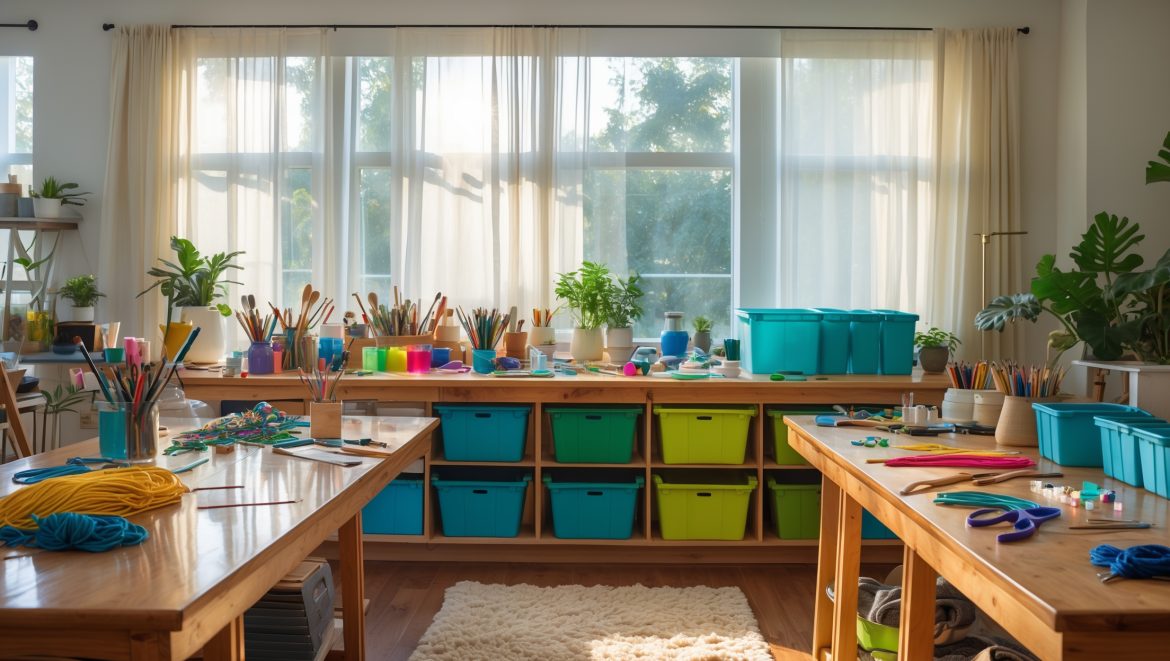
Organizational Systems to Support Cleanliness
1. Label Everything
Clear labels on bins, drawers, and shelves make it easy to put things back in the right place, even when you’re in a creative rush.
2. Use Modular Storage Solutions
Stackable bins, rolling carts, and drawer organizers keep supplies accessible and easy to clean around.
3. Create Zones
Designate areas for cutting, painting, sewing, or assembly. This prevents cross-contamination (e.g., glitter in your sewing machine) and makes spot-cleaning easier.
- Pro Tip: Invest in a few high-quality cleaning tools (microfiber cloths, a small shop vac, gentle cleaners) and keep them visible and within reach in your studio.
Maintaining Air Quality: The Hidden Cleaning Task
1. Regular Ventilation
Open windows when possible or run exhaust fans during and after using chemicals. If your studio lacks windows, consider installing a portable air purifier with a HEPA filter.
2. Control Humidity
Too much humidity encourages mold, while too little can dry out materials. Use a hygrometer to monitor levels and a dehumidifier or humidifier if needed.
3. Houseplants as Natural Filters
Certain houseplants (like spider plants and pothos) help filter air naturally and add a creative touch to your studio, but be sure to keep them off work surfaces to avoid mess and pests.
Safety Considerations When Cleaning
- Always unplug electrical equipment before cleaning.
- Use gloves when handling harsh chemicals or cleaning solvents.
- Keep cleaning products clearly labeled and stored away from children and pets.
- Follow all manufacturer instructions for tool and equipment maintenance.
Sample Cleaning Schedule for Craft Studios
Daily
- Clear and wipe work surfaces
- Sweep or vacuum floor
- Put away tools and supplies
- Empty trash and recycling
- Air out the studio
Weekly
- Deep clean tools and equipment
- Dust shelves and storage
- Sanitize high-touch areas
- Mop or wet-clean floors
Monthly/Seasonal
- Clean ventilation and air purifiers
- Review and rotate supplies
- Deep clean furniture
- Check for pests
- Declutter and reorganize
Conclusion: Make Cleanliness Your Creative Secret Weapon
A clean craft studio isn’t just about neatness—it’s a strategic advantage for any creative, from hobbyists to professional makers. When your space is free of clutter, dust, and hazards, you’ll work safer, feel more inspired, and spend less time searching for supplies or fixing preventable problems. Routine cleaning protects your tools, materials, and—most importantly—your health. By adopting daily, weekly, and seasonal maintenance habits tailored for the unique demands of crafting, you’ll ensure your studio supports your best work, project after project.
Start with small, manageable routines and gradually build them into your creative process. Invest in a few reliable cleaning tools, set reminders, and encourage everyone who shares your space to follow suit. The reward? More time for creativity, fewer interruptions from breakdowns or mess, and a studio that truly reflects your passion and professionalism.
Remember, even the most dazzling projects begin with a clean slate. Make cleanliness your creative secret weapon—and watch your ideas shine.


You mention that dust buildup can damage tools like sewing machines. Do you have specific recommendations for safe cleaning products or methods for delicate equipment like these, especially if I share my studio space with my kids?
For delicate equipment like sewing machines, use a soft, lint-free microfiber cloth to gently wipe away dust. A small, hand-held vacuum with a brush attachment can help with harder-to-reach spots. Avoid canned air since it can push dust deeper inside. For families with kids, select non-toxic, fragrance-free cleaning wipes for surfaces and always unplug machines before cleaning to keep everyone safe.
If my studio is already super cluttered, how would you suggest getting started with these cleaning routines without feeling overwhelmed or disrupting my creative flow?
Start by dedicating just 10–15 minutes a day to one small area, like a desk or shelf. Focus on removing obvious trash or unused items first. Gradually introduce the maintenance routines from the article as you clear more space, so the process feels manageable and doesn’t interrupt your creativity.
The section on protecting tools caught my eye. Are there any particular cleaning steps I should add if I use a lot of electronics, like cutting machines, in my home studio?
For electronics like cutting machines, it’s important to unplug them before cleaning. Use a soft, dry microfiber cloth to wipe surfaces and avoid using water or sprays directly on the devices. Clean vents gently with compressed air, and regularly check for dust buildup around buttons and ports to prevent overheating or malfunctions.
I worry about inhaling fumes from certain craft supplies. Are there particular types of air filters or ventilation systems you recommend for small home studios?
For small home studios, using a HEPA air filter combined with an activated carbon filter is very effective for capturing both particles and fumes from craft supplies. Additionally, a portable exhaust fan or window-mounted ventilation system can help remove fumes directly from your workspace. Try to work near an open window when possible, and regularly air out your studio to keep the air fresh.
How often would you suggest doing a deeper seasonal clean if my studio is pretty small and I mostly do weekend projects? Is following a full seasonal routine still necessary?
If your studio is small and mainly used on weekends, a full deep seasonal clean might not be necessary every season. Instead, consider doing a thorough clean twice a year—like spring and fall—while keeping up with regular light cleaning after each use. This should keep your space tidy without being overwhelming.
For someone on a tight budget, what are some affordable tools or hacks to help keep a studio organized and minimize clutter without spending a lot on new storage solutions?
You can repurpose items like glass jars, shoeboxes, or food containers for organizing supplies. Wall-mounted hooks or pegboards made from scrap wood are great for hanging tools. Labeling everything helps maintain order, and stacking bins or baskets you already own can maximize vertical space without any extra expense.
You mention using the appropriate cleaner for different work surfaces. How do I know which cleaners are safe for wood versus laminate, especially if I use both in my studio?
For wood surfaces, choose a gentle, wood-specific cleaner or a diluted mild soap solution—avoid harsh chemicals or anything with ammonia, as these can damage the finish. For laminate, you can generally use a mild all-purpose cleaner, but steer clear of anything abrasive or overly wet, since excess moisture can cause swelling. Always test a small spot first if you’re unsure.
I noticed you mentioned that different surfaces need different cleaners, like wood versus laminate. Could you give some specific product recommendations or homemade cleaner recipes that are safe for craft studio surfaces?
For wood surfaces, use a mild wood cleaner or a homemade mix of one part white vinegar to two parts olive oil, applied with a soft cloth. For laminate, try a gentle mix of warm water and a few drops of dish soap. Always avoid harsh chemicals or abrasives on both surfaces, and spot test any cleaner first.