Introduction: Why Hand Tool Care Matters in Your DIY Craft Studio
Every passionate DIYer knows the thrill of transforming raw materials into something new, beautiful, or useful. Whether your creative pursuits involve papercraft, woodworking, sewing, jewelry-making, or mixed media, your hand tools are the backbone of your craft studio. Dull scissors, rusty pliers, sticky glue guns, or misaligned rulers can quickly turn a relaxing project into a frustrating ordeal. Worse, neglected tools can pose safety hazards or shorten their usable life—costing you time, money, and creative momentum. Yet, many crafters overlook the importance of systematic tool care, assuming it’s reserved for industrial workshops. In reality, establishing smart cleaning routines, efficient storage solutions, and simple maintenance habits in your DIY craft studio delivers outsized rewards: smoother workflow, safer crafting, improved results, and longer-lasting tools. This in-depth guide will walk you through every aspect of hand tool care, from selecting ideal storage for your creative space to practical cleaning routines and long-term preservation strategies. Whether you’re a beginner or a seasoned maker, you’ll discover actionable tips to safeguard your investment and keep your studio ready for inspiration at any moment.
Understanding Hand Tools in the Craft Studio: Categories & Risks
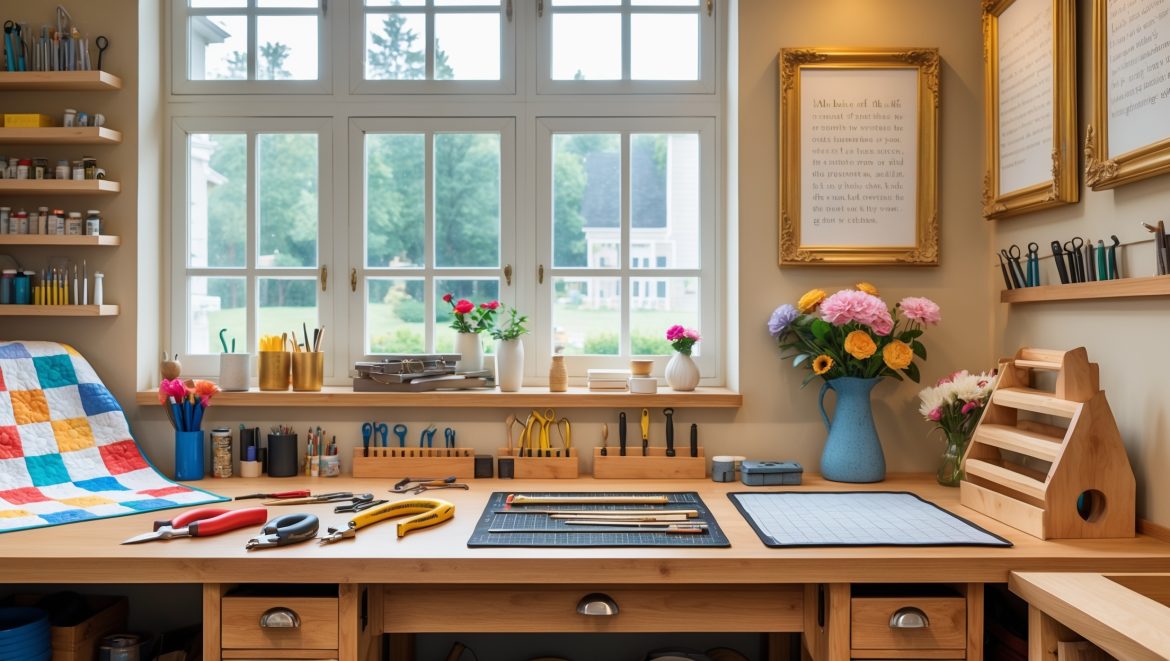
Common Hand Tools in DIY Creative Spaces
- Cutting tools: Scissors, craft knives, rotary cutters, wire cutters
- Measuring tools: Rulers, measuring tapes, squares, calipers
- Shaping tools: Files, rasps, sandpaper blocks, embossing tools
- Joining tools: Pliers, tweezers, clamps, staplers, glue guns
- Marking tools: Pencils, chalks, awls, marking wheels
Each type comes with unique maintenance needs. For example, adhesives can gum up cutting edges, while moisture can rust metal rulers or pliers.
Risks of Neglected Tool Care
- Decreased tool accuracy: Dull or dirty tools lead to imprecise cuts and measurements.
- Rust and corrosion: Exposure to humidity, glue, or paint accelerates metal degradation.
- Safety hazards: Sticky handles or residue-covered blades increase the risk of slips or injuries.
- Shortened tool lifespan: Accumulated debris causes wear, breakage, and malfunction.
Optimizing Hand Tool Storage: Strategies for Every Space
Key Principles for Tool Storage
- Accessibility: Frequently used tools should be within easy reach of your main work area.
- Protection: Prevent dust, moisture, and accidental drops.
- Organization: Group tools by function (e.g., all cutting tools together) to streamline workflow.
Storage Solutions for Small to Large Studios
- Magnetic Strips: Perfect for metal tools like scissors, pliers, and screwdrivers. Mount above your workbench for instant access.
- Pegboards with Custom Hooks: Versatile for a wide range of tools. Add labeled outlines for each tool’s place.
- Drawer Organizers: Use foam inserts, adjustable dividers, or upcycled containers to prevent tools from banging together.
- Wall-Mounted Shelves and Rails: Ideal for larger hand tools or toolboxes. Add bins for small parts.
- Portable Tool Caddies: For mobile crafting or limited space, a caddy or rolling cart keeps essentials organized and mobile.
For specialty tools (like delicate needle-nose pliers or burnishers), use padded cases or lined drawers to prevent nicks and scratches.
Climate and Environmental Considerations
If your studio is in a basement, garage, or sunroom, monitor temperature and humidity. Excess moisture can cause rust, while direct sunlight may degrade plastic or rubber tool handles. Use silica gel packs in drawers or consider a small dehumidifier if needed.
Cleaning Routines: Keeping Hand Tools in Top Condition
Daily and Weekly Cleaning Tasks
- Wipe Down After Each Use: Use a soft, lint-free cloth to remove dust, glue, or paint before putting tools away.
- Sanitize Handles: Especially for shared studios, regularly clean handles with a mild soap solution or disinfecting wipe.
For tools exposed to adhesives, such as scissors or utility knives, remove sticky residue with a dab of rubbing alcohol or a commercial adhesive remover (test first to avoid damaging finishes).
Deep Cleaning Procedures by Tool Type
- Metal Tools: Remove rust with fine steel wool or a rust eraser. For persistent corrosion, soak in white vinegar, then dry thoroughly and apply a light oil.
- Cutting Blades: Disassemble if possible. Wash with warm, soapy water, dry completely, and reassemble. Lubricate pivot points with sewing machine oil.
- Measuring Tools: Dust with a dry cloth. If exposed to paint or glue, use a plastic scraper to avoid scratching markings.
- Pliers and Clamps: Clean joints with a brush. Lubricate moving parts sparingly to avoid attracting dust.
- Wooden Handles: Clean with damp cloth, dry immediately. Apply mineral oil periodically to prevent cracking.
Tips for Sticky or Resin-Coated Tools
For tools that are sticky from glue, tape, or resin, avoid harsh solvents that may damage plastic. Instead, use vegetable oil to soften, then wash with soap and water. Always dry thoroughly before returning to storage.
Maintaining and Preserving Tool Longevity
Regular Inspections
- Check for Loose Screws & Worn Parts: Tighten handles, replace springs or blades as needed.
- Test Functionality: Open and close moving parts to identify stiffness, sticking, or misalignment.
- Inspect for Damage: Look for chips, cracks, or bent components—replace or repair promptly to avoid accidents.
Sharpening and Conditioning
- Scissors and Blades: Use a sharpening stone, ceramic rod, or purpose-built sharpener according to manufacturer’s instructions. Wipe clean after sharpening.
- Files and Rasps: Clean teeth with a wire brush; avoid using files on hard metals if meant for wood or plastic.
- Lubrication: Apply light oil to joints, hinges, and cutting edges. Wipe off excess to prevent dust build-up.
Labeling, Tracking, and Rotating Tools
- Tool Tags: Label tools with purchase date for tracking age and wear.
- Rotation: Periodically rotate tools in active use to ensure even wear and spot maintenance needs early.
Safe Handling and Usage: Preventing Damage and Injury
Best Practices for Everyday Use
- Always use tools for their intended purpose—misuse accelerates wear or causes breakage.
- Don’t force a tool; if it’s not cutting or gripping smoothly, stop and clean or sharpen first.
- Keep your workspace clutter-free to avoid dropping or damaging tools.
Safety Reminders for DIYers
- Wear protective eyewear when cutting, filing, or working with adhesives.
- Store sharp tools with blade covers or in designated slots to prevent accidental cuts.
- Keep tools away from children or pets when not in use.
Preparing Tools for Long-Term Storage or Studio Moves
Steps for Safe Storage During Downtime
- Clean and dry all tools thoroughly.
- Apply a thin layer of oil to metal parts (wipe off excess).
- Wrap delicate tools in cloth or bubble wrap; use silica gel packs in storage bins.
- Store in a dry, temperature-stable environment, away from direct sunlight.
Moving or Renovating Your Studio
- Sort and declutter: Donate or recycle tools you no longer use.
- Pack tools by category in sturdy boxes; label clearly for easy setup in your new space.
- Secure sharp or heavy tools to prevent shifting and damage during transport.
Tool Care on a Budget: DIY Solutions and Hacks
- Repurpose ice cube trays or silicone muffin pans for small tool or parts storage.
- DIY blade covers from old fabric or felt scraps.
- Use recycled glass jars for brushes, files, and pencils—easy to clean and see contents.
- Save silica packets from packaging to keep in tool drawers as mini dehumidifiers.
Investing a few dollars in basic maintenance supplies (oil, cloths, rust erasers) pays off many times over in tool longevity and performance.
Establishing Your Studio’s Hand Tool Care Routine
Sample Weekly and Monthly Checklists
- Weekly: Wipe down all handles and blades, check for residue, sanitize if needed, inspect for visible damage.
- Monthly: Deep clean cutting tools and pliers, sharpen blades, oil moving parts, review tool storage for organization and climate control.
Set reminders or pair maintenance tasks with the start or end of a big project to make the habit stick.
Conclusion: Protecting Your Investment and Creative Flow
Hand tools are more than just objects in a craft studio—they’re extensions of your creativity, skill, and imagination. By prioritizing their care through proper storage, regular cleaning, and mindful usage, you not only extend their lifespan but also elevate every project you undertake. Well-maintained tools work more smoothly, produce more precise results, and ensure a safer crafting environment. Setting up a personalized routine for hand tool maintenance doesn’t require expensive equipment or hours of effort—just a bit of planning and consistency. The dividends are immediate: less frustration, fewer interruptions, and more time spent in the creative flow. Whether you’re organizing a brand-new studio or refreshing your current space, make hand tool care a cornerstone of your DIY practice. Your future self—and your inspired projects—will thank you every time you reach for a tool that’s ready to perform at its best.


I use a lot of glues and adhesives in my projects, and my scissors get sticky pretty fast. Are there any easy cleaning methods or products that work well for removing glue without dulling the blades?
Sticky scissors are a common issue in craft studios. To clean them, wipe the blades gently with a cloth dampened with rubbing alcohol or nail polish remover, which dissolves glue without harming the metal. Avoid abrasive pads, as they can dull the blades. After cleaning, dry thoroughly and add a drop of oil to the pivot point for smooth cutting.
If I’m working with a lot of adhesives and sometimes forget to clean my cutting tools right away, what’s the best method to remove dried glue from scissors or utility knives without damaging them?
To safely remove dried glue from scissors or utility knives, soak the blades in warm, soapy water for several minutes to soften the adhesive. Then gently scrape off the glue with a plastic scraper or cloth. For stubborn residue, rubbing alcohol or acetone can help, but be sure to rinse and dry the tools thoroughly afterward to prevent rust.
For someone on a tight budget, what are some affordable ways to organize and store a wide variety of hand tools without compromising on long-term care or safety?
For budget-friendly tool organization, try using pegboards with hooks, which are inexpensive and keep tools visible and accessible. Repurpose containers like jars or cans for small items, and store sharp tools in old fabric rolls or pouches for safety. Keeping tools clean and dry is key, so add silica gel packets or use a simple DIY moisture absorber.
For crafters on a budget, which maintenance habits truly make the biggest difference in extending hand tool life without requiring expensive products or storage systems?
Focusing on a few basic habits goes a long way: always wipe tools clean and dry after each use to prevent rust, store them in a dry spot (even a simple toolbox or drawer works), and occasionally apply a light coat of household oil to metal parts. These simple steps can dramatically extend the life of your hand tools without extra expense.
How often should I perform cleaning and maintenance routines on commonly used hand tools in a home studio to avoid the issues mentioned such as dull blades or sticky glue guns?
For commonly used hand tools in your home studio, it’s best to give them a quick wipe-down after each use to remove debris or sticky residues. Perform a more thorough cleaning and maintenance routine, like sharpening blades and checking moving parts, about once a month. This helps prevent dullness, buildup, and keeps tools in optimal condition.
How often should I actually be cleaning and maintaining my tools if I use them just a few times a month? I don’t want to overdo it but also don’t want issues from neglect.
If you use your tools just a few times a month, a thorough cleaning and inspection every month or two is usually enough. You can simply wipe them down after each use to remove dust and moisture, then do a deeper clean and oiling as needed. This routine prevents rust and keeps your tools in good shape without extra effort.
I noticed you mentioned that adhesives can gum up cutting edges. Do you have specific recommendations for cleaning sticky residue off scissors and craft knives without damaging them or affecting their sharpness?
For sticky residue on scissors and craft knives, try wiping the blades with a cloth dampened with rubbing alcohol or a bit of acetone-based nail polish remover. Avoid soaking the tools. For stubborn spots, use a soft cloth rather than anything abrasive. Finish by thoroughly drying and lightly oiling the blades to maintain sharpness and prevent rust.
How often should basic hand tools like craft knives or pliers be cleaned for longevity, especially in a busy home studio? Does more frequent use mean doubling up on maintenance?
In a busy home studio, you’ll want to clean craft knives and pliers after each use, especially if you work with adhesives, paints, or materials that leave residue. More frequent use doesn’t necessarily mean doubling up, but regular wipe-downs and a weekly thorough cleaning will keep them in top shape for longer.
What are your recommendations for budget-friendly maintenance supplies for DIYers who want to prolong tool life but don’t want to invest in professional-grade products?
For budget-friendly tool maintenance, you can use basic supplies like light machine oil or even household mineral oil for lubricating metal parts. A stiff-bristle brush and old cotton rags work well for cleaning. Sandpaper or a simple sharpening stone keeps blades sharp. Store tools in dry containers or tool rolls to prevent rust without needing expensive products.
I’m wondering if you have recommendations for efficient storage solutions in small craft studios where space is limited. Are there particular organizers or storage hacks you suggest for things like measuring tapes and marking wheels?
For small craft studios, wall-mounted pegboards or magnetic strips work well for keeping tools like measuring tapes and marking wheels visible and accessible without taking up counter space. Drawer dividers or small bins can help organize smaller items. You might also use clear hanging shoe organizers on doors to store and easily spot your tools.
I noticed you mentioned metal rulers and pliers can rust if exposed to moisture. Do you have recommendations for affordable storage solutions that also prevent humidity damage in a small apartment studio?
To protect your metal rulers and pliers from humidity in a small apartment, consider using airtight plastic containers with silica gel packets inside to absorb moisture. You can also store tools in a toolbox with a dehumidifier pack. Both options are compact and budget-friendly, making them ideal for limited spaces.
You mention that moisture can rust pliers or metal rulers—I’m in a pretty humid area, so what are some affordable storage solutions to minimize rust in a home craft studio?
To help prevent rust in humid conditions, consider storing your tools in airtight plastic containers with silica gel packets or moisture-absorbing desiccants. You can also line your toolbox with rust-inhibitor paper. Regularly wiping down metal tools with a light layer of machine oil or WD-40 will add extra protection. These solutions are budget-friendly and effective for a home craft studio.
I usually work with both fabric and jewelry-making tools. Is there a risk of cross-contamination or damage if these tools are stored together, or should they have separate storage areas?
Storing fabric tools and jewelry-making tools together can cause cross-contamination—fibers, metal shavings, or residues might transfer between tools and materials. It’s best to give them separate storage areas or at least use divided containers to keep them distinct and reduce any risk of damage or contamination.
I sometimes struggle with rusty rulers and pliers, especially in more humid months. Are there any affordable methods or products for preventing rust in a typical home craft studio environment?
Humidity can definitely speed up rust. To prevent it, try storing your metal tools with silica gel packets or small containers of rice to absorb moisture. Wiping tools with a light coat of mineral oil after use also helps protect them. For an affordable option, you can use WD-40 or even petroleum jelly as a protective layer.
Do you have any tips on keeping glue guns from getting sticky and messy over time? Mine always end up with dried glue and I’m worried it might damage other tools when stored together.
To keep your glue gun clean, let it fully cool after each use and wipe any drips with a damp cloth. Place a silicone mat or piece of foil under the gun during use to catch drips. Store the glue gun in a separate container or pouch to prevent residue from getting on other tools.
When setting up a cleaning routine for my hand tools, about how often do you recommend I do a thorough cleaning versus just a quick wipe-down?
A quick wipe-down of your hand tools after each use is usually enough to prevent dirt and rust buildup. For a more thorough cleaning—including inspecting for damage, oiling, and deep cleaning—plan to do this every few months, or more often if you use your tools heavily. This balance helps keep your tools in great shape.
How often should basic tools like scissors and craft knives be cleaned or sharpened to maintain their accuracy and longevity? Is there a recommended frequency for home crafters?
For home crafters, it’s best to clean scissors and craft knives after each use, especially if they’ve been cutting sticky or fibrous materials. Sharpen scissors every few months, or sooner if you notice dullness. Craft knife blades should be replaced or sharpened as soon as they start to drag or tear instead of making clean cuts.
Can you recommend any affordable yet effective storage solutions for small craft studios with limited space, especially for separating sharp tools like scissors from items like measuring tapes?
For small craft studios, consider using magnetic strips on the wall to safely hold sharp tools like scissors, keeping them separate and easy to reach. You can also repurpose drawer dividers or small plastic bins within a drawer or on a shelf to separate items like measuring tapes from sharp tools. Pegboards with hooks are another space-saving option for organized, visible storage.