Introduction: Why Fire Safety Matters in Your DIY Craft Studio
Creative spaces brim with energy, inspiration, and—if you’re not careful—hidden fire risks. Whether you’re a seasoned maker or a weekend crafter, your DIY craft studio is likely filled with flammable materials, electrical tools, and creative setups that change often. Yet, fire safety in these environments is commonly overlooked until it’s too late. A minor oversight—like leaving a glue gun plugged in or storing solvents near a heat source—can escalate quickly, threatening not just your projects, but your health, your home, and your peace of mind.
This comprehensive guide drills into fire safety for DIY craft studios, offering practical, actionable strategies for prevention, equipment setup, emergency planning, and workspace organization. We’ll uncover common risk factors, recommend essential gear, and walk you through a fire safety setup tailored for creative workspaces. Whether you run a dedicated studio or craft at your kitchen table, these tips will empower you to create with confidence, knowing your space is as safe as it is inspiring.
Understanding Fire Risks in Craft Studios
The Unique Hazards of Creative Spaces
Unlike traditional offices or living rooms, craft studios combine various materials and tools that raise the risk of fire. Recognizing these hazards is the first step to managing them:
- Flammable Supplies: Paints, solvents, alcohol inks, adhesives, and cleaning agents are often highly combustible.
- Textiles & Paper: Fabrics, yarns, papers, and other organic materials ignite quickly and can fuel a fire’s rapid spread.
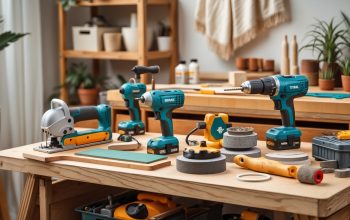
- Electrical Equipment: Power tools, hot glue guns, heat presses, and sewing machines can overheat or spark if misused or poorly maintained.
- Improvised Setups: Extension cords, overloaded outlets, and DIY lighting may not meet safety standards.
- Clutter: Excess scrap materials and poor organization increase both the risk of ignition and the difficulty of evacuation.
Typical Fire Scenarios in Studios
- Unattended heat tools (like wood burners or embossing guns) left on for long periods.
- Improper storage of rags soaked in oil-based paints or solvents, which can self-ignite.
- Electrical shorts caused by frayed cords or overloaded power strips.
- Sparks from soldering or metalwork igniting nearby materials.
Understanding these scenarios helps you anticipate and prevent them before they become emergencies.
Fire Prevention: Foundational Habits and Workspace Organization
Smart Storage Solutions
Proper storage is your first line of defense. Here’s how to reduce risk:
- Segregate Flammables: Store paints, solvents, and aerosols in a dedicated, ventilated metal cabinet—never near heat sources or direct sunlight.
- Seal Containers: Always close bottles and cans tightly to minimize vapor release.
- Safe Textile Storage: Keep fabrics and papers in closed bins, away from electrical equipment.
- Oily Rag Protocol: Place used rags in a metal container with a self-closing lid; empty regularly to prevent spontaneous combustion.
Electrical Safety Measures
- Inspect Cords and Plugs: Check all electrical cords for fraying or exposed wires before each use. Replace damaged cords immediately.
- Limit Extension Cords: Use permanent outlets whenever possible; avoid daisy-chaining multiple extension cords or power strips.
- Surge Protection: Use surge protectors for sensitive tools and unplug devices when not in use.
- Dedicated Circuits: For high-wattage equipment (like kilns or presses), use dedicated circuits installed by a licensed electrician.
Clutter Control and Workspace Zoning
- Declutter Regularly: Remove scraps, dust, and unused supplies weekly. Dust buildup can be combustible, particularly near outlets or heat-producing tools.
- Zone Your Studio: Create clear zones: a ‘hot’ zone for tools that generate heat, a ‘wet’ zone for paints and solvents, and a ‘dry’ zone for paper and fabric. This prevents cross-contamination and limits the spread of fire.
- Keep Exits Clear: Never block doorways or windows with storage or furniture.
Essential Fire Safety Equipment for Craft Studios
Fire Extinguishers: Types and Placement
Not all fire extinguishers are created equal. For studios, the following are recommended:
- ABC Dry Chemical Extinguisher: Effective for ordinary combustibles (paper, wood, fabric), flammable liquids (paints, solvents), and electrical fires.
- Class K Extinguisher: If you work with oils or wax (e.g., encaustic art), consider a Class K extinguisher for grease fires.
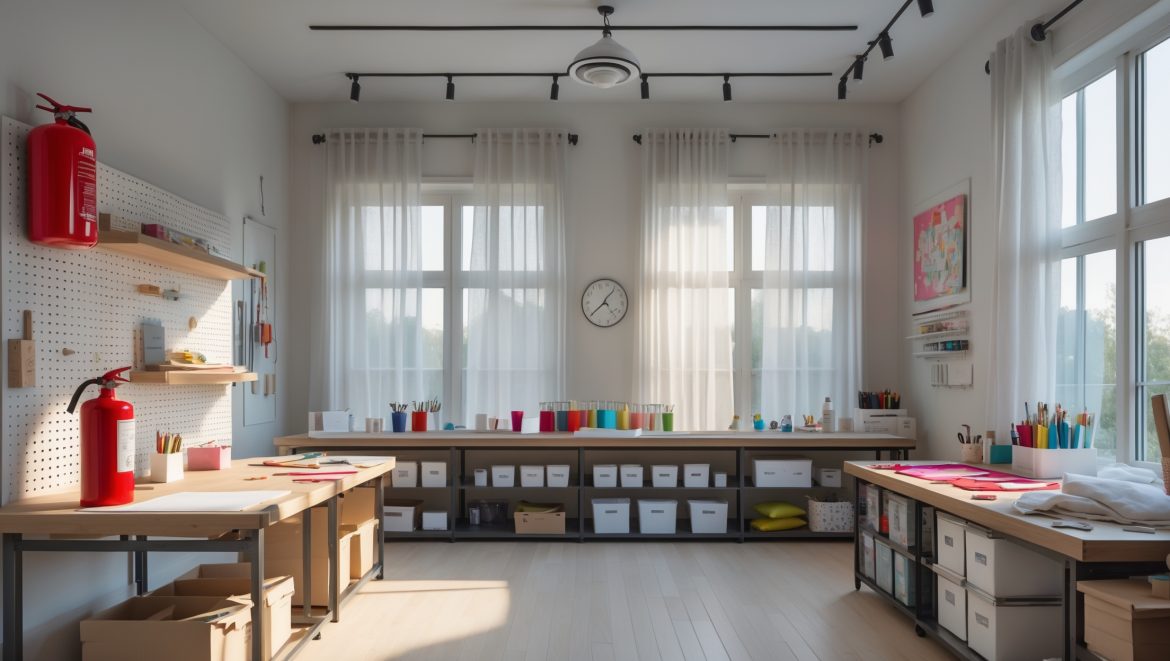
Placement Tips: Mount extinguishers near exits and within 30 feet of high-risk zones. Mark their locations clearly and ensure they’re unobstructed. Check the pressure gauge monthly and service annually.
Smoke and Heat Detectors
- Install dual-sensor smoke detectors (ionization and photoelectric) for comprehensive coverage. Mount at least one detector in the studio area and another in adjacent spaces.
- Test alarms monthly and replace batteries twice a year. Replace units every 10 years.
Fire Blankets and Emergency Stops
- Fire Blanket: Ideal for smothering small fires on work surfaces or clothing. Store in a wall-mounted pouch, easily accessible from main work areas.
- Emergency Power Cutoff: Install a clearly marked master switch or unplug station to shut off power to all tools instantly in an emergency.
Secondary Equipment
- Metal Trash Cans: For disposing of combustibles and oily rags safely.
- First Aid Kit: Include burn dressings and aloe gel for minor thermal injuries.
- Escape Ladder: For studios above ground level, keep a foldable fire escape ladder near a window.
Step-by-Step Fire Safety Setup for DIY Studios
Step 1: Assess Your Space
Walk through your studio with a critical eye. Identify all sources of ignition, clusters of flammable materials, and potential blockages to exits. Sketch a quick floor plan marking these areas. This will guide your equipment placement and workflow redesign.
Step 2: Organize and Zone
- Separate ‘hot’ (heat-producing) and ‘cold’ (storage, assembly) zones.
- Store all flammable liquids in one metal cabinet, away from direct sunlight and electrical outlets.
- Place fire extinguisher(s) and blanket(s) near the primary exit and ‘hot’ zones.
Step 3: Electrical Audit
- Test all outlets with a circuit tester. Label any high-wattage circuits.
- Replace any damaged cords, plugs, or adapters.
- Install surge-protected power strips with an auto-shutoff feature for workstations.
Step 4: Install Safety Devices
- Mount smoke detectors on the ceiling, away from vents or windows.
- Install fire extinguisher brackets at eye level, no higher than 5 feet from the floor.
- Hang fire blankets in a visible, unobstructed location.
Step 5: Set Up Emergency Protocols
- Post a simple evacuation map near the main door.
- Write or print out emergency numbers and keep them by the phone or studio entrance.
- Practice unplugging all tools at the end of each session—make it a ritual.
Fire Response: What to Do in an Emergency
Immediate Actions
- Alert: Shout “Fire!” to warn others. Activate the nearest smoke alarm if it hasn’t sounded.
- Evacuate: Leave via the safest, most direct route. Do not re-enter the studio until cleared by authorities.
- Contain (If Safe): If the fire is small (waste bin, tabletop), use the appropriate extinguisher or fire blanket. Always keep your exit route clear.
- Call Emergency Services: Dial your local emergency number from a safe distance.
Post-Incident Steps
- Do not use any equipment or electrical outlets until inspected.
- Dispose of any materials affected by smoke or heat.
- Restock safety gear as needed.
Preventive Maintenance and Routine Checks
Monthly Tasks
- Test smoke alarms and check extinguisher gauges.
- Inspect power cords and outlets for wear.
- Clear out scrap materials and dust from all work zones.
- Empty and clean metal trash cans and oily rag containers.
Quarterly Tasks
- Review your emergency evacuation plan and update if your studio layout has changed.
- Check the expiration dates on solvents, adhesives, and first aid supplies.
Annual Tasks
- Schedule professional extinguisher servicing and electrical inspections.
- Replace smoke detectors as needed (typically every 10 years).
- Deep clean storage areas and reorganize supplies to maintain clear, safe zones.
Advanced Tips: Upgrading Your Studio’s Fire Safety
Smart Technology Options
- Wi-Fi Smoke Detectors: Send alerts to your phone if you’re away from the studio.
- Smart Plugs: Schedule or remotely cut power to high-risk devices.
- Temperature/Humidity Sensors: Monitor conditions that could raise fire risk (e.g., high heat in summer).
Material Choices
- Consider flame-retardant work mats or table coverings, especially near heat tools.
- Opt for metal shelving for storage instead of wood or plastic.
Studio Policies for Group Spaces
- Establish clear rules: no unattended tools, daily clean-up, and designated smoking/vaping areas (preferably outdoors).
- Hold annual fire drills, even in home studios, to reinforce emergency protocols.
Conclusion: Fire Safety as a Creative Habit
Fire safety isn’t about stifling your creative spark—it’s about safeguarding it. The most inspiring studios are those where imagination flourishes alongside practical habits and thoughtful setup. By understanding the unique fire risks in your DIY craft space and implementing the strategies outlined here, you’re not just protecting your supplies or projects; you’re preserving your ability to create freely and confidently for years to come.
Make safety checks and tidiness part of your routine, not a one-time event. Invest in the right equipment, organize your space with intention, and keep emergency procedures fresh in your mind. If you share your studio with others, communicate expectations and lead by example. Remember, even a few minutes spent on prevention can save a lifetime of memories, creativity, and hard work.
Take action today: walk through your studio, spot the hazards, and commit to a safety plan. With these practical fire safety strategies, your DIY craft studio will always be a place where inspiration—and you—can thrive safely.


You mentioned overloaded outlets and extension cords as a common risk—what’s the safest way to set up power strips and charge tools in a small space where outlets are limited?
To stay safe, use only power strips with built-in surge protection and never daisy-chain them together. Avoid plugging high-wattage tools into the same strip, and distribute devices across available outlets. Unplug tools when not in use, and consider having an electrician install extra outlets if possible to reduce reliance on extension cords.
As someone who crafts at my kitchen table and doesn’t have a dedicated studio, are there specific fire safety tips I should prioritize to keep my workspace safe, especially when kids are around?
Absolutely, for crafting at your kitchen table, prioritize keeping flammable materials like paper, fabrics, and glues away from heat sources such as the stove or candles. Always supervise kids when using tools or hot equipment, and store sharp objects and hazardous supplies out of their reach. Make sure you have a small fire extinguisher nearby and know how to use it, just in case.
Do you have any recommendations for safe ways to store flammable solvents and paints in a small craft room that doesn’t have a built-in ventilation system?
For a small craft room without built-in ventilation, keep flammable solvents and paints in tightly sealed, clearly labeled containers. Store them in a metal cabinet specifically designed for flammable materials, away from direct sunlight and heat sources. Limit the quantities on hand to only what you need for your projects, and always keep a fire extinguisher nearby.
For someone just starting out, what is the most budget-friendly essential fire safety equipment you would recommend buying first for a home craft area?
A small, multipurpose (ABC) fire extinguisher is a cost-effective first purchase for a home craft area. It covers most fire types you might encounter with typical craft materials. Pairing this with a basic smoke detector adds another important layer of safety without a big investment.
Can you give examples of affordable, essential fire safety gear for college students on a tight budget who want to craft safely but can’t invest in a full setup?
Absolutely! For college students on a budget, start with a basic ABC fire extinguisher, which is versatile and affordable. Add a smoke alarm for early warning and a fire blanket for small fires. Keep a simple first aid kit nearby and avoid overloading power strips. These essentials offer key protection without a big investment.
Have you found any smart ways to keep clutter under control in an active craft studio, especially during big projects, without sacrificing workflow or creativity?
One helpful approach is to use labeled bins or trays to group supplies by project phase, so you only keep out what you’re actively using. Rolling carts or portable shelves let you move materials around as needed. At the end of each session, a quick five-minute tidy-up can keep clutter from piling up while still letting creativity flow.
Could you elaborate on what kind of emergency planning works best for a one-person studio? For example, should I have a written evacuation plan even if I’m usually working alone?
For a one-person studio, emergency planning should still be a priority. While you may not need a complex, written evacuation plan, it helps to clearly identify and keep clear your escape route. Post important contact numbers in an obvious spot and make sure fire extinguishers and exits are always accessible. Regularly check that nothing blocks your way out, and consider leaving a note or notifying someone when you’re working on riskier projects.
When it comes to emergency planning, do you recommend keeping a certain type or size of fire extinguisher in a home craft studio, and are there legal requirements for this in residential settings?
For a home craft studio, an ABC-rated fire extinguisher is usually the best choice because it handles most types of fires you might encounter, such as those involving paper, fabric, or electrical equipment. A 5-pound unit is generally practical for small spaces. Most residential settings don’t have legal requirements for fire extinguishers, but it’s a smart safety addition.
If someone is just starting out with their first DIY craft space and is on a tight budget, which fire safety equipment is absolutely essential to get right away versus what can maybe wait?
For a new DIY craft space on a tight budget, start with a smoke detector and a basic ABC fire extinguisher—these are essential for immediate safety. Items like fire blankets or specialized extinguishers can be added later as your budget allows. Always keep your workspace uncluttered to minimize fire risks from the start.
Do you have specific recommendations for organizing flammable supplies like paints and solvents in a small studio where space is really limited? I’m not sure what storage options are safest in tight quarters.
For a small studio, it’s best to use metal safety cabinets designed for flammable materials—even compact countertop versions work well. Always keep flammable supplies in their original containers with tight lids, and store them away from heat sources. If a cabinet isn’t possible, a metal box with a self-closing lid is a safer alternative than plastic. Remember to keep only the smallest practical quantity inside the studio and replenish as needed.
I use a lot of extension cords because my studio doesn’t have enough outlets. Is there a certain type or rating of extension cord that’s safer for use with things like hot glue guns and sewing machines?
For devices like hot glue guns and sewing machines, use heavy-duty extension cords rated for at least 15 amps and marked for indoor use. Make sure the cord has a grounded plug (three prongs) and avoid daisy-chaining multiple cords. Always check that your total equipment wattage doesn’t exceed the cord’s rating to prevent overheating and fire risks.
Do you have any advice on how often certain safety checks should be performed, like inspecting electrical cords or updating emergency plans, to maintain a safe craft environment over time?
It’s smart to schedule regular safety checks in your craft studio. Inspect electrical cords at least once a month for wear or damage. Review and update your emergency plans every six months, or whenever you make significant changes to your studio setup. These routines help catch issues early and keep your workspace safer.
Could you clarify if there are any recommended storage solutions for flammable materials like paints and solvents that won’t take up too much space in a small craft room?
For small craft rooms, compact metal safety cabinets designed for flammable materials are highly recommended. Look for models that fit under work tables or have vertical designs to save space. Always keep containers tightly sealed and store only what you need to minimize clutter and risk. Wall-mounted lockable cabinets are also a good option if floor space is limited.
How frequently should I do a safety check in my craft workspace, especially if I tend to move things around and swap out tools pretty often? Is there a checklist you personally use, or is it more of a case-by-case basis?
If you regularly rearrange your workspace and swap tools, it’s best to do a safety check at least once a month, or anytime you make significant changes. While the article doesn’t include an official checklist, many people find it helpful to have a list covering items like checking electrical cords, ensuring exits aren’t blocked, and confirming fire extinguishers are accessible. Adjust your checklist as your setup evolves.
My workspace often gets cluttered with fabric scraps and paper. Do you have tips for organizing these materials so they’re less of a fire hazard but still easy to access for different projects?
Keeping fabric scraps and paper in labeled, lidded bins or metal containers is a great way to reduce fire risks without sacrificing accessibility. Store the bins on shelves instead of the floor to minimize clutter, and keep only what you need for current projects nearby. Regularly sort through your materials to discard unusable scraps, which also helps keep things organized and safe.