Introduction: Why Dust Management Matters in DIY Craft Studios
Every creative endeavor comes with its own set of unique challenges, but if you’re a passionate DIYer or craft enthusiast, there’s one invisible adversary you can’t afford to ignore: dust. Whether you’re cutting fabric, sanding wood, embossing paper, or mixing pigments, craft studio dust is more than just a nuisance—it’s a health hazard, a project spoiler, and a silent saboteur of your tools and workspace. Proper dust management isn’t only about keeping things looking tidy; it’s about safeguarding your respiratory health, preventing allergic reactions, ensuring the longevity of your equipment, and preserving the quality of your creative output.
Unlike commercial workshops, most home-based craft studios are not designed with robust dust control in mind. The result? Dust settles everywhere—on shelves, in tool mechanisms, and even inside your lungs. Over time, this can lead to chronic health issues, reduce the lifespan of expensive materials, and mar the finish of your hard work. Fortunately, you don’t need a commercial-grade system to maintain a dust-free creative zone. With a combination of smart design choices, affordable DIY solutions, and routine practices, you can dramatically improve air quality and keep your studio clean and healthy. In this guide, we’ll explore practical, actionable dust management strategies tailored to the realities of home craft spaces.
Understanding Craft Studio Dust: Types, Sources, and Risks
Common Types of Dust in Craft Studios
- Wood Dust: Generated from sanding, sawing, or carving wood. Fine particles can be toxic and allergenic depending on the species.
- Paper and Cardstock Dust: Comes from cutting, sanding, or tearing paper, especially with power tools or sandpaper.
- Fabric Fibers: Released during cutting, sewing, or tearing fabrics. Certain fibers can trigger allergies.
- Paint and Pigment Particulates: Aerosols from spray paints, powdered pigments, or sanding painted surfaces.
- Plastic and Polymer Dust: Created when cutting or sanding acrylics, resins, or other synthetic materials.
- Miscellaneous: Glitter, embossing powder, clay dust, or even organic debris like dried flowers.
Sources of Dust Generation
- Power tools (saws, sanders, rotary tools)
- Manual sanding or filing
- Cutting and trimming
- Spray painting or airbrushing
- Mixing powders or pigments
Risks of Poor Dust Management
- Health Hazards: Respiratory problems, allergic reactions, skin irritation, and long-term health risks from exposure to fine particulates and chemical residues.
- Project Contamination: Dust settling on wet paint, glue, or finishes can ruin the appearance and durability of your work.
- Tool Damage: Fine dust infiltrates moving parts, reducing longevity and performance.
- Fire Hazard: Accumulated dust, especially from flammable materials, increases fire risk.
DIY Dust Management Solutions: From Prevention to Cleanup
1. Zoning Your Workspace for Dust Control
Strategically organizing your studio can dramatically reduce dust spread:
- Designate “Clean” and “Dirty” Zones: Reserve one area for dust-generating activities (e.g., sanding, cutting) and another for assembly, finishing, or storage.
- Physical Barriers: Use heavy curtains, folding screens, or even clear plastic sheeting to separate zones. This helps isolate dust and makes cleanup more efficient.
- Portable Work Surfaces: Employ movable workbenches or trays that can be taken outside for especially dusty tasks.
2. Source Containment: Capture Dust at the Origin
- DIY Dust Collection Hoods: Create simple hoods from plastic storage bins or cardboard boxes. Cut a hole for your vacuum hose—instant dust capture!
- Shop Vacuum Attachments: Invest in vacuum adaptors for your tools, or use universal nozzles and flexible hoses. Many modern shop vacuums come with HEPA filters for fine dust.
- Tabletop Air Extractors: Build a low-profile extractor using a box fan and furnace filter. Place it next to your work area to draw dust away as you work.
3. Air Filtration: Improving Studio Air Quality
- DIY Air Purifier: Tape a high-quality furnace filter to a box fan. This affordable solution captures airborne particles as small as 0.3 microns.
- HEPA Air Purifiers: For high-traffic studios, consider investing in a portable HEPA air purifier. Position it near your dustiest workstations.
- Ventilation: Use window fans, open windows, or install a through-wall vent to keep fresh air circulating and expel airborne dust.
4. Smart Storage: Keeping Dust Off Materials and Tools
- Seal-It Solutions: Store fabrics, papers, and supplies in airtight plastic bins or lidded storage boxes. Label everything for quick access.
- Tool Covers: Use dust covers or even repurposed pillowcases to shield tools and machines between uses.
- Open Shelving with Curtains: If you use open shelves, hang lightweight curtains in front to reduce dust buildup.
5. Routine Cleaning: Establishing a Dust-Busting Habit
- Daily Quick Clean: Wipe down your main work surfaces with a damp microfiber cloth at the end of each session.
- Weekly Deep Clean: Vacuum floors, baseboards, and under furniture. Use small brushes to clean tool crevices.
- Monthly Filter Maintenance: Clean or replace vacuum and air purifier filters regularly to ensure peak performance.
6. Tackling Difficult Dust: Glitter, Fine Particulates, and More
- Glitter Management: Work over a damp paper towel or sticky mat to catch stray glitter. Use a lint roller to pick up remaining bits.
- Powdered Pigments: Keep a small handheld vacuum or dustpan nearby. Clean spills immediately to prevent airborne spread.
- Clay and Plaster Dust: Mist the area with water before sweeping—this helps trap dust and prevents it from becoming airborne.
Building Your DIY Dust Control Toolkit
Essential Tools and Supplies
- Shop Vacuum (with HEPA filter): Your first line of defense for both floors and tool cleanup.
- Microfiber Cloths: Trap fine dust rather than simply moving it around.
- Box Fan + Furnace Filter: Instant, affordable air purifier.
- Spray Bottle: Fill with water for misting surfaces before sweeping up fine dust.
- Compressed Air: For cleaning tool crevices (always follow safety guidelines).
- Storage Bins and Covers: Keep supplies dust-free when not in use.
- Small Brushes: Clean tight spaces and tool interiors.
- Lint Roller: A must for glitter, fabric fibers, and other stubborn bits.
Optional Upgrades
- Portable Air Purifier: For studios with limited ventilation or heavy dust production.
- Workstation Extraction Hoods: For frequent sanding or spray work, consider building dedicated extraction hoods with flexible ducting.
- Anti-Static Mats: Reduces dust clinging to surfaces and makes cleanup easier.
Dust Management for Specific Crafts
Woodworking and Mixed Media
Wood dust is one of the most hazardous, especially from exotic species. Always use a dust mask (N95 or better) and operate tools with vacuum extraction. Seal finished projects before bringing them into “clean” zones.
Textile and Fiber Arts
Fibers from wool, felt, and synthetics can cause mild to severe allergies. Vacuum floors and table surfaces after each session, and wash hands before touching your face or eyes. Store fabrics in sealed bins to prevent fiber migration.
Paper Crafts
Paper dust is less hazardous but can quickly accumulate, especially when sanding or distressing edges. Use a mini vacuum or handheld brush after each session, and keep finished pieces covered until fully cured.
Polymer Clay and Sculpture
Clays and plasters release fine silica dust. Mist surfaces before cleaning, and wear a mask when sanding. Clean tools with damp cloths rather than dry dusters.
Painting and Pigment Work
Spray paints and powdered pigments release ultrafine particles. Always work with good ventilation or local extraction, wear a respirator rated for particulates, and keep finished projects in a dust-free drying area.
Maintenance and Prevention: Long-Term Dust Control Strategies
Material Choices
- Low-Dust Alternatives: When possible, choose low-dust materials (e.g., pre-cut wood, pre-washed fabrics, water-based paints).
- Sealed Surfaces: Apply sealant to raw wood or MDF in your studio furniture to reduce ongoing dust shedding.
Studio Layout Tips
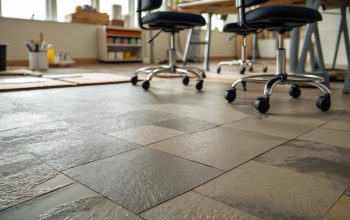
- Easy-Clean Flooring: Choose smooth, non-carpeted floors for easy vacuuming and mopping.
- Minimalist Decor: Limit knickknacks and open shelving, which collect dust.
- Wall-Mounted Storage: Keep tools off worktables to reduce dust accumulation and make cleaning faster.
Personal Safety Practices
- Always wear appropriate masks or respirators for dusty tasks.
- Change clothes after heavy dust exposure, especially if you have allergies or asthma.
- Wash hands and exposed skin after each craft session.
Cost Breakdown: DIY Dust Management on Any Budget
- Entry Level (Under $50): Microfiber cloths, basic shop vacuum, DIY box fan air filter, spray bottle, storage bins.
- Midrange ($50–$150): HEPA filter for vacuum, portable air purifier, vacuum tool adapters, anti-static mats, additional storage solutions.
- Advanced ($150+): Dedicated dust extraction hoods, high-end air purifiers, custom venting solutions, built-in vacuum systems.
Step-by-Step: Building a DIY Box Fan Air Filter
What You Need
- 1 box fan (20-inch standard)
- 1 high-efficiency furnace filter (MERV 11 or higher, matching fan size)
- Strong tape (duct or painter’s tape)
Assembly Instructions
- Unwrap the filter and ensure it fits flush against the intake side of the box fan.
- Secure the filter to the fan using tape, ensuring all edges are sealed to prevent air bypass.
- Place the fan near your work area with the filter facing the dust source.
- Turn on the fan during and after dusty activities for continuous air filtration.
- Replace the filter every 1–2 months, or when visibly dirty.
Conclusion: Achieving a Cleaner, Healthier Creative Space
Dust may be an inevitable byproduct of creativity, but it doesn’t have to rule your craft studio. With thoughtful planning, affordable DIY solutions, and consistent routines, you can maintain a workspace that supports both your artistic vision and your well-being. Remember, dust management isn’t a one-time fix—it’s a mindset that values both productivity and health. By zoning your workspace, capturing dust at the source, improving air quality, and storing materials wisely, you’ll spend less time cleaning and more time creating.
Investing in dust control isn’t just about cleanliness—it’s about protecting your lungs, your tools, and your inspiration. Even small changes, like a homemade air filter or a daily cleaning habit, can yield big results over time. For those who craft with friends or teach workshops, a dust-free studio is also a sign of professionalism and care for your creative community.
Start small, assess your studio’s specific needs, and gradually build your dust management toolkit. As you refine your approach, you’ll notice not only cleaner surfaces, but clearer thinking and better results in every project. Your creative space is an extension of your imagination—keep it as fresh, vibrant, and healthy as the ideas you bring to life.