
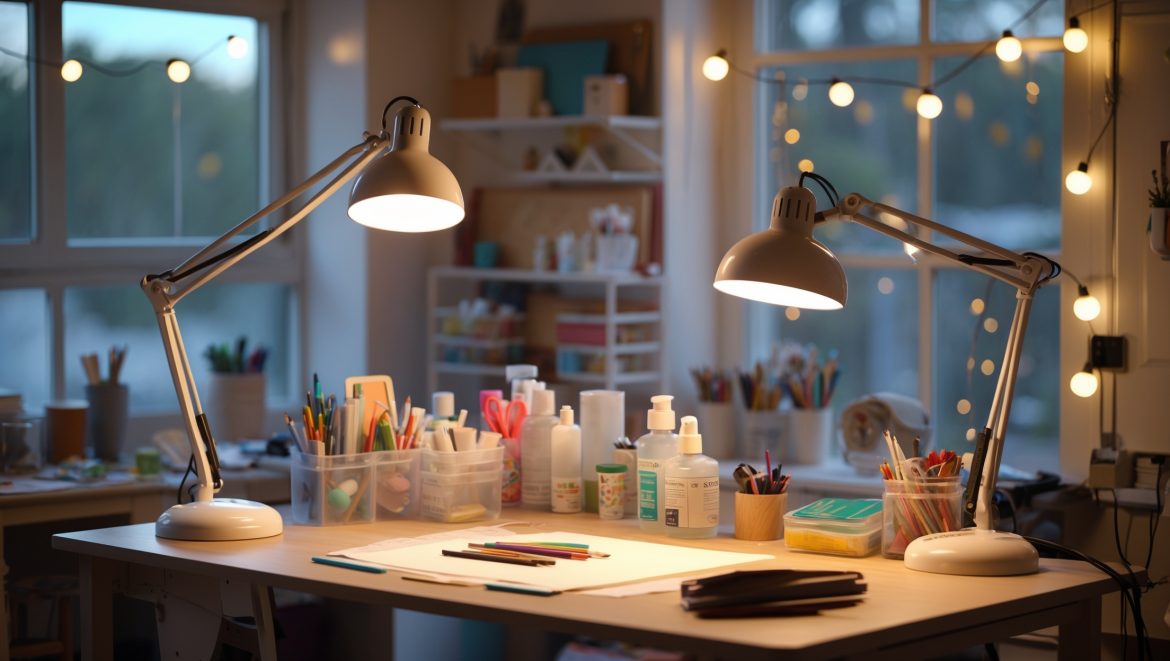
Introduction: The Power of Great Lighting in Your DIY Craft Studio
Lighting is one of the most transformative yet overlooked elements in any creative workspace. If you’ve ever struggled to match colors accurately, experienced eye strain after a long crafting session, or found your photos never quite capture the vibrancy of your projects, chances are your lighting setup could use an upgrade. The good news? You don’t need a massive budget or professional installation to dramatically improve your craft studio’s lighting. Whether you’re carving out a corner of your bedroom, using a converted garage, or making the most of a dedicated room, affordable lighting solutions can make your space feel brighter, more comfortable, and infinitely more inspiring. In this guide, we’ll explore practical, budget-friendly ways to light your DIY craft studio—covering everything from natural light hacks to low-cost task lighting, creative ambient options, and energy-efficient upgrades. You’ll get step-by-step advice, product recommendations, DIY project ideas, and troubleshooting tips to help you create a space where your creativity truly shines.
Understanding the Basics: What Your Craft Studio Lighting Needs
Three Layers of Lighting for Maximum Functionality
Effective lighting isn’t just about making things brighter. It’s about layering different types of light to serve distinct purposes:
- Ambient Lighting: The general, overall illumination that fills the space.
- Task Lighting: Focused light for detailed work—think sewing, painting, or jewelry making.
- Accent Lighting: Decorative touches that add warmth, highlight special features, or create mood.
What to Look For in Craft Studio Lighting
- Color Temperature: Aim for 4000–5000K “daylight” bulbs for true color rendering.
- Brightness: Measured in lumens—more is better for detailed work, but adjustable is ideal.
- Energy Efficiency: LEDs are your friend for cost savings and longevity.
- Flexibility: Adjustable fixtures let you direct light exactly where you need it.
Maximizing Natural Light—No Demolition Required
Simple Upgrades to Harness Sunshine
Natural light is free, flattering, and energizing. Even if your studio only has a small window or none at all, these tips can help:
- Use Sheer Curtains: Replace heavy drapes with white sheers to diffuse sunlight without glare.
- Strategic Mirror Placement: Hang a mirror opposite a window to bounce light deeper into the room.
- Lighten Up Surfaces: Opt for white or pale paint on walls, ceilings, and even tabletops to reflect light.
- Keep Windows Clean: A regular wipe-down can noticeably increase light transmission.
DIY Light Shelves and Reflectors
Try attaching a white-painted shelf just below the top of your window. It will bounce daylight upward, increasing ambient brightness. For windowless spaces, set up a large white foam board behind your main work area and angle a lamp toward it for a similar effect.
Ambient Lighting: Affordable Ways to Brighten the Whole Room
Budget Overhead Lighting Solutions
Harsh, single-bulb ceiling fixtures rarely do the trick. Consider these cost-effective alternatives:
- Plug-In Pendant Lights: These can be hung from ceiling hooks and plugged into wall outlets—no rewiring required. Use “daylight” LED bulbs for clear, even light.
- LED Shop Lights: Commonly used in garages, these are inexpensive, bright, and easy to mount above worktables or across the ceiling.
- Paper Lanterns: Large lanterns with LED bulbs diffuse light beautifully and add a touch of whimsy.
DIY Project: Upcycling for Ambient Glow
Transform a thrifted lampshade, basket, or even a colander into a unique pendant fixture. Pair it with an LED bulb and a simple plug-in pendant cord kit (available for under $15 online). This project requires minimal tools and no electrical expertise.
Task Lighting: Focused Solutions for Crafting Precision
Why Task Lights Matter
Task lights reduce eye strain and help you see fine details, making them essential for any serious crafter. Here’s how to get the most for your money:
- Adjustable Desk Lamps: Look for models with flexible arms, clamp bases, and dimmer switches. LED versions cost as little as $20 and last for years.
- Gooseneck Clip Lights: Perfect for attaching to shelves, easels, or even your sewing machine.
- Under-Cabinet LED Strips: Stick-on strips can be mounted under shelves or cabinets for shadow-free workspace illumination. Many are USB-powered and can be daisy-chained for wider coverage.
DIY Project: Task Lamp Makeover
Revitalize an old desk lamp by repainting the base and swapping in a high-quality LED bulb. For extra flexibility, attach adhesive magnetic strips to the lamp and your metal tabletop, so you can reposition it as needed.
Accent Lighting: Adding Personality and Warmth
String Lights, Fairy Lights, and More
Accent lighting isn’t just decorative—it can help reduce shadows and add visual interest to your studio. Low-cost ideas include:
- LED String Lights: Drape along shelves, pegboards, or around windows for a soft, inviting glow.
- Battery-Powered Puck Lights: Stick inside cabinets or under shelves to highlight displays.
- DIY Lanterns: Upcycle glass jars, tin cans, or origami paper into unique accent lanterns with battery candles or LED tea lights.
RGB and Color-Changing Options
Programmable LED strips or smart bulbs (sometimes as cheap as $10) allow you to change the mood of your studio with a tap on your phone—perfect for setting the right creative atmosphere or photographing finished projects.
Energy Efficiency and Cost-Saving Strategies
Why LEDs Rule the Craft Studio
LED bulbs use up to 80% less energy than incandescent bulbs, stay cool, and last up to 25,000 hours. They’re now available in every shape, size, and color temperature—making them ideal for every layer of your lighting design.
Smart Plugs and Timers
Plug your lights into timers or smart plugs (many under $15) to ensure you never leave them on by accident. Some smart plugs even let you control lights from your phone, saving you both energy and hassle.
Bulk Buying and Rebates
Save money by purchasing multi-packs of LED bulbs or strip lights. Also, check your local utility provider’s website for rebates or giveaways on energy-efficient lighting products for home workspaces.
Common Lighting Mistakes in DIY Craft Studios (and How to Avoid Them)
- Mixing Color Temperatures: Using “warm white” and “cool white” bulbs together can make colors look muddy. Stick to one temperature throughout your workspace.
- Under-lighting Key Areas: Don’t rely on overheads alone—always supplement with task lighting for your main work surface.
- Ignoring Glare: Position lights to minimize harsh reflections off glossy tables or project surfaces.
- Overlooking Outlets: Plan your lighting layout around available outlets, and use power strips with built-in surge protection.
Step-by-Step: Planning and Installing Your Budget Lighting Setup
1. Assess Your Space
- Take note of natural light sources, outlet locations, and dark corners.
- List your main work zones (cutting, painting, assembly, display, etc.).
2. Choose Your Lighting Layers
- Start with ambient: overhead LED shop lights or plug-in pendants.
- Add task lighting: desk lamps, clamp lights, or under-shelf strips at each work zone.
- Finish with accents: string lights, puck lights, or RGB bulbs for mood and display areas.
3. Map Out Placement
- Sketch a simple floor plan and mark where each fixture will go.
- Ensure cords can reach outlets safely—use cord organizers for a tidy setup.
4. Install Fixtures
- Hang pendant lights from ceiling hooks using anchors if needed.
- Mount LED strips or puck lights under shelves with included adhesive or mounting brackets.
- Set up desk lamps and clip lights at your main workstations.
5. Test, Adjust, and Tweak
- Try out your setup at different times of day.
- Adjust angles, switch bulbs, or add reflectors to reduce shadows and glare.
- Label switches or timers for easy control.
Troubleshooting: Solving Common Craft Studio Lighting Problems
- Too Dim? Add more fixtures or upgrade to higher-lumen bulbs.
- Too Harsh? Use diffusers, lampshades, or bounce light off walls and ceilings.
- Colors Look Off? Switch to daylight (4000–5000K) bulbs throughout.
- Not Enough Outlets? Use a heavy-duty surge-protecting power strip, or run extension cords neatly along baseboards with cord covers.
- Workspace Shadows? Add under-shelf or clamp lights behind your dominant hand to counteract.
Budget Lighting Shopping List: Essentials and Estimated Costs
- LED Shop Light (4 ft): $20–$35 each
- Plug-In Pendant Cord Kit: $10–$15
- LED Bulbs (6-pack): $12–$18
- Adjustable Desk Lamp: $20–$30
- LED Strip Lights (16 ft): $15–$25
- Fairy/String Lights: $8–$15
- Puck Lights (4-pack): $15–$20
- Smart Plug: $10–$15
- Mirror (for reflecting light): $15–$30
- Sheer Curtains: $10–$20
- White Paint (quart): $15–$20
Total for a complete starter setup: typically under $150, with many items reusable from around the house or from thrift stores.
Maintaining Your Lighting Setup
- Dust fixtures and bulbs monthly for maximum brightness.
- Check cords and plugs regularly for wear or damage.
- Replace batteries in puck lights or remotes as needed.
- Periodically review your setup—your lighting needs may change as your crafting evolves!
Conclusion: Let There Be (Better) Light—Without Breaking the Bank
Creating an inspiring, comfortable, and functional craft studio doesn’t require a huge investment—just a smart strategy and a willingness to get creative with your lighting solutions. With practical upgrades like plug-in pendants, LED strips, and clever natural light hacks, you can transform any space into a haven for creativity. Layering your lighting ensures you have the perfect mix of brightness, accuracy, and ambiance for every project, from detailed sewing to vibrant painting and everything in between. Remember, the right lighting not only makes your work easier and more enjoyable; it also showcases your finished crafts in their best light—literally. Don’t be afraid to experiment with placement and fixture types, upcycle what you already have, or add a touch of personality with accent lights. Most importantly, prioritize comfort and flexibility—your eyes (and your creative spirit) will thank you. By following the steps and tips in this guide, you’ll have a well-lit, energy-efficient craft studio that inspires you daily, all while sticking to a realistic budget. Happy crafting!
I get that 4000–5000K daylight bulbs are recommended for color accuracy, but is there a big difference in how projects look under those compared to regular ‘soft white’ bulbs? Would it really matter for things like painting or beadwork?
Daylight bulbs in the 4000–5000K range produce a much whiter, more natural light than soft white bulbs, which tend to be warmer and more yellow. For painting or beadwork, this means colors will appear truer and closer to how they’ll look in natural daylight, which is especially important if you’re matching shades or photographing your work. Soft white bulbs can make colors look duller or slightly off.
Could you suggest specific LED bulb brands or models that balance energy efficiency and adjustable brightness for detailed crafts like jewelry making?
For detailed craft work like jewelry making, consider LED bulbs from brands like Philips Hue or GE Refresh. Both offer dimmable options with high color rendering index (CRI), which is important for seeing true colors. Look for models labeled as ‘daylight’ or in the 5000K–6500K color temperature range for bright, natural light while maintaining energy efficiency.