Every creative knows the struggle: you’re mid-project and can’t find your favorite pair of scissors, your rotary cutter is buried under a pile of felt, or your paints are lost behind a mountain of mystery boxes. An organized craft studio isn’t just about aesthetics—it’s the foundation for efficient, inspired making. One of the most effective, flexible, and visually satisfying solutions is the humble pegboard. But why settle for a basic store-bought panel when you can build a custom pegboard system tailored to your workflow, space, and style?
This comprehensive guide will walk you through everything you need to know to design, build, and maintain a custom pegboard organization system for your DIY craft studio. We’ll cover planning your layout, choosing the right materials, installation steps, clever storage hacks, and ongoing care. Whether you’re a painter, woodworker, jewelry maker, or multi-medium crafter, you’ll discover actionable strategies to maximize your space and streamline your creative process. Ready to reclaim your workspace and elevate your craft? Let’s get started!
Why a Custom Pegboard System?
Pegboards have endured for decades in workshops and studios for good reason: they’re adaptable, affordable, and endlessly reconfigurable. A custom pegboard system goes a step further, allowing you to:
- Design for your tools: Place hooks, shelves, and holders precisely where you need them for your unique mix of supplies.
- Maximize wall space: Go big or small, shape around windows and outlets, or even build around corners.
- Add personality: Choose colors, materials, and accessories that make your studio inspiring and uniquely yours.
- Future-proof your workspace: Re-arrange, expand, or tweak your pegboard as your crafting needs evolve.
Planning Your Pegboard System
Step 1: Assess Your Needs
Start by taking inventory:
- List your most-used tools and supplies.
- Group items by type (cutting, measuring, adhesives, paint, etc.).
- Measure oversized or awkwardly shaped items you want to store on the pegboard.
Consider workflow: Where do you want each tool? What should be within arm’s reach? What can go higher or lower?
Step 2: Measure Your Space
Choose a wall or section of wall. Measure the dimensions, noting:
- Obstacles (outlets, light switches, windows)
- Stud locations (for secure mounting)
- Clearance for opening drawers or doors
Step 3: Sketch Your Layout
Use graph paper or a digital tool to map your pegboard area. Place outlines of your key tools and experiment with arrangements. Factor in:
- Zones (e.g., cutting, painting, assembly)
- Vertical reach (place everyday tools between shoulder and hip height)
- Decorative elements for inspiration
Selecting Materials & Tools
Pegboard Panels
- Material: The classic is tempered hardboard (1/4″ thick), but metal and plastic options offer durability and moisture resistance.
- Size: Standard panels are 2’x4’ or 4’x8’, but most big box stores will cut panels to size.
- Hole spacing: Standard is 1″ apart; check compatibility with accessories.
Mounting Hardware
- 1×2 wood furring strips (to create space behind the board for hooks)
- Wood screws (2″–3″)
- Wall anchors (if not screwing into studs)
- Level, stud finder, drill, measuring tape, and pencil
Pegboard Accessories
- Metal hooks (various styles and lengths)
- Bins and baskets
- Shelves and shelf brackets
- Specialty holders (tape dispenser, screwdriver rack, paint brush tray)
- Magnetic strips (for scissors, blades, metal tools)
Building Your Pegboard System
Step 1: Prep the Wall
Clear the area and mark the outline of your pegboard on the wall. Use a stud finder to locate wall studs and mark them lightly with a pencil.
Step 2: Install Furring Strips
The strips provide a gap for hooks to fit through the holes. Cut 1×2 strips to the width of your pegboard. For panels taller than 4’, add a horizontal strip at the midpoint for support.
- Attach strips horizontally at the top and bottom (and middle if needed) of the outlined area, screwing directly into studs.
- If studs don’t line up, use heavy-duty wall anchors.
Step 3: Paint or Finish (Optional)
Customize your pegboard before mounting! Use latex paint for hardboard, spray paint for metal, or even apply wallpaper or fabric for a unique look. Let dry completely.
Step 4: Mount the Pegboard
- With a helper, position the pegboard over the furring strips.
- Drill pilot holes through the pegboard into the strips at intervals of 12–16″.
- Secure with wood screws. Check for level as you go.
Step 5: Accessorize and Organize
- Add hooks, shelves, and bins according to your plan.
- Test the arrangement with your actual tools—adjust as needed for comfort and flow.
- Label or color-code zones for quick identification.
Smart Pegboard Organization Strategies
Tool Zoning
Group similar items together. For example:
- Cutting tools: scissors, rotary cutters, X-Acto knives
- Measuring & marking: rulers, tape measures, pencils
- Adhesives: tapes, glues, hot glue gun (with a holster or shelf)
- Paint & brushes: tubes, bottles, brush holders
Vertical Storage Hacks
- Hang washi tape or ribbon spools on dowels between hooks
- Use small bins for loose hardware, beads, or embellishments
- Clip small items (pattern pieces, notes) with bulldog clips on hooks
- Install a magnetic strip for metal tools
Custom Features
- Attach a fold-down work tray for extra surface area
- Mount a small shelf for in-progress projects
- Add a charging station (with cord management) for hot glue guns or rotary tools
- Paint a section with chalkboard or dry-erase paint for notes and sketches
Optimizing for Small or Awkward Spaces
Not every studio has a giant blank wall. Here’s how to adapt:
- Mini Pegboards: Use small panels above your workbench, inside closet doors, or on cabinet ends.
- Corner Mounting: Join two panels at a right angle to wrap around corners and maximize storage.
- Mobile Pegboards: Mount panels on rolling carts or create a freestanding frame for flexibility in small rooms.
- Backsplash Pegboards: Install a narrow strip between countertop and upper cabinets.
Pegboard Maintenance and Upgrades
Keeping It Clean
Dust accumulates quickly in busy studios. Wipe the pegboard and accessories with a damp cloth monthly. For stubborn spots, remove accessories and clean with mild soap and water; let dry fully before rehanging tools.
Reconfiguring for New Projects
- Seasonally review your setup—move underused tools out of prime positions.
- Adjust hooks and bins as your projects change.
- Swap bins or add specialty holders as your tool collection grows.
Repair and Longevity
- Check for sagging panels or loose screws every few months; tighten or reinforce as needed.
- For chipped paint or dents, touch up with matching finish to prevent moisture entry (especially with hardboard).
- Replace damaged hooks or bins promptly—safety first!
Creative Inspiration: Real-World Pegboard Setups
Case Study 1: Textile Artist’s Studio
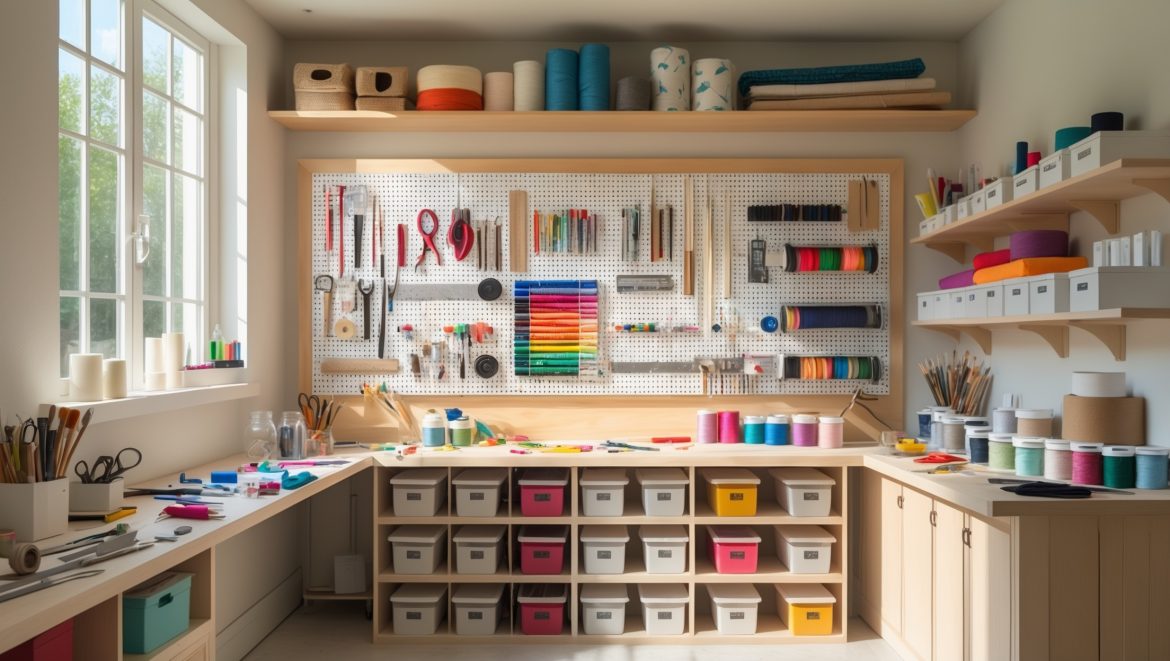
Sarah, a fiber artist, designed a wall-length pegboard with color-coded tool zones: green for fabric scissors and rotary cutters, blue for rulers and templates, red for pins and needles. She added a magnetic strip for metal bobbins and an integrated thread rack, drastically cutting her project prep time.
Case Study 2: Maker’s Multifunctional Garage
Chris repurposed a garage wall with a painted pegboard, combining woodworking, electronics, and bike repair zones. Custom plywood shelves hold glue bottles and sandpaper, while a fold-out tray gives extra assembly space. A chalkboard paint section tracks project deadlines.
Case Study 3: Small Space Crafter
Emily, working in a studio apartment, installed a mini pegboard above her desk. She mounted a dowel for washi tape, bins for markers, and a clip-on LED light. Everything is within reach—but the desktop stays clear for projects (and dinner).
Conclusion: Your Studio, Your System
Organization is an ongoing process, not a one-time project. A custom pegboard system not only brings order to your DIY craft studio but also creates a visual inventory of your creative potential. With the ability to reorganize and expand as your interests and supplies shift, a well-designed pegboard is a lifelong investment in your creative workflow.
Don’t be afraid to experiment—paint your board a bold color, mix materials, or try unconventional accessories. The beauty of a custom system is its adaptability. Set aside time every few months to assess what’s working and what’s not, and don’t hesitate to make changes. Your studio should evolve alongside your creative journey.
Most importantly, remember that the ultimate goal is to support your creativity—not to achieve Instagram-perfect tidiness. Allow your pegboard to reflect your personality and process. Whether you’re tackling your first DIY build or refining a seasoned maker’s space, a thoughtful organization system can transform chaos into calm, and clutter into inspiration. Happy crafting!