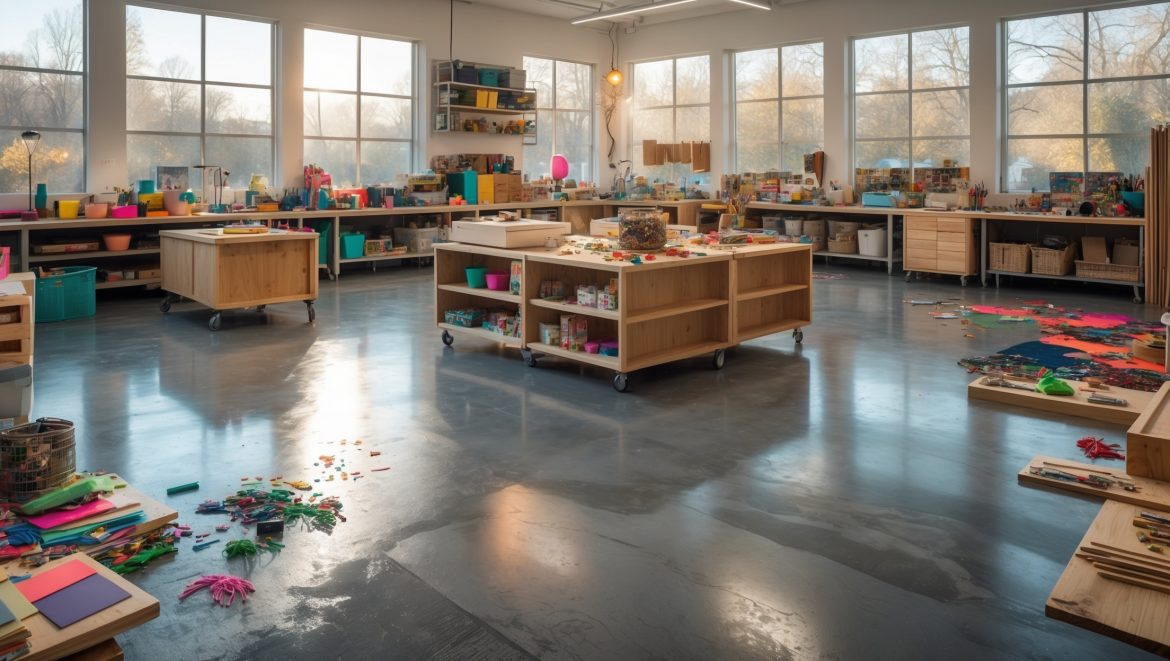
Introduction: The Foundation of Your Creative Space
When designing a DIY craft studio, most creators eagerly focus on workbenches, storage hacks, and tool organization. Yet, the very foundation underfoot—your studio’s flooring—is one of the most crucial, yet overlooked, decisions you’ll make. The right flooring can affect everything from your comfort during long crafting sessions to the safety, cleanliness, and even the long-term value of your creative space. Whether you’re a seasoned maker setting up a dedicated studio or a passionate hobbyist revamping a spare room, your flooring choice impacts every project you undertake. This comprehensive guide will walk you through the best flooring options for DIY craft studios, practical installation advice, and essential maintenance strategies. By the end, you’ll be equipped to make a confident, informed decision that supports your creativity and protects your investment for years to come.
Understanding Craft Studio Flooring Needs
What Makes Flooring Craft-Friendly?
Unlike standard residential or office spaces, craft studios demand flooring that withstands spills, dropped tools, rolling chairs, and frequent movement. The ideal craft studio floor should be:
- Durable: Withstands impact, abrasion, and repeated cleaning.
- Easy to Clean: Resists stains from paint, glue, ink, and other common materials.
- Comfortable: Offers some resilience for standing or moving for long periods.
- Safe: Provides traction to prevent slips, especially if spills occur.
- Budget-Friendly: Balances upfront cost with long-term value.
- Easy to Install/Replace: Especially for DIYers who want to keep things hands-on.
Evaluating Your Space
Before diving into materials, take stock of your studio’s unique needs:
- Is it a high-traffic zone or a solo retreat?
- Do you work with heavy equipment or delicate crafts?
- Are moisture and temperature fluctuations a concern (e.g., basement or garage studios)?
- What is your subfloor: concrete, wood, or tile?
- Will you need to accommodate rolling chairs or heavy storage units?
Understanding your answers will help determine which flooring options best fit your space.
Top Flooring Options for DIY Craft Studios
1. Luxury Vinyl Plank (LVP)
Overview: LVP is a top choice for creative spaces due to its durability, water resistance, and realistic wood or stone appearance. It’s available in click-lock or glue-down formats, making installation manageable for DIYers.
- Pros: Waterproof, easy to clean, resists scratches and stains, softer underfoot than tile, affordable.
- Cons: Can be dented by very heavy loads, may fade in direct sunlight.
- Best For: High-traffic studios, multipurpose spaces, areas prone to messes.
2. Sheet Vinyl
Overview: Sheet vinyl comes in large rolls, providing a seamless, water-resistant surface. It’s budget-friendly and available in a range of patterns, including fun colors and faux wood or tile looks.
- Pros: Seamless (few places for mess to hide), very affordable, soft and resilient, excellent moisture resistance.
- Cons: Can be punctured by sharp tools, difficult to repair if damaged, may off-gas initially.
- Best For: Budget-conscious crafters, large studios, basement or garage spaces.
3. Laminate Flooring
Overview: Laminate mimics hardwood at a lower price, offering a tough, stain-resistant surface. Modern waterproof laminates are suitable even for spaces prone to spills.
- Pros: Attractive, scratch-resistant, easy DIY installation, comfortable with underlayment.
- Cons: Non-waterproof types can swell with moisture, can be slippery when wet.
- Best For: Dry, climate-controlled studios, those who want a high-end look without the price.
4. Rubber Flooring (Tiles or Rolls)
Overview: Rubber mats or tiles are popular in gyms but work beautifully for craft studios. They’re soft, reduce fatigue, and provide a non-slip, forgiving surface for dropped tools.
- Pros: Cushioned, slip-resistant, absorbs noise and impact, easy to replace sections.
- Cons: Can have an initial odor, limited style options, more costly than vinyl.
- Best For: Artists standing for long periods, studios with heavy or sharp tools.
5. Sealed Concrete
Overview: For basement or garage studios, sealed concrete is a budget and maintenance-friendly option. Epoxy or polyurethane coatings add color and durability.
- Pros: Extremely durable, easy to clean, customizable with stains/paints, excellent for rolling furniture.
- Cons: Hard on feet/joints, cold, may need anti-fatigue mats, requires professional prep for best results.
- Best For: Garages, basements, large multipurpose spaces, those with heavy machinery.
6. Cork Flooring
Overview: Eco-friendly cork offers a warm, slightly springy surface. It’s naturally antimicrobial and reduces sound, making it ideal for cozy, quiet studios.
- Pros: Comfortable underfoot, sustainable, reduces noise, easy to install as click tiles.
- Cons: Can be damaged by sharp objects, sensitive to water, requires periodic sealing.
- Best For: Low-impact craft studios, upstairs rooms, those seeking natural materials.
7. Interlocking Foam Tiles
Overview: These puzzle-piece mats are a quick, temporary solution for renters or those looking for extra comfort. They’re soft and easy to replace, but not as durable long-term.
- Pros: Cushioned for comfort, easy to install/remove, inexpensive, available in many colors.
- Cons: Prone to punctures and indentation, can trap dirt in seams, not suitable for rolling furniture.
- Best For: Temporary studios, renters, spaces with limited tool use.
How to Choose the Right Flooring for Your Craft Studio
Step 1: Assess Your Priorities
Start by listing your top needs: is easy cleaning paramount, or do you need extra cushioning for comfort? Do you prefer a particular aesthetic, or are you working within a strict budget?
Step 2: Consider the Subfloor
Your existing subfloor affects both the installation process and your flooring options. Concrete can accommodate most floors, but wooden subfloors may require additional moisture protection. For basements, prioritize waterproof options.
Step 3: Think About Installation
Are you comfortable with DIY flooring projects, or will you hire help? Click-lock vinyl, laminate, and cork are DIY-friendly, while sheet vinyl and epoxy coatings may require professional assistance for best results.
Step 4: Plan for the Future
Consider how easily your flooring can be repaired or replaced if damaged. Modular tiles (rubber, foam) are simplest; glued-down vinyl or sheet goods are more challenging.
Step 5: Balance Cost with Longevity
Low-cost options may be tempting but consider replacement frequency. Durable surfaces like LVP, sealed concrete, and quality rubber often offer better value over time.
DIY Installation Tips for Popular Craft Studio Floors
Luxury Vinyl Plank (LVP) & Laminate
- Acclimate Materials: Let planks sit in your studio for 48 hours to adjust to temperature/humidity.
- Prepare the Subfloor: Ensure it’s clean, level, and dry. Use a self-leveling compound if needed.
- Underlayment: Install an appropriate underlayment for sound reduction and comfort.
- Layout: Stagger seams for a natural look and structural stability.
- Cutting: Use a sharp utility knife for vinyl; a jigsaw or circular saw for laminate.
- Expansion Gap: Leave a 1/4-inch gap at walls to allow for movement; cover with baseboard or quarter-round.
Rubber Flooring Tiles
- Clean the Subfloor: Remove dust and debris.
- Dry Fit: Lay out tiles to plan placement and minimize cuts.
- Trimming: Cut edge pieces with a sharp utility knife and straightedge.
- Adhesive: Some tiles are loose-lay; others may require double-sided tape or adhesive for high-traffic zones.
Sheet Vinyl
- Accurate Measurement: Order extra material to account for pattern matching and errors.
- Seams: Avoid seams in high-traffic or high-mess areas if possible.
- Adhesion: Use recommended adhesive; roll out bubbles for a smooth finish.
Epoxy/Sealed Concrete
- Surface Prep: Patch cracks, degrease, and etch the concrete if needed.
- Ventilation: Epoxy products require good airflow and safety precautions.
- Multiple Coats: Two or more coats may be needed for the best protection and color saturation.
Flooring Maintenance Best Practices for DIY Craft Studios
Routine Cleaning
- Daily: Sweep or vacuum to remove debris and prevent scratches.
- Weekly: Damp mop with appropriate cleaner; avoid harsh chemicals that degrade finishes.
- Immediate Action: Wipe up spills (paint, glue, water) right away to prevent stains or damage.
Protecting Your Floor
- Use chair mats or felt pads under rolling chairs and furniture.
- Place anti-fatigue mats in standing work zones for comfort and floor protection.
- For heavy equipment, use protective mats or pads to disperse weight.
Repair and Replacement Tips
- LVP/Laminate: Replace individual planks/boards if damaged; keep spares on hand.
- Rubber/Foam Tiles: Swap out damaged tiles; clean new tiles thoroughly before installing.
- Sheet Vinyl: Patch kits are available, but color match can be tricky.
- Sealed Concrete: Reseal every few years, especially in high-traffic zones.
- Cork: Reseal annually and spot-repair dents with cork filler as needed.
Flooring Safety Checklist for Craft Studios
- Confirm slip resistance—especially if working with liquids or in socks.
- Anchor rugs or mats to prevent tripping hazards.
- Keep cords and cables tidy and away from walkways.
- Address uneven transitions between different floor types with threshold strips.
- Choose low-VOC flooring and adhesives to maintain good air quality.
- Ventilate well during installation and after chemical treatments.
- Check for loose planks or tiles regularly and repair promptly.
Creative Flooring Ideas to Personalize Your Studio
- Use painted concrete or stenciled patterns for a budget-friendly, artistic touch.
- Mark work zones with contrasting floor tiles or color blocks.
- Add a pop of color with fun, patterned vinyl or cork tiles.
- Incorporate removable rugs for seasonal changes or to define areas.
- For shared spaces, use tape or decals to clearly mark hazardous or off-limits zones.
Conclusion: Build Your Studio on the Right Foundation
Flooring is more than just a backdrop—it’s the literal foundation of your DIY craft studio, supporting every creative endeavor, every experiment, and every joyful mess. Choosing the right flooring solution empowers you to work comfortably, safely, and efficiently. Whether you opt for the resilience of luxury vinyl, the warmth of cork, or the utilitarian strength of sealed concrete, a thoughtfully chosen and well-maintained floor can inspire confidence and creativity alike.
Don’t underestimate the value of investing time and resources into your studio floor. The right choice will protect your tools, safeguard your health, simplify cleaning, and even make your studio more inviting for friends, collaborators, or clients. By following the guidance in this comprehensive flooring guide, you’ll create a workspace that’s not only practical and beautiful, but also uniquely yours. So, as you lay down each plank or tile, remember: you’re building the foundation for years of creative success. Step boldly—and let your imagination flourish from the ground up.


Can you clarify whether certain floors are easier for a solo DIYer to install over wood subfloors versus concrete, especially if I might need to replace a section later on?
Floating floors like laminate and luxury vinyl planks are generally easier for solo DIYers to install, whether over wood or concrete subfloors. They don’t require glue or nails and are also simpler to remove or replace a section later. Over concrete, you might need a moisture barrier, but the installation process remains straightforward for both subfloor types.
Could you elaborate on which flooring options provide the best mix of comfort and safety for someone who stands for long periods while crafting? I am worried about both fatigue and slips in my workspace.
For long periods of standing, cushioned vinyl and cork flooring are excellent choices. They provide a softer surface underfoot, reducing fatigue and joint strain. Both options also generally offer decent slip resistance, especially if you choose textured finishes. If you want extra comfort, consider using anti-fatigue mats in high-use areas for additional support and safety.
Can you elaborate on the installation process for someone using a concrete subfloor? I want to do it myself but am unsure if I need special underlayments or surface prep for craft-related spills.
For a concrete subfloor, start by making sure the surface is clean, dry, and free of cracks or moisture. If you plan to install flooring like vinyl planks or laminate, a moisture barrier underlayment is a good idea to protect against spills. For added comfort and spill resistance, consider using foam or cork underlayment. Seal any cracks and let the concrete cure fully before installing your chosen floor.
You mention durability and ease of cleaning as key factors for craft studio flooring. Can you share which specific flooring materials hold up best against repeated spills from things like paint or glue?
For craft studios where spills are common, vinyl plank, sealed concrete, and high-quality laminate flooring tend to hold up best. These surfaces resist staining from paint or glue and are easy to wipe clean. Make sure to choose flooring with a moisture-resistant or sealed finish for extra protection against repeated spills.
You mention the importance of comfort for long crafting sessions. Do you have any specific recommendations for underlayment or padding that works well under more durable flooring options like vinyl or laminate?
For added comfort under vinyl or laminate flooring, consider using high-density foam or cork underlayment. These materials provide cushioning, reduce fatigue during long crafting sessions, and help with sound absorption. Make sure the underlayment is compatible with your chosen flooring and meets the manufacturer’s recommendations to maintain durability and warranty.
For crafters who deal with a lot of paint and glue spills, do you have tips on cleaning and maintaining the floor to keep it looking good over time?
For frequent paint and glue spills, use a floor with a sealed or impervious surface, like vinyl or sealed concrete. Wipe up spills promptly with a damp cloth, and for dried spots, use a gentle scraper or non-abrasive cleaner. Place mats or drop cloths in high-mess zones to minimize damage, and periodically use a mild floor cleaner to prevent buildup.
What would be your advice for someone needing to retrofit an older wood subfloor on a tight budget while still aiming for a cleanable, durable surface suitable for frequent crafting?
For a budget-friendly retrofit over an old wood subfloor, consider using sheet vinyl or peel-and-stick vinyl tiles. Both are affordable, easy to clean, and durable for craft activities. Make sure the subfloor is smooth and clean before installation. You can also add a few throw rugs in high-traffic spots for extra protection and comfort.
If I am setting up my craft studio in a rented space, which flooring choice would be easiest to install temporarily and remove later without damaging the original floor underneath?
For a rented space, interlocking foam tiles or peel-and-stick vinyl planks are both great temporary flooring options. They’re easy to put down without adhesives, offer comfort, and can be removed cleanly when you move out, leaving the original floor undamaged.
The article mentions balancing upfront costs with long-term value. Do you have a ballpark idea of what budget range I should expect for a medium-sized studio if I want something comfy but still pretty affordable?
For a medium-sized craft studio, comfortable and affordable flooring options like cushioned vinyl or laminate typically range from $2 to $5 per square foot, including basic installation. So, for a 200-square-foot space, your total budget might fall between $400 and $1,000. This gives you a good balance of comfort, durability, and easy maintenance.
What would you recommend as the most cost-effective flooring solution that still meets the durability and easy-clean standards you mention for high-traffic craft studios?
For a high-traffic craft studio, vinyl sheet flooring is often the most cost-effective choice. It’s durable, resists stains, and is easy to clean. It also stands up well to spills and heavy use, making it a practical option that doesn’t sacrifice quality or longevity.
With young kids running in and out of my craft room, I’m worried about both durability and safety. Which flooring types from your list are cushioned enough for comfort but still tough enough to withstand a spill or dropped scissors?
From the flooring options discussed, rubber flooring and high-quality vinyl are your best bets. Rubber tiles offer great cushioning, reducing the risk of injury if kids fall, and they’re tough enough to handle spills and dropped tools. Luxury vinyl planks are also resilient, water-resistant, and softer underfoot than laminate or tile, making them a solid, easy-to-clean choice for a family-friendly craft room.
If my craft studio is in an unfinished basement where moisture is sometimes an issue, what kind of maintenance steps should I expect for keeping the flooring in good condition?
In an unfinished basement with moisture issues, regular maintenance is key. Use a dehumidifier to control humidity and check for leaks often. Clean spills immediately, and sweep or vacuum regularly to prevent mold growth. If you use waterproof flooring, occasionally inspect seams for wear or gaps. Also, consider lifting area rugs to let the floor dry completely.
Could you give more details about which flooring options offer the best comfort for standing long hours, especially for people who have back or joint pain?
For long hours of standing, especially if you have back or joint pain, cushioned options like cork flooring, rubber tiles, and padded vinyl are the most comfortable. These surfaces provide resilience and shock absorption, reducing fatigue and strain. You might also want to use anti-fatigue mats in work areas for extra support, regardless of the main flooring choice.
I noticed you suggest considering comfort for standing long hours. Is there a flooring type that balances resilience and easy cleaning, or would adding anti-fatigue mats be better for that purpose?
For both resilience and easy cleaning, luxury vinyl tile and sealed cork are great flooring options—they offer a bit of give while being simple to maintain. However, if you spend long periods standing in one spot, anti-fatigue mats can boost comfort further and can be used on top of either flooring type for extra support.
I run a small embroidery business out of my garage where temperature and humidity can change a lot. What flooring materials are best for resisting warping or mold in those conditions while still being comfortable for long periods on my feet?
For your garage embroidery studio, consider luxury vinyl plank (LVP) or sealed concrete flooring. Both handle temperature and humidity swings well, resist warping and mold, and are easy to clean. For comfort, add anti-fatigue mats in work areas—these provide cushioning without trapping moisture.
Are there any crafts or materials that might be especially hard on certain flooring types, like resin or hot glue, that people should consider when picking what to use in their studio?
Certain crafts, like working with resin, hot glue, or heavy paints, can damage or stain some flooring types. Resin and hot glue can stick to and discolor carpet or damage hardwood. For messy crafts, it’s best to choose stain-resistant flooring like vinyl or sealed concrete, and use mats or protective coverings in high-risk areas.
Could you clarify how to properly prep a concrete subfloor before installing new flooring in a craft studio? I’m a bit nervous about whether I need special underlayment or moisture barriers.
Before installing new flooring on a concrete subfloor, start by cleaning and sweeping thoroughly. Check for cracks or uneven spots and repair them with a patching compound if needed. For most craft studios, a moisture barrier is recommended if your concrete is below grade or prone to dampness. Underlayment depends on your flooring type—vinyl often needs little, but laminate or engineered wood usually requires one for cushioning and moisture resistance.
You mentioned the need for flooring that’s comfortable for long periods of standing. Are there specific materials or underlayments that help reduce fatigue, especially for people who do a lot of sewing or painting?
Yes, for craft studios where you’ll be standing a lot, cushioned flooring materials like cork, rubber, or vinyl with extra padding are all excellent for reducing fatigue. You might also consider adding anti-fatigue mats in key work areas, or using a foam underlayment beneath laminate or hardwood to give some extra softness underfoot.
For a space that doubles as both a craft studio and a reading nook, is there a best flooring material that combines comfort for standing and also feels cozy underfoot?
For a space that serves as both a craft studio and a reading nook, cork flooring is a great option. It’s soft and comfortable for standing during craft sessions, while also providing a warm, cozy feel underfoot when you’re relaxing. Alternatively, luxury vinyl with a good underlayment or interlocking foam tiles can provide both comfort and a welcoming atmosphere.
In terms of safety, do any flooring types stand out as especially resistant to slipping when wet, especially for studios where liquid spills are common?
Rubber flooring and textured vinyl are especially good choices for craft studios where spills are frequent, as they provide excellent slip resistance even when wet. Look for flooring with a textured or non-slip surface to further reduce the risk of accidents in your workspace.
You mentioned that moisture and temperature fluctuations can be a concern in spaces like basements and garages. Which flooring options handle those conditions best without being too expensive or difficult to install?
For spaces with moisture and temperature changes, luxury vinyl plank (LVP) and interlocking rubber tiles are both reliable choices. They resist moisture, are easy to install yourself, and usually cost less than hardwood or tile. Just make sure to properly seal concrete floors underneath to add extra protection.
You mentioned the importance of comfort for long crafting sessions. Are there particular flooring options that offer more cushioning but still hold up against rolling chairs and frequent movement?
Yes, some flooring options can provide both cushioning and durability for a craft studio. Luxury vinyl plank with a quality underlayment, cork flooring, and certain rubber tiles are good choices—they offer comfort underfoot while resisting dents from rolling chairs and frequent activity. Choose a type rated for high traffic to ensure it holds up over time.
If I have an existing tile subfloor in my craft studio, do you suggest covering it, removing it, or working with it as is? Are there any installation tips specific to tile?
You can usually work with your existing tile subfloor as long as it’s stable, clean, and level. Floating floors like luxury vinyl planks or interlocking foam tiles can go right over tile. Just make sure to fill any deep grout lines and repair any loose or damaged tiles for a smooth surface before installation.
Does your installation advice cover prepping a concrete subfloor for flooring, especially when it comes to ensuring comfort for long hours of standing? I’m planning to convert my garage and want to avoid fatigue.
Yes, the installation tips do address prepping a concrete subfloor. For comfort during long hours of standing, the article suggests using underlayments like foam or cork before installing your chosen flooring. These help cushion your feet and reduce fatigue, making your garage-turned-studio more comfortable for extended crafting sessions.
When considering budget-friendly flooring options, are there any materials that strike a good balance between durability and lower upfront costs for someone revamping a spare room for crafts?
Laminate flooring and luxury vinyl planks are both popular choices if you want durability without spending too much. They resist paint spills, scratches, and general wear, making them practical for a craft room. Peel-and-stick vinyl tiles are another budget option, especially if you prefer a simple, DIY installation process.
Can you elaborate on which flooring types are best for handling repeated paint spills? I tend to work with a lot of messy mediums and need something that truly resists staining over time.
For frequent paint spills and messy projects, sealed concrete, luxury vinyl tile (LVT), and epoxy-coated floors are your best options. These materials are highly resistant to staining and easy to clean, even after repeated spills. Avoid carpet and untreated wood, as they absorb stains. Make sure to maintain the protective finish on your floor to keep it stain-resistant.