Introduction: The Power of Transformation in Creative Spaces
Every DIY enthusiast dreams of a space where creativity flows effortlessly—a place to store supplies, experiment with new materials, and perhaps even turn passion into profit. Yet, for many, the journey from a cluttered spare room to a fully functional craft studio seems overwhelming. Today, we’re diving into a real-world case study that demonstrates not only what’s possible with resourcefulness and planning but also the nitty-gritty decisions that make or break a DIY craft studio. Follow along as we explore how Alex, a seasoned crafter, transformed a neglected guest room into a profitable, inspiring workspace. We’ll break down space planning, cost control, smart tool selection, workflow optimization, and the actionable steps that led to creative and financial success. Whether you’re planning your own studio or just love to peek behind the scenes, this case study delivers practical insights and a blueprint for making your DIY dreams a reality.
Project Overview: From Spare Room to Studio
The Starting Point
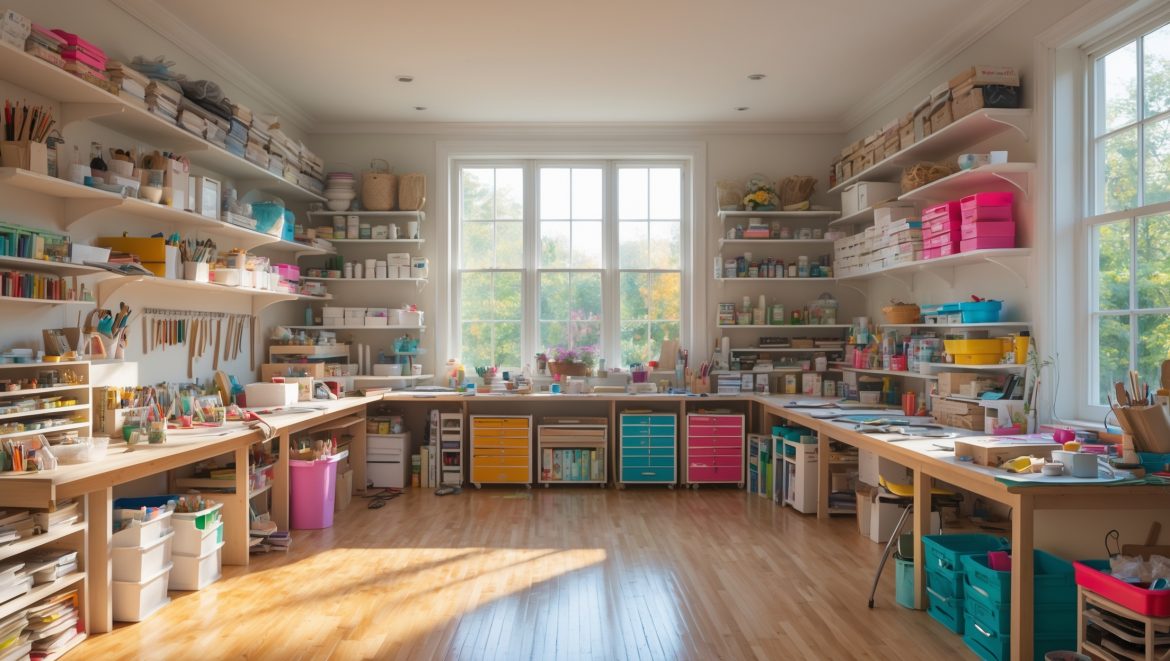
Alex’s journey began with a 12×14-foot spare room, previously used as impromptu storage and an occasional guest space. The room had basic carpeting, a single window, two standard outlets, and a ceiling light. The goal: create a multi-functional craft studio for sewing, papercraft, and small woodworking projects, with the flexibility to host workshops and sell products online.
Objectives
- Maximize usable workspace and storage within a modest footprint
- Keep the total renovation budget under $3,000
- Ensure excellent lighting, safety, and ventilation
- Design for easy clean-up and maintenance
- Create zones for different craft activities
- Enable future scalability for business needs
Budget Breakdown and Smart Spending
Initial Assessment
Alex started by listing absolute necessities versus nice-to-haves. The main investment priorities were:
- Work surfaces and sturdy tables
- Storage solutions (shelving, bins, pegboards)
- Improved lighting
- Basic power tools and safety equipment
- Ventilation upgrades
- Organizational supplies
Final Cost Breakdown
- Workbenches and Tables: $450 (IKEA hacks + secondhand finds)
- Shelving & Storage: $380 (wall-mounted shelves, clear bins, pegboards)
- Lighting: $250 (LED shop lights, task lamps)
- Power Tools: $500 (entry-level bandsaw, cordless drill, sander)
- Ventilation: $180 (window fan, HEPA air purifier)
- Safety Gear: $120 (fire extinguisher, first-aid, PPE)
- Paint & Flooring: $220 (washable paint, vinyl mats)
- Misc. Organization: $100
- Total: $2,200
By sourcing used furniture and DIY-ing some storage solutions, Alex stayed well under budget, leaving room for future upgrades.
Design: Workflow, Zoning, and Ergonomics
Mapping the Space
Before moving anything, Alex measured the room and created a scale drawing. Using painter’s tape on the floor, zones were mapped for:
- Work Zone 1: Sewing and fabric cutting (near natural light)
- Work Zone 2: Papercraft and assembly
- Tool Station: For woodworking and power tools (by window for ventilation)
- Storage Wall: Floor-to-ceiling shelves and pegboards
- Clean-up Area: Small sink (bathroom nearby) and trash/recycling
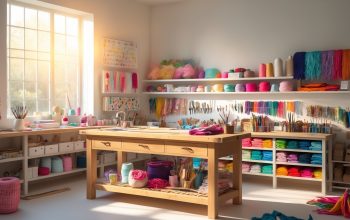
Furniture and Layout Choices
Alex prioritized modular worktables with locking casters for flexibility. All storage was open shelving to keep supplies visible, reducing time spent searching. A fold-down wall table provided extra workspace when needed.
Lighting Strategy
- Ambient: Two LED shop lights for even overhead illumination
- Task: Adjustable arm lamps at each work zone
- Accent: Under-shelf lighting for detailed work and display
Tools and Equipment: Essentials, Upgrades, and Workflow
Must-Have Basics
Alex’s approach was to buy only what was needed immediately, then reinvest profits into upgrades. The initial kit included:
- Cordless drill/driver
- Compact bandsaw (for small wood projects)
- Orbital sander
- Precision craft knife set
- Sewing machine (mid-tier, multi-purpose)
- Cutting mats and rotary cutters
- Glue gun and adhesives
- Basic hand tools (screwdrivers, pliers, clamps)
Workflow Optimization
To avoid tool clutter, Alex set up a pegboard with labeled outlines for each tool. Consumables (glue sticks, thread, sandpaper) were stored in clear bins, grouped by project type. A charging station kept all cordless tools ready to go.
Overcoming Challenges: Real-World Solutions
Electrical Limitations
The room’s two outlets quickly became a bottleneck. Alex solved this by:
- Using heavy-duty surge-protected power strips, mounted above workbenches
- Scheduling tool use to avoid tripping breakers (never running multiple power-hungry tools at once)
- Investing in battery-powered tools to reduce cord clutter
Ventilation and Dust Control
With woodworking in the mix, dust was a concern. Alex installed a window fan to exhaust air during sanding, and used a HEPA-filter air purifier for ongoing dust removal. A small shop vac made clean-up fast and thorough.
Maximizing Storage in a Small Footprint
Vertical storage was the key. Wall-mounted shelves, pegboard, and hanging baskets kept the floor clear. Rolling carts provided mobile storage for frequently used items, doubling as extra work surfaces.
Monetizing the Studio: Turning Passion Into Profit
Initial Revenue Streams
- Online Sales: Alex opened an Etsy shop featuring hand-sewn bags, custom journals, and small wood crafts.
- Workshops: In-person classes for up to three students at a time, focusing on techniques like bookbinding and fabric dyeing.
- Custom Orders: Local commissions via social media and word of mouth.
Startup Marketing Tactics
- Before-and-after room transformations shared on Instagram and Pinterest
- Time-lapse videos of studio setup and projects
- Referral discounts for attendees of the first workshop
- Collaborations with local makers for bundle giveaways
Maintenance and Upkeep: Keeping the Studio Functional
Daily Routines
- 10-minute end-of-day tidy-up: returning tools, clearing surfaces, sweeping floors
- Weekly bin check: restocking consumables, removing expired supplies
- Monthly deep clean: vacuuming shelves, checking for tool wear, sanitizing tables
Safety and Compliance
Even as a home studio, Alex followed key safety practices:
- Fire extinguisher mounted by the door
- First-aid kit on a visible shelf
- Proper storage of flammable materials (in a metal cabinet)
- Clear emergency exit path at all times
Results: What Worked, What Didn’t, and Lessons Learned
Successes
- Highly efficient use of space: No wasted corners, flexible zones
- Under-budget build: Room to reinvest in higher-end tools
- Profit within six months: Studio paid for itself via product sales and classes
- Low-stress maintenance: Organization systems made clean-up quick
Pitfalls and Pivots
- Underestimated dust from woodworking—required additional air filtration
- Needed more outlets than expected; battery-powered tools helped, but future upgrade is planned
- Workshop scheduling was tricky with shared home space—added portable partitions for privacy
Conclusion: Inspiration and Action for Your Creative Space
Alex’s transformation from a forgotten spare room to a bustling DIY craft studio proves that creativity thrives in well-designed, functional environments. By carefully assessing needs, setting a realistic budget, and investing in flexible, modular solutions, Alex created a space that not only sparked personal joy but also generated sustainable income. The project highlights the importance of planning for workflow, embracing vertical storage, and staying adaptable as your craft evolves. Challenges—like dust control and limited outlets—were met with practical workarounds, showing that perfection isn’t required for progress.
Most importantly, this case study demonstrates that you don’t need a massive budget or a commercial space to launch a thriving creative studio. With smart layout choices, a focus on organization, and a willingness to iterate, you can maximize even the smallest room. Whether your goal is to simply enjoy your hobbies or build a business, let Alex’s journey inspire you to take that first step. Start with what you have, tailor the space to your unique needs, and let your creativity transform not just your studio—but your life.


How did Alex decide on the best way to divide up the zones for sewing, papercraft, and woodworking with only a 12×14-foot room to work with? Any tips for keeping things flexible?
Alex mapped out the room on paper first, considering natural light for sewing, proximity to outlets for woodworking, and storage needs for papercraft. She used modular furniture and rolling carts so each zone could be rearranged as needed. If you want flexibility, try mobile worktables, fold-down surfaces, and open shelving to adapt the space for different projects.
Could you elaborate on how Alex addressed the limited number of electrical outlets during the renovation? I’m curious if additional wiring was needed or if alternative solutions made the space work for multiple tool use.
Alex handled the limited electrical outlets by consulting an electrician to add a few more strategically placed outlets, especially near workstations where multiple tools would be used. In addition, Alex used heavy-duty power strips for flexibility with portable tools. No major rewiring was required, but the upgraded outlets ensured safe and efficient power distribution throughout the studio.
After turning the spare room into a craft studio, how long did it take before Alex began seeing a profit from selling products or hosting workshops?
Alex began seeing a profit about four months after launching the craft studio. This included time for setting up the space, building an online presence, and holding the first few workshops. Sales from handmade products and workshop bookings started to grow steadily after that initial period.
How long did the whole transformation process take, from the initial planning to having a fully functional workshop? I’m wondering what kind of timeline I should expect for a similar project.
The article mentions that the transformation process took about three months from the initial planning stages to having a fully functional workshop. This included time for clearing out the space, designing the layout, purchasing supplies, and completing renovations. Your timeline might vary depending on your room size, sourcing materials, and how much time you can dedicate each week.
Could you share which specific work surfaces or tables Alex chose to balance sturdiness with the goal of staying under the $3,000 budget? Were any DIY solutions used to save money?
Alex selected sturdy, budget-friendly work tables from IKEA, specifically the Linnmon tabletops paired with adjustable Adils legs, to keep costs down while ensuring durability. To stretch the budget further, Alex also built a custom pegboard wall and used repurposed wooden boards for additional shelving and workspace, combining store-bought and DIY solutions effectively.
Can you share how Alex balanced the budget between upgrading lighting, adding storage, and buying work tables? I always struggle to decide which area to focus on without overspending.
Alex prioritized spending based on immediate needs and long-term value. She allocated most of her budget first to essential lighting upgrades for better visibility, then focused on versatile, modular storage solutions, and finally searched for sturdy but affordable secondhand work tables. By tackling necessities first and shopping around for deals, Alex avoided overspending and gradually improved other areas as funds allowed.
About the workflow for selling products online: Did Alex have to make changes to the space once the business side started growing, or was everything set up to scale from the beginning?
Alex made some adjustments to the space as the business grew. Initially, the setup worked for small-scale production, but as online orders increased, she reorganized storage, added designated packing and shipping areas, and improved inventory systems to handle higher demand. The room was flexible, but it definitely needed changes to support the scaling business.
With a 12×14-foot space, how did Alex decide on the layout for different activity zones without things feeling cramped or cluttered, especially with future scalability in mind?
Alex started by listing out the main activities the studio needed—like crafting, storage, and relaxing—and then mapped each zone to a specific section of the room based on natural light and traffic flow. She chose modular furniture that could be easily rearranged or expanded and kept some open floor space for flexibility. This approach helped avoid clutter and kept the room adaptable for future needs.
Did Alex run into any unexpected challenges with ventilation or keeping the room safe for both crafting and occasional workshops? I’m not sure what to look out for in an older home.
Alex did encounter a few surprises with ventilation. The older windows barely opened, so they invested in a portable air purifier and added a small exhaust fan to help with fumes from paints and adhesives. For safety, they also checked electrical outlets and installed smoke detectors. It’s wise to assess airflow and upgrade basic safety features, especially in older homes.
Do you have any tips on improving ventilation in a spare room like this, especially when doing small woodworking projects? I’m worried about dust and fumes in a space with just one window.
Improving ventilation is important for woodworking. If you have only one window, consider using a box fan to blow air out, which helps draw fresh air in from any small gaps or under the door. Adding an air purifier with a HEPA filter can help reduce fine dust. Also, try to use water-based finishes and low-VOC products to minimize fumes.
I’m curious, what types of storage solutions ended up working best for those different craft zones? I have a small room too and need ideas that maximize every inch.
In the case study, clear stackable bins worked well for organizing supplies in the sewing and painting zones, letting everything stay visible and easy to grab. Wall-mounted shelves and pegboards saved floor space for tools and materials, while a fold-down table in the corner created extra work surface without crowding the room. Labeling containers also made it simple to keep things tidy.
How long did the transformation from spare room to finished studio actually take, including any planning and shopping? My schedule is packed, and I’m trying to gauge if I could tackle a similar project in small chunks.
The entire transformation, from initial planning and shopping to the finished studio, took about three weeks. The process was split into manageable phases, like clearing the space, sourcing materials, assembling furniture, and organizing supplies. Tackling it in small sessions—an hour or two each day—helped balance the project with a busy schedule.
After setting up the studio, what was the biggest maintenance or organizational challenge Alex faced, and how did they address it to keep the workspace functional?
Alex’s main challenge after setting up the studio was keeping tools and materials organized as projects multiplied. To handle this, Alex introduced labeled storage bins and mounted pegboards for tools, making it easy to find and store items quickly. This system helped keep the workspace tidy and efficient, allowing for smooth workflow even during busy periods.
After getting the studio up and running, what was the first step Alex took to actually start making profit, like hosting workshops or selling products, and how did that transition go?
Once the studio was set up, Alex’s first step toward making a profit was hosting small group workshops on weekends. She promoted these locally and kept class sizes manageable. The transition went smoothly because she focused on beginner-friendly projects, which attracted community interest and helped her build a loyal customer base right from the start.
For someone wanting to scale their own space for future business needs, what features or layouts would you recommend prioritizing based on Alex’s experience?
Based on Alex’s experience, it’s smart to prioritize flexible storage solutions, dedicated work zones for different tasks, and plenty of natural light. Modular furniture that can adapt as your business grows is also helpful. Consider an open layout that allows easy movement and space for future equipment or additional workstations.
I noticed the budget was under $3,000—can you share which items Alex prioritized spending on first and if there were any unexpected expenses that came up during the renovation?
Alex focused on allocating the budget to essential items like sturdy worktables, quality lighting, and versatile storage solutions first, as these were crucial for setting up a functional workspace. Some unexpected expenses did pop up, such as upgrading the electrical outlets to handle more equipment and fixing minor wall damage discovered during the renovation.
Do you know how long the entire transformation took from start to finish? I’m planning something similar but only have weekends available to work on it, so a rough timeline would help set my expectations.
The article mentions that the transformation took about eight weeks from start to finish. Since the owner worked mostly on weekends, this timeline should give you a good reference for your own project, especially if you have a similar schedule and room size.
Did Alex run into any unexpected expenses during the renovation that almost pushed the project over the $3,000 budget? If so, how were those handled or what was prioritized?
Alex did encounter some surprise expenses, mainly when discovering old wiring that needed to be replaced for safety. This could have pushed the project over budget, but to manage costs, Alex decided to handle some finishing touches, like custom shelving, at a later stage. Essential upgrades and safety were prioritized over purely aesthetic improvements.
For ventilation, especially with small woodworking projects, what kind of setup did Alex choose to keep the air clear without breaking the budget?
Alex opted for a combination of a box fan placed in the window and a portable air purifier with a HEPA filter. This setup kept dust levels low during woodworking without requiring expensive ventilation systems. The box fan exhausted air outdoors while the purifier captured fine particles left behind.
Did Alex encounter any issues with the existing electrical outlets when setting up equipment for different craft zones? If so, what adjustments were made to ensure safety and functionality?
Alex did encounter a few issues with the existing electrical outlets, as there weren’t enough in convenient locations for all the craft zones and some circuits couldn’t handle heavier equipment. To address this, Alex consulted an electrician who added extra outlets and upgraded certain circuits. This ensured that each area had safe, reliable power for its specific equipment.
I’m curious about workflow optimization—were there any initial mistakes in the layout or tool selection that Alex had to adjust after starting work in the studio?
Alex did encounter some initial challenges with the studio layout and tool selection. At first, tools were stored too far from the main work area, causing unnecessary movement. Additionally, some bulky equipment took up prime workspace. Alex later rearranged the layout to keep frequently used tools within arm’s reach and swapped out oversized items for more space-efficient options, which significantly improved workflow.
I noticed Alex kept the renovation under $3,000. Could you share more details on which materials or tools offered the best balance between quality and affordability when setting up the studio?
Alex prioritized multipurpose furniture and durable, budget-friendly materials like plywood for shelving and work surfaces. For tools, essential items such as a cordless drill, basic hand tools, and a reliable cutting mat were chosen for their long-term value. Repurposing existing decor and shopping at local hardware stores also helped keep costs low without sacrificing quality.
The article mentions zones for different craft activities. How flexible are those designated areas if Alex wants to switch from, say, sewing to hosting a workshop, or do some zones stay permanent?
The zones Alex created are designed to be quite flexible. While some areas, like storage or large equipment spots, tend to remain permanent due to their setup, most workstations can be reconfigured. This allows Alex to easily switch from personal projects like sewing to group activities or workshops by moving tables and supplies around as needed.