
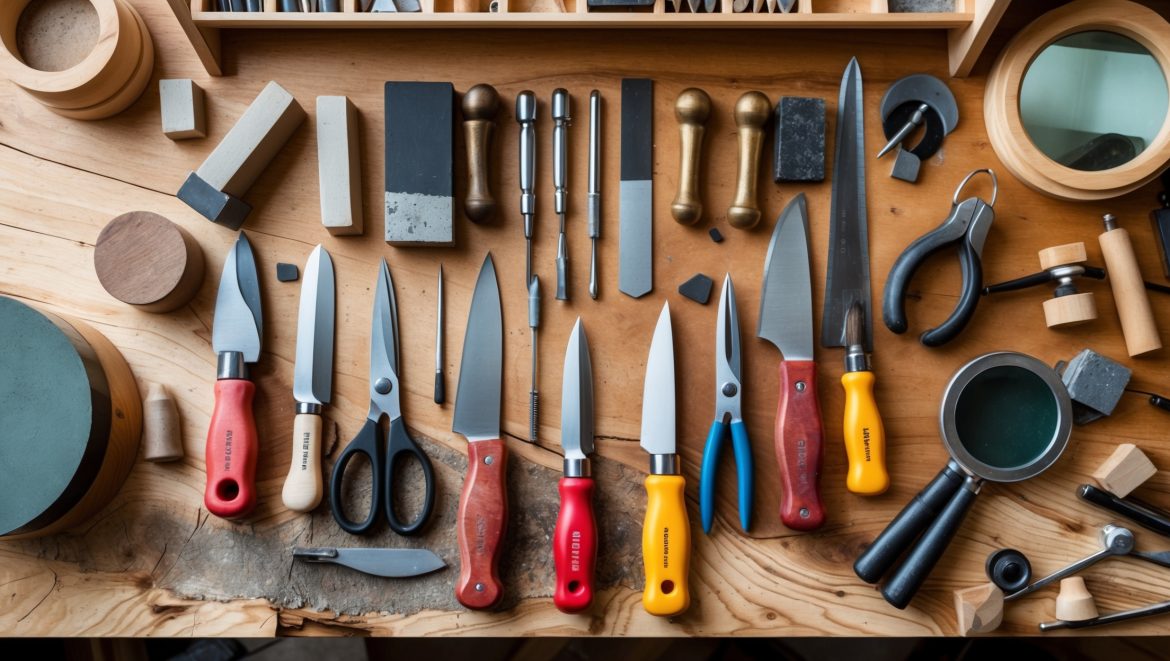
Introduction: Why Tool Sharpening Matters in Your DIY Craft Studio
In the vibrant world of DIY, crafts, and creative living, your tools are extensions of your hands, shaping raw materials into works of art. Whether you’re a paper crafter, woodworker, jewelry maker, or textile artist, the sharpness of your tools directly affects your efficiency, safety, and the quality of your finished projects. Dull blades don’t just slow you down—they can cause ragged cuts, frayed edges, and even dangerous slips that risk injury or ruined materials. Regular sharpening isn’t just for professionals; it’s an essential habit for every craft studio, from the beginner’s nook to the seasoned artisan’s workshop.
This comprehensive guide is designed for the hands-on creative who wants to master tool sharpening at home. We’ll dive into the best sharpening methods for common craft tools, essential maintenance routines, and practical safety tips tailored for a DIY studio environment. You’ll gain confidence in keeping your scissors, knives, chisels, and specialty blades performing at their best, ensuring every cut is clean and every project a pleasure. Let’s unlock the full potential of your toolkit—safely, affordably, and with the satisfaction of doing it yourself.
Understanding Tool Sharpening: The Basics
What is Sharpening?
Sharpening restores the keen edge of a cutting tool by removing metal from its surface, creating a precise angle where two surfaces meet. This edge—measured in microns—is what allows your tool to slice, trim, or carve with minimal force and maximum control.
When Should You Sharpen?
- Performance drops: Tools require more effort to cut or snag on materials.
- Visual dullness: Blade edge appears rounded or nicked under light.
- Irregular results: Cuts are jagged, torn, or imprecise despite proper technique.
- Routine maintenance: For frequently used tools, a light touch-up every few projects keeps edges optimal.
Common Craft Tools That Need Sharpening
- Scissors (fabric, paper, general purpose)
- Craft knives and utility blades
- Chisels and gouges (wood, linoleum, leather)
- Rotary cutters
- Awls and punches
- Specialty blades (X-Acto, scalpel, carving knives)
Essential Sharpening Methods for DIY Craft Studios
1. Sharpening Stones (Whetstones)
Sharpening stones are versatile, affordable, and ideal for most hand tools. They come in various grits, from coarse (removing nicks) to fine (polishing edges).
- Best for: Chisels, knives, scissors, specialty blades
- How to use: Soak water stones as recommended. Hold the blade at the correct angle (usually 20° for knives, 30° for chisels). Slide the edge across the stone in smooth, even strokes, alternating sides. Finish on a finer grit for a razor-sharp edge.
- Studio tip: Use a honing guide for consistent angles, especially on chisels and planers.
2. Sharpening Rods and Honing Steels
These cylindrical tools maintain a sharp edge between full sharpenings, ideal for quick touch-ups.
- Best for: Craft knives, rotary cutter blades
- How to use: Hold the rod vertically. Draw the blade down and across the rod at the correct angle several times per side.
- Studio tip: Keep a ceramic honing rod at your workstation for daily maintenance.
3. Diamond Files and Plates
Diamond abrasives cut quickly and work well on hardened tool steels.
- Best for: Small blades, scissors, intricate carving tools
- How to use: Gently stroke the blade along the diamond surface, maintaining the proper angle. Use light pressure to avoid uneven removal.
- Studio tip: Color the bevel with a marker to track your sharpening progress.
4. Scissor Sharpeners
Specialized devices for aligning and sharpening scissor blades, ranging from simple pull-through models to professional jigs.
- Best for: Fabric, paper, and utility scissors
- How to use: Follow manufacturer instructions. Typically, you’ll open the scissors, place blades in the guide, and make several smooth passes.
- Studio tip: Avoid using universal knife sharpeners on scissors; the angles differ and can worsen performance.
5. Rotary Blade Sharpeners
Handheld or tabletop tools designed for rotary cutter blades used in quilting or paper crafts.
- Best for: Rotary cutter blades
- How to use: Insert the blade and rotate per instructions. Some models use abrasive disks; others rely on friction and ceramic elements.
- Studio tip: Always clean blades before sharpening to prevent debris from scratching the edge.
6. Sandpaper and Lapping Films
Adhesive-backed sandpaper or films mounted on glass or flat boards are budget-friendly and effective for small or delicate tools.
- Best for: X-Acto blades, micro chisels, fine carving tools
- How to use: Secure abrasive to a flat surface. Guide the blade in consistent strokes, progressing through finer grits.
- Studio tip: Use a drop of water for lubrication and to minimize heat.
Step-by-Step Sharpening: Practical Tutorials
Sharpening Scissors
- Disassemble: If possible, unscrew to separate blades for easier access.
- Clean: Remove adhesive, lint, or gunk.
- Angle: Place the blade flat on your sharpening stone at the original bevel (usually 60°-75°).
- Sharpen: Slide the blade across the stone, following the edge, 10-15 times.
- Deburr: Flip and gently remove the burr from the flat side with one or two light passes.
- Reassemble and test: Cut scrap material to check sharpness; repeat if needed.
Sharpening Craft Knives
- Remove blade: Use pliers and safety gloves.
- Choose method: Whetstone, diamond plate, or lapping film.
- Angle: Hold at 15°-20°.
- Stroke: Draw the blade edge-forward across the abrasive, alternating sides.
- Finish: Strop on leather or fine cardboard for a polished edge.
- Reinstall safely.
Sharpening Chisels and Carving Tools
- Flatten the back: Lay flat on fine grit to polish and remove imperfections.
- Bevel sharpening: Use a honing guide for consistency, sharpening at 25°-30°.
- Progress through grits: Start coarse, move to fine.
- Strop: Polish on leather with compound for extra sharpness.
Essential Maintenance Routines
Clean Tools Before and After Sharpening
Remove all debris, glue, and residue with isopropyl alcohol or warm soapy water (dry thoroughly to prevent rust). Clean stones and abrasives as instructed by the manufacturer.
Store Tools Properly
- Use blade guards or tool rolls for sharp tools.
- Store in a dry, organized drawer or wall rack.
- Add silica gel packs to toolboxes to absorb moisture.
Regular Touch-Ups
- Strop blades on leather or cardboard after each session.
- Use a honing rod for quick edge refreshes.
- Mark a calendar for monthly thorough sharpening if tools see heavy use.
Check for Damage and Address Promptly
- Inspect for chips, bends, or rust regularly.
- Replace blades that can’t be safely restored.
- Apply a light oil to carbon steel tools to prevent corrosion.
Sharpening Safety: Best Practices for DIY Studios
- Personal protective equipment (PPE): Wear cut-resistant gloves and eye protection when sharpening.
- Stable work surface: Secure sharpening stones and tools to prevent slipping.
- Proper lighting: Illuminate your workspace to clearly see blade edges and debris.
- Slow and steady: Avoid rushing; focus on consistent, controlled strokes.
- Dispose of metal filings: Clean up immediately to prevent contamination of other projects.
- Safe storage: Return sharpened tools to sheaths or covers right away.
Choosing Sharpening Tools for Your Studio
Budget-Friendly Essentials
- Medium and fine grit combination stone
- Ceramic honing rod
- Diamond file set
- Leather strop
- Non-slip mat
Advanced Options for Dedicated Crafters
- Sharpening system with angle guides
- Rotary blade sharpener
- Professional scissor jig
- Lapping films for micro tools
Organizing Your Sharpening Station
- Designate a spot away from clutter and flammable materials.
- Label abrasives and tools for quick access.
- Keep a small brush or vacuum for easy cleanup.
Sharpening Myths and Mistakes to Avoid
- Myth: Sharpening is only for professionals. Reality: Anyone can learn with basic tools and patience.
- Myth: All blades use the same angle. Reality: Each tool type has an optimal bevel—check manufacturer specs.
- Mistake: Skipping grits or using too much pressure, leading to uneven edges.
- Mistake: Neglecting safety gear—accidents can happen to anyone.
- Mistake: Letting blades get too dull before sharpening; frequent light touch-ups are easier and safer.
Sharpening Specialty Craft Tools: Quick Reference
- Rotary Cutter Blades: Use a purpose-built sharpener or replace as needed. Clean before sharpening.
- Jewelry Making Shears: Sharpen on fine diamond plates; check for burrs with a loupe.
- Leatherworking Knives: Maintain with stropping and occasional fine whetstone honing.
- Linoleum Cutters: Use tiny diamond files or lapping films; avoid removing too much material.
FAQ: DIY Craft Studio Tool Sharpening
How often should I sharpen my craft tools?
Frequency depends on use: daily for heavy-duty tools, monthly for occasional use, and as soon as performance drops for all tools.
Can I use electric sharpeners?
Electric sharpeners can be fast but may remove too much material or overheat small craft blades. Stick to manual methods for better control unless the device is specifically designed for your tool type.
What’s the best way to test sharpness?
Use the tool on scrap material. For knives, gently slice a piece of paper. For chisels, shave thin wood curls. For scissors, cut a single sheet of tissue paper; it should glide smoothly with no snagging.
Conclusion: Sharpening as a Creative Ritual
Sharpening may seem like a chore, but it’s a transformative ritual for the DIY crafter. Each session is an opportunity to slow down, tune into your tools, and prepare for creative success. Regular maintenance extends the lifespan of your favorite implements, saves money on replacements, and prevents the frustration of poor performance. Most importantly, sharp tools support your safety—reducing the risk of slips and injuries that can sideline your crafting passion.
By mastering sharpening basics, choosing the right methods for your toolkit, and implementing simple safety and maintenance routines, you empower yourself as a maker. You’ll experience cleaner cuts, smoother finishes, and greater confidence in every project, knowing your tools are ready to bring your vision to life. Make sharpening part of your crafting rhythm, and you’ll find that the care you invest in your tools is reflected in the quality and joy of your creative work. Let your DIY craft studio shine, one razor-sharp edge at a time.



I noticed the article mentions that regular sharpening is important for both safety and efficiency in a craft studio. Are there any basic signs of over-sharpening, or ways to tell if I’ve taken too much metal off my scissors or blades?
Yes, over-sharpening can be an issue. Signs include noticeably thinner or uneven blade edges, a blade that feels fragile, or scissors that no longer close smoothly. If you notice the cutting edge looking wavy or the blades don’t align properly, you may have removed too much metal. Try to sharpen only when you notice dullness and use gentle, even strokes.
Could you explain more about the best maintenance routines for people with a smaller DIY studio or limited storage space? I’m looking for practical ways to keep my sharpening setup compact but effective.
For smaller studios, focus on multi-purpose tools and compact sharpening systems like small whetstones or handheld sharpeners. Store everything in a designated bin or drawer organizer to keep them together and accessible. Regularly clean and oil your tools after use to prevent buildup and rust, and schedule a quick monthly check to maintain sharpness without taking up extra space.
How often should someone with a moderate crafting schedule actually do routine maintenance sharpening? Is there a rule of thumb for how many projects or hours of use before touch-ups are needed?
For moderate crafting, a good rule of thumb is to sharpen your tools after every 10 to 15 hours of use, or after completing 3 to 5 medium-sized projects. Always check your tools for dullness—if cutting or slicing feels less smooth, it’s time for a quick touch-up regardless of the schedule.
Is there a quick way to visually check if my blade edge is sharp enough, or do I need a magnifier or special tool? Sometimes I can’t tell just by looking under regular light.
You don’t need a magnifier or special tool to check sharpness. A simple method is to hold the blade under a good light and look for reflections along the edge. A sharp edge won’t reflect light, while dull spots will appear shiny. You can also gently drag the blade across your thumbnail—if it bites in without sliding, it’s sharp.
Could you clarify how often ‘a light touch-up every few projects’ should actually be for someone who sews or paper crafts daily? I’m worried about accidentally over-sharpening my tools.
If you sew or paper craft daily, a light touch-up on your tools every week should be sufficient. This prevents over-sharpening while keeping your blades in good condition. Full sharpening can be done monthly or when you notice a drop in performance. Always use gentle strokes to avoid removing too much material.
Could you recommend any affordable sharpening tools or kits that are good for beginners? I’m trying to set up my small home studio on a budget, and I’m not sure which essentials I should prioritize for effective maintenance.
For a budget-friendly home studio, consider starting with a basic honing stone or a dual-grit sharpening stone, which works well for most scissors and craft knives. Handheld sharpeners designed for utility knives are also affordable and easy to use. If you use rotary cutters, a rotary blade sharpener is a good investment. Prioritize versatile tools you’ll use often, and remember to follow safety guidelines while sharpening.
Could you elaborate on the best way to restore scissors that have already developed small nicks along the blade? Is it possible to fix this yourself, or do you need professional help at a certain point?
You can often fix small nicks in scissors at home using a sharpening stone or fine-grit sandpaper. Gently run the blade along the sharpener at the correct angle, focusing on the nicked area until it smooths out. However, if the nicks are deep or the blades no longer align properly, it’s best to have them professionally sharpened or repaired to prevent further damage.
The article mentions touching up tools every few projects. For someone who crafts only on weekends, how often should I plan to sharpen my most-used scissors and blades?
If you craft mainly on weekends, sharpening your most-used scissors and blades once every month or two should be enough, assuming moderate use. Keep an eye on how smoothly they cut—if they start to snag or require more force, it’s time for a quick touch-up. Regular light maintenance will keep them in great shape.
You mention a light touch-up every few projects—does that mean I need to buy special sharpening stones, or are there budget-friendly, everyday items I can use for quick maintenance between bigger sharpening sessions?
You don’t necessarily need to buy special sharpening stones for light touch-ups. For everyday maintenance between major sharpening, you can use a ceramic mug’s unglazed bottom, a leather belt for stropping, or even fine-grit sandpaper. These household items work well to keep your tools sharp until you’re ready for a more thorough sharpening session.
In your experience, is hand sharpening generally better than using electric sharpeners for craft tools, or does it depend on the tool type? I’d love more insight to help me decide which approach to take in my home studio.
Hand sharpening offers greater control and is ideal for delicate or high-quality craft tools, letting you customize the edge and avoid overheating. Electric sharpeners are faster and useful for larger, durable tools, but can remove more material quickly. Which method is better really depends on the tool and your comfort level—many crafters use both depending on the situation.
Could you explain a bit more about the safety precautions you suggest, especially for DIYers working in a small home studio with kids around? I want to make sure I’m doing everything as safely as possible.
Absolutely. For a small home studio, always store sharp tools and sharpening equipment out of children’s reach, preferably in locked drawers or high shelves. When sharpening, work on a stable surface with good lighting and keep your workspace clutter-free to avoid accidents. Always use protective gear like cut-resistant gloves and clean up metal filings or sharpening debris immediately after use. Never leave tools unattended, especially if kids are present.
How often would you recommend doing routine maintenance sharpening on tools if I use them a few times a week? I want to avoid over-sharpening but still keep my cuts clean.
If you use your tools a few times a week, routine maintenance sharpening every 3 to 4 weeks is usually enough to keep edges clean without over-sharpening. In between, just keep the blades clean and do a quick touch-up with a honing tool as needed. That balance should keep your tools in top shape.
You mentioned affordable methods for tool sharpening—are there any budget-friendly products or homemade solutions you’d suggest for keeping craft studio tools sharp?
You can keep craft studio tools sharp using a few budget-friendly options. For example, a simple whetstone or diamond sharpening stone is affordable and effective for most tools. You can also use fine-grit sandpaper wrapped around a flat surface as a homemade sharpening solution. Honing rods and even an old leather belt can help maintain sharpness between sharpenings.
You mention that dull blades can cause frayed edges and dangerous slips. If my cuts are starting to feel rough even right after sharpening, what troubleshooting steps would you recommend?
If your cuts feel rough even after sharpening, double-check that you’re using the correct sharpening angle and technique for your tool. Inspect the blade for chips, nicks, or build-up that sharpening alone might not fix. Also, ensure the blade is installed securely and that the cutting surface is clean and stable.
The article mentions sharpening tools at home—do you recommend any affordable sharpening systems for beginners, especially for those of us balancing a tight family budget?
For beginners on a budget, a simple sharpening stone (whetstone) or a basic handheld sharpening tool works well for most craft studio tools. These are affordable, easy to use, and versatile. You can usually find good quality options at hardware stores or online without spending much. Just remember to follow the basic safety tips mentioned in the article for best results.
I noticed routine touch-ups are suggested, but what’s the safest sharpening method for someone with very limited space and a tight budget in a small apartment craft studio?
For limited space and budget, a handheld sharpening stone is a safe and compact option. Simply secure your tool, gently run it along the stone at the correct angle, and wipe clean afterward. Always sharpen away from your body and work slowly to maintain control. This method requires minimal storage and is very affordable.
If my scissors are leaving jagged cuts even after sharpening as you described, what might I be doing wrong? Could it be an issue with technique or the type of sharpener?
If your scissors still leave jagged cuts after sharpening, the issue could be either technique or the sharpener itself. Make sure you’re maintaining the correct blade angle and sharpening both blades evenly. Also, some sharpeners are meant for knives, not scissors, so using the right tool matters. Check for nicks or damage along the blade edge, as those may require professional repair.
Are there affordable sharpening tools or methods recommended for DIY crafters on a budget, particularly for those who work mostly with paper and fabric?
For budget-friendly sharpening, you can use a standard whetstone or a fine-grit sandpaper (like 600–1000 grit) for scissors and craft knives. A ceramic mug’s unglazed bottom also works in a pinch. For rotary cutters, specialized sharpening disks are affordable and extend blade life. Always finish by wiping blades clean to maintain their edge.