Introduction: Crafting the Perfect Space—Without Regrets
Everyone dreams of a creative studio where inspiration flows and projects come together seamlessly. But ask any experienced DIYer, and you’ll hear tales of early mistakes: cramped work areas, endless clutter, frustrating tool hunts, or even costly safety mishaps. Setting up your first craft room is exciting, but it’s surprisingly easy to overlook essential details that affect your productivity, sanity, and even your safety. In this guide, we’ll dive into the most common beginner mistakes—straight from the trenches of real DIYers—and show you how to sidestep them. Whether you’re carving out a corner of your living room, converting a spare bedroom, or transforming a garage, these practical tips will save you time, money, and frustration. By learning from others’ missteps, you can create a craft room that truly supports your creativity, keeps you organized, and grows with your evolving projects.
1. Underestimating Workspace Needs
Don’t Box Yourself In
One of the top regrets among DIYers is not leaving enough room to work. It’s tempting to maximize storage and fill every inch with supplies, but if your work surface is too small or awkwardly placed, you’ll quickly feel frustrated. Consider:
- Project Size: Will you be quilting, painting, woodworking, or making jewelry? Each craft demands different workspace dimensions.
- Movement Flow: Leave enough clearance to move comfortably. Ideally, build in a minimum of 3 feet of open space around main work areas.
- Expandable Surfaces: Modular tables or fold-out leaves let you adjust your workspace as projects change in scale.
Plan your layout with painter’s tape on the floor to test possible arrangements before moving in furniture.
2. Ignoring Lighting Quality
Natural vs. Artificial Light
Poor lighting leads to eye strain, color mix-ups, and even accidents. Yet, many beginners rely on a single overhead bulb or ignore lighting placement entirely. Here’s how to avoid the most common pitfalls:
- Maximize Daylight: Position your primary work zone near a window. Use sheer curtains to diffuse harsh sunlight.
- Layered Lighting: Combine ambient (overhead), task (desk lamps), and accent (under-shelf) lights for flexibility.
- Color Temperature: Choose bulbs between 4000K–5000K for true-to-life colors—especially crucial for painting, fabric work, or scrapbooking.
Test lighting at night and during the day before finalizing your setup. Shadows and glare can hide flaws or cause mistakes.
3. Overcrowding with Storage—At the Expense of Function
Balance Is Key
It’s easy to get carried away with bins, drawers, and shelves. But overwhelming your space with storage can actually reduce efficiency. Common mistakes include:
- Blocking Access: Storage units that jut into pathways or block windows restrict movement and light.
- Out-of-Sight, Out-of-Mind: Deep bins or high shelves hide supplies, leading to forgotten or duplicate purchases.
- Too Much “Permanent” Storage: Fixed units aren’t easily rearranged as your needs evolve.
Opt for clear, labeled containers; open shelving for frequently used items; and a mix of mobile carts for flexibility. Regularly declutter and reassess your storage strategy.
4. Skipping Ergonomics and Comfort
Protect Your Body, Boost Your Creativity
Hours spent hunched over a table or standing on a hard floor take a toll. Many beginners use whatever chair or stool is handy, or overlook simple ergonomic fixes. Common regrets include:
- Uncomfortable Seating: Invest in a height-adjustable chair with lumbar support to prevent back pain.
- Improper Table Height: Standard desk height (28–30 inches) may be too low for standing crafts; consider adjustable-height work surfaces.
- Hard Flooring: Use anti-fatigue mats if you’ll be standing for long periods. These reduce joint strain and fatigue.
Take regular breaks to stretch and adjust your posture. Comfort leads to longer, more enjoyable creative sessions.
5. Neglecting Safety Basics
Simple Precautions, Big Impact
Even simple crafts involve risks—sharp tools, hot glue, solvents, or dust. Many first-time crafters overlook basic safety steps, leading to preventable injuries or damage. Don’t make these mistakes:
- No Fire Extinguisher: Always have a small, multi-purpose extinguisher within reach.
- Poor Ventilation: Even non-toxic glues and paints can cause headaches in small, stuffy spaces. Open windows, use fans, and consider a portable air purifier.
- Improper Tool Storage: Store sharp tools in locked drawers or on magnetic strips out of children’s reach.
- Lack of First Aid: Stock basic supplies—bandages, antiseptic, eye wash—so you can respond quickly to minor accidents.
Safety should never be an afterthought. Build it into your setup from day one.
6. Overlooking Power and Charging Needs
Plan for Today—and Tomorrow
With more crafters using electronic tools, power supply is critical. New DIYers often encounter:
- Too Few Outlets: Extension cords snaking across the floor create tripping hazards and clutter.
- Poor Placement: Outlets hidden behind heavy furniture are hard to access.
- No Charging Station: Phones, tablets, glue guns, and rotary tools all need charging—often at once.
Install a power strip with surge protection at your main work area. Mount USB charging stations under shelves. Always check the combined wattage of your devices to avoid overloading circuits.
7. Failing to Plan for Mess and Cleanup
Contain Chaos Before It Spreads
Crafting is messy by nature, but many beginners skip planning for spills, scraps, and dust. This leads to:
- Permanent Stains: Protect surfaces with washable mats or cutting boards.
- No Trash or Recycling Bins: Keep small bins within arm’s reach at every station—one for trash, one for recyclables.
- Forgotten Cleaning Supplies: Stock paper towels, wipes, and a handheld vacuum for quick tidying.
Establish a weekly cleaning routine and schedule deep cleans every season. A tidy studio is healthier and more motivating.
8. Not Customizing for Your Craft(s)
One Size Does Not Fit All
While Pinterest is full of beautiful, one-size-fits-all craft rooms, real-world needs vary. Common beginner blunders include:
- Generic Workstations: A sewing station needs a sturdy table, while a jewelry bench requires great lighting and fine tool storage.
- Ignoring Storage Needs: Yarn and fabric need open shelves for airflow, while paints and glues need cool, enclosed storage.
- Lack of Specialized Tool Racks: Custom holders and racks keep tools at hand and prevent damage.
Before buying furniture, make a list of your core activities and the equipment each requires. Build your space around these needs, not generic inspiration photos.
9. Forgetting Future Flexibility
Adapt as You Grow
Most crafters’ interests and needs evolve. Beginners often fixate on their current setup and neglect modularity. Avoid:
- Permanent Fixtures: Heavy, fixed furniture limits reconfiguration.
- Single-Purpose Storage: Choose units that can be adapted, stacked, or moved as your projects change.
- No Room to Expand: Leave at least one open wall or corner for future upgrades.
Use rolling carts, stackable bins, and furniture with adjustable shelves to stay flexible. Revisit your setup every few months to see what’s working—and what’s not.
10. Ignoring Inspiration and Display Areas
Creativity Needs Visual Fuel
A purely functional space can feel sterile or uninspiring. Many beginners wish they’d included areas for displaying finished projects, mood boards, or inspiration clippings. Consider:
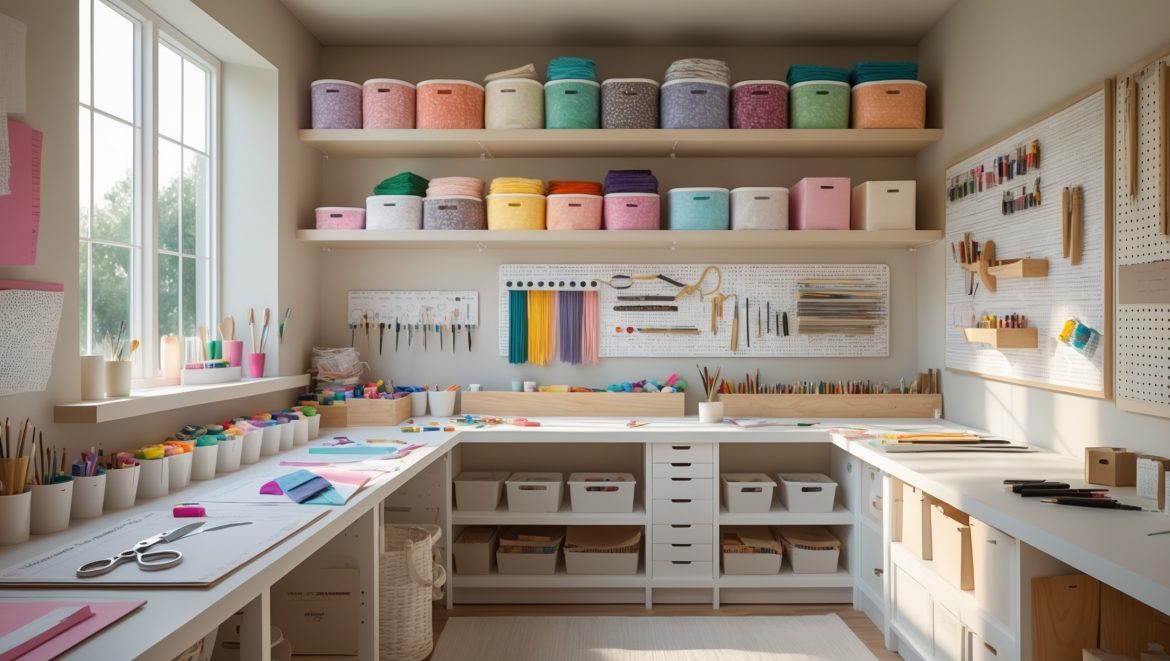
- Pegboards or Corkboards: Display tools, works-in-progress, or inspirational images.
- Floating Shelves: Showcase your best pieces to remind yourself of your progress.
- Rotating Displays: Swap out seasonal or themed projects to keep your space feeling fresh.
Inspiration boards aren’t just pretty—they help you organize ideas and stay motivated through creative blocks.
Conclusion: Build Smarter, Create Happier
Setting up your craft room is an investment in your creative future. By learning from the real-world mistakes of DIYers who have gone before you, you can avoid wasted money, frustration, and regrets. The most successful craft spaces are flexible, comfortable, safe, and truly tailored to the maker’s needs—not just a copy of a magazine photo. Take the time to plan your layout, lighting, and storage with your specific crafts in mind. Don’t neglect comfort or safety, and always leave room for your practice to evolve. Remember, no setup is perfect from day one—regularly reassessing your space will keep it aligned with your creativity. With these practical lessons in hand, you can design a craft room that not only supports your projects but also inspires you to keep creating, learning, and enjoying the DIY journey. Happy making!