Introduction: How a Spare Room Became a Textile Art Studio
For many crafters, the dream of having a dedicated studio space feels out of reach—especially when living in a typical home or apartment. But what if you could transform a simple spare room into a hub of creativity, tailored to your unique workflow and projects? In this in-depth case study, we’ll explore the real-life transformation of a blank, uninspired spare room into a vibrant textile art studio. You’ll get a detailed look at the planning process, practical layout solutions, cost-effective storage upgrades, and the workflow tweaks that made all the difference. Whether you’re a quilter, embroiderer, or fiber artist, discover actionable insights and clever ideas to inspire your own DIY studio journey.
This isn’t a generic studio setup guide—it’s a deep dive into the challenges, choices, and problem-solving mindset that turn an ordinary domestic space into a productive, inviting creative haven. From taming fabric chaos to optimizing lighting for detailed work, every solution in this story is field-tested and ready to adapt to your own needs. Let’s unlock the full potential of your home’s unused corners and create a textile studio that supports your art—and your wellbeing.
Room Selection: Evaluating the Space
Assessing Size and Shape
The journey began with a 10’ x 12’ spare bedroom—once a catchall for storage and occasional guests. The rectangular shape was a plus, making it more flexible for furniture arrangement. Key questions considered:
- Is there enough floor space for a large work table and storage?
- Are outlets and natural light sources accessible?
- What’s the state of the flooring—can it handle dropped pins and fabric scraps?
Identifying Limitations
The room had some challenges: only one window (north-facing, limiting sunlight), a closet with sliding doors, and beige carpet that showed every speck of lint. The owner listed out both assets and hurdles to inform the design plan.
Vision and Priorities: Setting the Studio’s Purpose
Defining Core Activities
Before making any purchases, the owner mapped out exactly how the studio would be used:
- Quilting and patchwork piecing
- Hand and machine embroidery
- Garment sewing and mending
- Fabric storage and project staging
Listing Must-Have Features
- Sturdy worktable with enough surface for cutting fabric
- Ergonomic sewing station with a comfortable chair
- Accessible storage for fabric, thread, and tools
- Good task lighting and some natural light
This clear vision helped avoid unnecessary spending and guided every design choice.
Studio Layout: Planning for Workflow and Comfort
Work Zones
The room was divided into three functional zones:
- Cutting & Prep: Large table near the window for natural light; cutting mat and rulers always accessible.
- Sewing & Embroidery: Sewing machine against a side wall, with pegboard above for tools and thread. Rolling chair for easy movement.
- Storage & Staging: Closet outfitted with shelves, plus open bins for ongoing projects and fabric organization.
Furniture Selection & Placement
Rather than buying new, the owner repurposed a sturdy dining table as a cutting station and sourced a secondhand office chair. Adjustable shelving was installed in the closet to maximize storage from floor to ceiling. Every piece was placed with workflow in mind—no more running laps across the room for each step of a project.
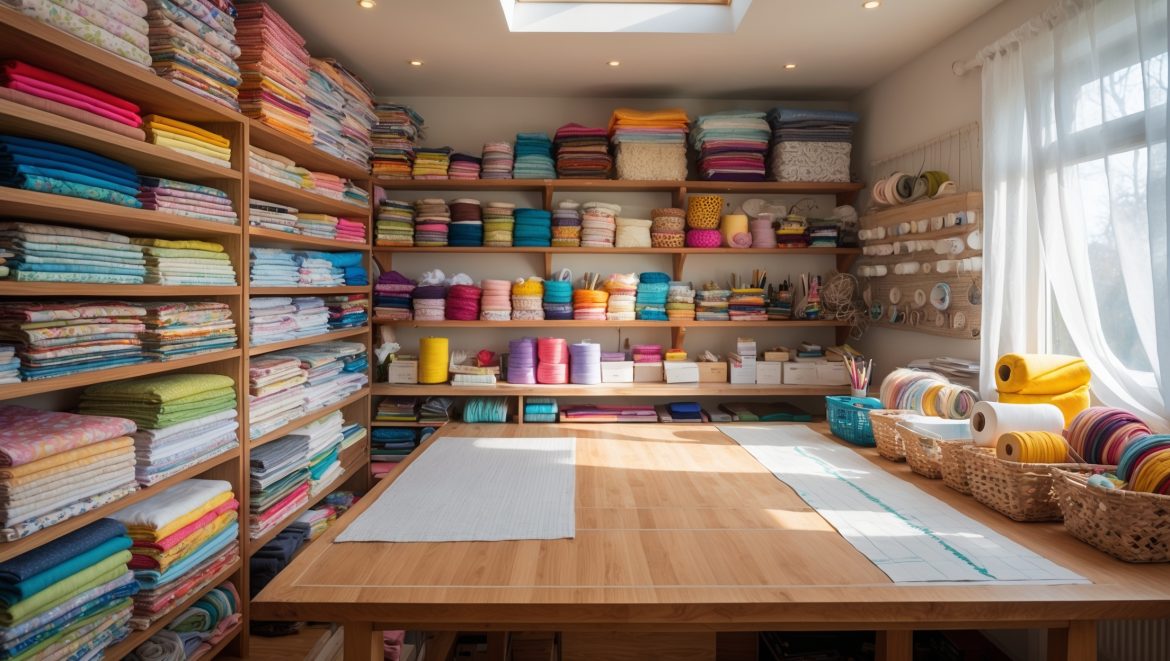
Storage Solutions: Taming Fabric and Tools
Fabric Organization
- Clear plastic bins sorted by fabric type (cotton, linen, specialty blends), stacked on closet shelves.
- Larger fabric cuts folded around comic book boards and stored upright in open cubes for easy viewing.
- Scrap basket under the cutting table for offcuts and trimmings.
Notions & Tool Storage
- Pegboard above the sewing table for scissors, rotary cutters, rulers, and essential hand tools.
- Magnetic strips mounted on the wall to hold pins and needles safely.
- Thread racks hung on the closet door for visibility and access.
- Small bins in drawers for bobbins, buttons, snaps, and fasteners.
Project Management
Ongoing projects each got their own large zippered pouch, stored in a labeled bin. This eliminated the dreaded “where did my pieces go?” panic and made it easy to pick up where she left off.
Lighting Upgrades: Achieving Perfect Illumination
Tackling Dim Corners
The north-facing window provided gentle ambient light but wasn’t enough for detailed work. Key upgrades included:
- LED adjustable desk lamp with a daylight color temperature (5000K) at the sewing station
- Clip-on task lights for the cutting table corners
- Battery-powered puck lights inside the closet for easy fabric identification
Layering Lighting for Comfort
Layers of light were prioritized to reduce eye strain and maintain a cozy atmosphere for long creative sessions. All new lighting used energy-efficient bulbs and could be positioned as needed.
Climate and Comfort: Creating a Pleasant Working Environment
Temperature Control
- Portable ceramic space heater with tip-over protection for winter
- Oscillating tower fan for summer airflow
- Blackout curtains to minimize heat gain on sunny days
Noise and Distraction Reduction
- Weatherstripping added to the door to muffle household sounds
- Small Bluetooth speaker for music and podcasts, enhancing focus
Budget Breakdown: Real Costs of the Transformation
Initial Investment
- Secondhand worktable: $40
- Office chair (thrifted): $30
- Pegboard and hooks: $25
- LED desk lamp: $35
- Plastic storage bins: $50
- Thread racks and organizers: $20
- Miscellaneous (mounting hardware, labels): $15
- Total: $215
Where to Save and Where to Splurge
The largest savings came from repurposing furniture and shopping secondhand. The biggest splurge—good lighting—paid off immediately in reduced eye strain and improved accuracy.
Workflow Tweaks: Practical Lessons Learned
Adapting the Layout
After a few months of use, the owner noticed that fabric piles tended to encroach on the cutting area. The solution? Adding a small rolling cart under the table for “in progress” pieces. Rolling furniture made it easy to clear space for large projects or group sessions.
Routine Maintenance
- Weekly sweep/vacuum to keep lint and threads under control
- Monthly reorganization of fabric and tool bins to prevent clutter buildup
- Quarterly check of lighting and power strips for safety
Unexpected Challenges and Creative Solutions
Managing Limited Outlets
With only two wall outlets, power management was crucial. The owner used a surge-protected power strip mounted under the worktable and labeled each plug for easy troubleshooting. Power-hungry tools weren’t used simultaneously to avoid tripping the circuit.
Dealing with Carpeted Floors
Carpet fibers trapped threads and pins. A clear plastic floor mat under the sewing area caught most debris and made it easy to sweep up. A magnetic pin picker made quick work of stray needles.
Safety and Wellbeing in the Studio
Good Habits
- Never leaving irons or heat tools unattended
- Keeping sharp tools on magnetic strips or in covered containers
- Storing heavy items on lower shelves to prevent tipping
Ergonomics
- Chair height and table height adjusted for proper posture
- Foam mats near standing workstations for comfort
- Frequent breaks for stretching and eye rest
Results: The Studio in Daily Use
Creative Output and Satisfaction
With the new setup, project completion rates increased, and mistakes caused by poor lighting or clutter dropped. The owner found herself spending more time in the studio, enjoying both the process and the results.
Hosting and Sharing the Space
The flexible layout made it possible to invite a friend for joint sewing sessions. The clear organization system made it easy for guests to find tools and clean up afterward. The studio became not just a workspace, but a space for creative community.
Conclusion: Adapting Ideas for Your Own Textile Studio
Transforming a spare room into a textile craft studio is about so much more than furniture and storage bins. It’s a process of understanding your creative habits, identifying what supports your best work, and making choices that fit your real-life needs (and budget). This case study shows that even with limitations—like small space, limited natural light, or carpeted floors—there are smart, affordable solutions that can give you a studio where you truly want to spend time.
Key takeaways for your own project:
- Start with a clear list of your main activities and must-have features.
- Divide your room into functional zones to streamline your workflow.
- Repurpose and thrift where possible to keep costs down.
- Prioritize lighting and ergonomic comfort—these are investments in your creativity and health.
- Stay flexible and be willing to tweak your setup as you go.
Most of all, remember that your studio should reflect your creative journey. Adapt these ideas, experiment, and don’t be afraid to make changes as your skills and interests evolve. With a little planning and a lot of heart, any spare room can become a haven for textile art—one that nurtures your craft and your joy every single day.


Could you share more about how you handled the beige carpet showing lint and threads? Did you find any particular flooring solution that worked for cleaning up textile scraps easily in your space?
The beige carpet did make lint and threads more noticeable, which was a challenge at first. Switching to a low-pile area rug helped minimize how much debris got stuck, and it was much easier to vacuum regularly. Some crafters prefer hard flooring like laminate or vinyl for even easier cleanup, but in this case, the rug provided a good balance of comfort and maintenance.
In the article, you mention repurposing a closet with sliding doors for storage. Did you encounter any issues with accessibility or organization using that closet for art supplies?
Repurposing the closet with sliding doors worked well for maximizing space, but there were some minor accessibility challenges. Sliding doors can limit access to only half the closet at a time, which made it important to use labeled bins and organizers for easy reach. Careful arrangement helped keep art supplies tidy and visible.
Can you share more about how you organized fabric and tools with the storage upgrades? I have a similar-sized spare room and I’m struggling to find affordable storage that actually keeps things tidy.
We focused on maximizing vertical space with wall-mounted shelves for fabric, sorted by color and type in transparent bins. Pegboards were installed for hanging tools, keeping them visible and within reach. Under-table rolling carts and stackable boxes helped store smaller supplies. Most items were sourced from budget-friendly stores and repurposed furniture, ensuring everything stayed organized without breaking the bank.
I noticed you had a north-facing window with limited sunlight. What lighting solutions ended up working best for tasks like embroidery or color matching in those conditions?
For embroidery and accurate color matching in the north-facing room, a combination of daylight-balanced LED desk lamps and an overhead light with a high CRI (Color Rendering Index) worked best. Adjustable task lamps placed close to the work area minimized shadows and provided consistent, bright lighting, making it much easier to see fine details and true fabric colors.
I’m curious about the process of converting the closet with sliding doors into usable storage. Were there any particular organizers or configurations that maximized that space for fabric and supplies?
The article describes removing the closet’s sliding doors to create an open, accessible space. Shelving units were added to maximize vertical storage, and clear bins were used to organize fabric by color. Smaller containers held supplies like threads and tools, making everything easy to find and reach. This configuration helped transform the closet into efficient, visible storage for textile materials.
I’m curious about how you handled the limited natural light from the single north-facing window. Did you install extra lighting, and if so, what kind worked best for your detailed textile projects?
We did address the limited natural light by installing a combination of daylight-balanced LED fixtures and adjustable task lamps. These lights provided consistent, bright illumination, which really helped with detailed textile work. Positioning the task lamps at workstations reduced shadows, making it easier to work on intricate designs without straining your eyes.