Introduction: Why Electrical Safety Matters in Your DIY Craft Studio
In the world of DIY, crafts, and creative living, your studio is both a sanctuary and a powerhouse. Power tools, glue guns, heat presses, LED lighting, and even the humble sewing machine all depend on a reliable electrical setup. Yet, electrical safety is often overlooked—until a breaker trips, a tool won’t start, or worse, a fire hazard emerges. Whether you’re carving out a corner in your basement or building a dedicated backyard shed, understanding and maintaining electrical safety is not only about protecting equipment, but also about safeguarding your creative journey and peace of mind. This detailed checklist will guide you through everything—from initial inspection and setup to daily checks and troubleshooting. You’ll learn which components to prioritize, common hazards to watch for, and how to power your creativity without risk. Let’s make sure your workspace is as safe as it is inspiring.
Section 1: Assessing Your Studio’s Electrical Infrastructure
1.1 Evaluate Electrical Service Capacity
Before you plug in your first tool, confirm that your studio’s electrical panel can handle the equipment you plan to use. Overloaded circuits are a leading cause of electrical fires in home studios.
- Check the amperage: Most home studios need at least a 20-amp dedicated circuit for tools and lighting. Heavy equipment may require more.
- Identify dedicated circuits: Major tools (e.g., table saws, heat presses) should have their own circuits to avoid overload.
- Consult with a licensed electrician: Especially for outbuildings, garages, or older homes where wiring may not meet current codes.
1.2 Inspect Outlets and Wiring
Worn or outdated outlets and wiring can cause arcing, shorts, and even fires. Inspect each outlet in your space:
- Test all outlets: Use a plug-in outlet tester to detect wiring faults (open ground, reverse polarity, etc.).
- Look for discoloration or scorch marks: These indicate past overheating and warrant immediate replacement.
- Ensure ground fault circuit interrupters (GFCIs): Required for studios in basements, garages, or anywhere moisture is present. Test GFCIs monthly using the built-in button.
- Upgrade ungrounded outlets: Two-prong outlets should be replaced with grounded, three-prong outlets by a professional.
1.3 Label Your Circuit Breaker Panel
In an emergency, you need to know which breaker controls your studio. Clearly label all relevant breakers and create a quick-reference diagram to hang near your panel.
Section 2: Setting Up Safe Power Distribution
2.1 Choose Quality Power Strips and Surge Protectors
Avoid daisy-chaining cheap power strips or using extension cords as permanent wiring. Instead:
- Use UL-listed surge protectors: These shield sensitive electronics (computers, sewing machines, lighting) from voltage spikes.
- Power strips with built-in circuit breakers: Add another layer of safety if a tool draws too much current.
- Never plug a power strip into another power strip: This can quickly overload circuits and increase fire risk.
2.2 Manage Cords and Cables
Tripping over cords is not only annoying—it’s hazardous. Proper cord management increases both safety and efficiency.
- Route cords along walls: Use cord channels or adhesive clips to keep cables off the floor.
- Avoid running cords under rugs: This can cause overheating and hidden wear.
- Replace damaged cords immediately: Frayed or cracked insulation exposes live wires.
- Label cords at both ends: Helps quickly identify what’s plugged in during troubleshooting.
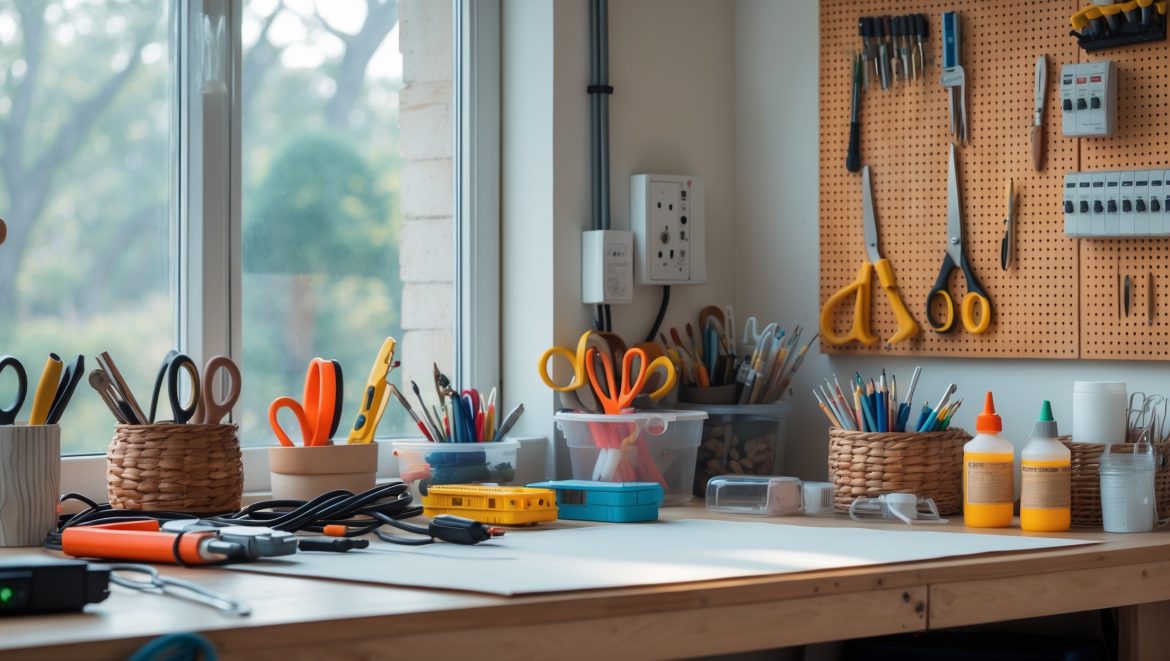
2.3 Install Adequate Outlets
Insufficient outlets tempt you to over-rely on extension cords. Plan for more outlets than you think you’ll need, spaced for your workflow.
- Install outlets every 6–8 feet: Especially along workbenches and high-use areas.
- Include ceiling outlets: Handy for overhead lighting or hanging tools.
- Consider USB outlets: For charging mobile devices and small electronics.
Section 3: Daily Electrical Safety Practices
3.1 Pre-Session Safety Walkthrough
Develop a quick, repeatable routine before you begin crafting:
- Unplug tools not in use: Prevents phantom loads and reduces fire risk.
- Visually inspect cords and plugs: Look for damage or loose connections each time.
- Check that outlets and power strips are cool to the touch: Warmth can signal overloading or faulty equipment.
- Keep flammable materials away from outlets and cords: Store paper, fabric, and solvents well clear of heat sources.
3.2 Smart Tool Usage
Every tool has its own electrical quirks. Protect yourself and your gear by following manufacturer safety guidelines:
- Don’t bypass safety switches: Many power tools include safety interlocks—never disable them.
- Let tools cool before unplugging: Especially heat guns, glue guns, and irons.
- Use tools only with rated extension cords: Check the amperage of both tool and cord to avoid overheating.
- Store tools unplugged: Prevents accidental activation or shorts.
3.3 Moisture Management
Many craft studios are located in basements, garages, or sheds where moisture is a concern. Protect outlets and cords from water exposure at all times.
- Use outlet covers: Especially in areas prone to splashes or spills.
- Elevate power strips: Place them on shelves, not the floor, to avoid water damage.
- Install a dehumidifier if needed: Reduces corrosion and minimizes shock risk.
Section 4: Periodic Maintenance and Inspection
4.1 Monthly Electrical Checklist
- Test all GFCI outlets.
- Inspect outlet covers and replace any that are cracked.
- Check cords for wear and replace as needed.
- Make sure all power strips and surge protectors function correctly (check indicator lights).
- Vacuum dust from around outlets, cords, and your breaker panel.
4.2 Annual Professional Inspection
Even the most diligent DIYer can overlook hidden hazards. Schedule a licensed electrician to inspect your studio’s wiring and outlets annually, especially if your space is older or heavily used. They can check for loose connections, overloaded circuits, and compliance with the latest code requirements.
4.3 Update and Upgrade
- Stay informed about new safety devices (smart breakers, Wi-Fi-enabled surge protectors, etc.).
- Replace surge protectors every 3–5 years.
- Upgrade outlets to tamper-resistant models for households with children.
Section 5: Troubleshooting Common Electrical Issues
5.1 Circuit Breaker Trips
If your breaker trips often, it’s a sign you’re drawing too much power or there’s a short. To troubleshoot:
- Unplug all devices, then reset the breaker. Plug in tools one at a time to isolate the issue.
- If tripping persists, consult an electrician—there may be a wiring problem or need for a higher-capacity circuit.
5.2 Flickering Lights or Brownouts
Fluctuating voltage can damage sensitive electronics and pose a fire risk.
- Check that all bulbs and fixtures are securely installed.
- Call an electrician if you notice persistent flickering or dimming when you turn on tools—this may signal insufficient wiring or a failing breaker.
5.3 Warm Outlets or Burning Smells
Immediately unplug all devices and cut power at the breaker if you notice heat or unusual odors. These are early warning signs of potentially dangerous faults.
Section 6: Advanced Protections and Upgrades
6.1 Arc-Fault Circuit Interrupters (AFCIs)
Modern code recommends AFCIs for many residential spaces. These breakers detect dangerous arcing conditions that traditional breakers miss. Ask your electrician if your studio would benefit from an AFCI upgrade.
6.2 Whole-Studio Surge Protection
For valuable electronics and tools, consider a whole-studio surge protector installed at the panel. This defends against lightning surges and utility spikes, offering more comprehensive protection than plug-in devices alone.
6.3 Smart Monitoring Devices
Wi-Fi-enabled power strips and smart plugs allow you to monitor energy usage, set timers, and remotely cut power to tools. These upgrades can add both safety and convenience to your workflow.
Conclusion: Empowering Safe Creativity
Electrical safety isn’t a one-and-done checklist—it’s an ongoing practice that underpins every project you tackle in your craft studio. By assessing your infrastructure, setting up safe power distribution, following daily best practices, and keeping up with regular maintenance, you not only protect your investments but also ensure that your creative energy is focused on building, making, and designing—not worrying about hazards. Remember, even seasoned DIYers benefit from periodic professional inspections and staying current with evolving safety technology. Invest in quality components, remain vigilant about small warning signs, and cultivate habits that make safety second nature. With the right setup and mindset, your DIY craft studio will be a haven for inspiration, productivity, and peace of mind for years to come. Power your creativity wisely—the most beautiful projects are made in spaces where safety and imagination go hand in hand.


If I’m setting up my craft studio in a detached backyard shed, what’s the best way to safely add more outlets without overloading my existing electrical service?
For a detached shed, the safest way to add outlets is to have a licensed electrician run a dedicated circuit from your main panel to the shed. This ensures your craft studio has enough capacity for your tools without overloading your home’s electrical service. Avoid using multiple extension cords or daisy-chaining power strips, as these can be fire hazards.
You mention that power tools and lighting should be on a 20-amp circuit. How do I figure out how many devices I can safely run at the same time without risking overload?
To determine how many devices you can run on a 20-amp circuit, first check the wattage of each device. Add up the total wattage, then divide by 120 volts to get the total amps. Keep the total below 16 amps (80% of the circuit’s capacity) for safety. This helps prevent tripped breakers or overheating.
If my studio is in an older home and I don’t know when the wiring was last updated, what specific signs should I look for that might indicate it’s time to call an electrician before setting up my tools?
If your studio is in an older home, watch for signs like flickering or dimming lights, outlets or switches that feel warm, buzzing or crackling sounds from outlets, frequent blown fuses or tripped breakers, and any outlets without three-prong (grounded) connections. Noticing any of these issues means you should call an electrician before setting up your equipment.
When inspecting for discoloration or scorch marks on outlets, what’s the best way to clean or repair minor issues, or is replacement always necessary for safety?
If you notice any discoloration or scorch marks on an outlet, it’s a sign of overheating and potential electrical issues. Cleaning is not recommended, as this could mask a serious problem. For safety, it’s best to stop using the outlet and have it inspected and replaced by a qualified electrician rather than attempting any DIY repairs.
If I discover open ground or reverse polarity on an outlet with the tester, what are my immediate next steps before continuing to use my studio?
If your tester shows open ground or reverse polarity, stop using that outlet right away to avoid electrical hazards. Unplug anything connected to it. Mark the outlet so others don’t use it, and contact a qualified electrician to inspect and fix the wiring before you continue work in your studio.
Could you elaborate on how to determine if a specific tool requires its own dedicated circuit, especially if I use several devices at the same time?
To decide if a tool needs its own dedicated circuit, check its wattage or amperage rating—usually found on a label. Add up the total amperage of devices you plan to use together. If the sum approaches 80% of your circuit’s capacity (typically 15 or 20 amps), you should use a separate circuit for high-powered tools to prevent overloads and tripped breakers.
After testing my outlets and finding some issues, what are some common troubleshooting steps I can try myself before calling in a professional?
If you notice issues with your outlets, start by checking if the circuit breaker has tripped and reset it if needed. Make sure all plugs and cords are in good condition and firmly connected. Try plugging another device into the same outlet to rule out the appliance. If the outlet is still dead, avoid using it until a professional can inspect it.
When inspecting outlets with a tester, if I find an issue like open ground or reverse polarity, is that something a DIYer can safely fix, or should I always call an electrician?
If your tester finds problems like open ground or reverse polarity, it’s usually best to call a licensed electrician, especially if you’re not experienced with electrical repairs. These issues can be hazardous and may indicate deeper wiring problems that require professional attention to ensure your safety and proper function of your studio.
If my studio is in an older garage and I’m not sure what kind of wiring was used, what’s the safest way to check if the outlets and circuits are up to current electrical codes?
The safest approach is to hire a licensed electrician to inspect your garage studio’s outlets and wiring. They can determine if everything meets current electrical codes and identify any outdated or unsafe wiring. Avoid opening panels or outlets yourself, as older wiring can pose shock or fire risks if not handled properly.
What would be the most cost-effective way to update the electrical setup in a backyard shed that was never wired for heavy tools, without having to rewire everything?
You might consider using a heavy-duty extension cord rated for outdoor use to power individual tools, but only as a temporary measure and not for high-demand equipment. For a safer, more permanent solution, adding a dedicated circuit from your main panel to the shed—perhaps with just one or two outlets—can be much more cost-effective than a full rewire, especially if you only need power for occasional heavy tool use.
If my studio is in a detached backyard shed, are there extra steps I should take to assess the electrical service capacity, beyond what you mentioned for regular basement setups?
Yes, a detached shed often has a separate electrical line from your main panel, so you should check if the wiring and breaker size are suitable for your intended equipment. It’s also important to confirm that the shed has proper grounding and weatherproofing for all outlets and fixtures, to handle outdoor conditions safely.
For someone on a tight budget, are there any must-do safety checks from your checklist that I should prioritize before investing in new equipment for my craft studio?
Absolutely, you should prioritize checking that your outlets and cords are in good condition—look for fraying or exposed wires and make sure nothing feels loose or warm after use. Also, test your circuit breakers or fuses to be sure they’re working. These steps are low-cost but crucial for safety before adding any new equipment.
When inspecting outlets with a plug-in tester, what should I do if I discover reverse polarity or an open ground? Is this something a DIYer can fix, or is it always a job for an electrician?
If your tester shows reverse polarity or an open ground, it’s important to stop using the outlet right away because these issues can be dangerous. While some experienced DIYers can fix problems like reversed wires, hiring a licensed electrician is the safest choice, especially if you’re unsure or if the wiring is old or complicated.
Can you explain a bit more about why heavy equipment needs its own dedicated circuit? I use a couple of power tools but they’re not super big—would they still need their own circuits?
Heavy equipment or power tools often draw a lot of electricity when running, especially at startup. A dedicated circuit ensures each tool gets enough power without overloading shared circuits, which helps prevent tripped breakers or potential fire risks. Even if your tools aren’t huge, if you’re using more than one at once or if they’re rated over 15 amps, consider dedicated circuits for safety.
When you mention heavy equipment possibly needing more than a 20-amp circuit, what’s the process for figuring out exactly how much amperage I need for things like a heat press and a sewing machine running at the same time?
To figure out the amperage needed, check each machine’s label or manual for its wattage or amperage rating. Add up the total watts for all equipment you’ll use simultaneously, then divide by your supply voltage (usually 120 in the US). That gives you the total amps needed. Always plan for a margin above your calculated need to prevent overloading circuits.
How often should I repeat the electrical safety checks mentioned in the checklist? Is this something I should do monthly, or just whenever I buy new equipment?
It’s a good idea to go through the full electrical safety checklist every three to six months, even if you haven’t added new equipment. However, you should also do a quick check each time you bring in new devices or make changes to your setup to ensure everything remains safe.
You mentioned using a plug-in outlet tester to check for wiring faults—are those reliable enough for an older house, or would you always recommend calling in an electrician for a full inspection?
Plug-in outlet testers are handy for spotting common wiring issues like reversed wires or missing grounds, even in older homes. However, they can miss some hidden or complex problems unique to older electrical systems. If your house is quite old or you notice any irregularities, it’s wise to have an electrician do a thorough inspection for peace of mind.
For smaller DIY spaces that don’t use heavy equipment, would a standard 15-amp circuit be enough, or is it still necessary to upgrade to 20 amps for safety?
For smaller DIY spaces that use mainly light tools and standard household equipment, a 15-amp circuit is usually sufficient, as long as you don’t overload it. Upgrading to 20 amps isn’t required for safety unless you plan to add more powerful equipment in the future. Just be sure to check the total wattage of everything you plan to use at once.
How can I tell if my older home studio’s wiring is really up to current codes, especially if I can’t afford to bring in an electrician right away?
To get a sense of whether your studio’s wiring meets current codes, look for warning signs like old two-prong outlets, frequent blown fuses, buzzing outlets, or visible cloth-insulated wires. Make sure outlets in damp areas are GFCI-protected. While these checks help, only a licensed electrician can be certain, so plan for a professional inspection when possible.