Introduction: Why Specialty Projects Demand Smart Studio Upgrades
DIY craft studios are as unique as the creators who use them. While a basic setup might suffice for casual crafting, specialty projects—like resin pours, miniature painting, metal clay work, or glass fusing—bring unique challenges that demand more than just a standard table and a few hand tools. Whether you’re a hobbyist expanding into new mediums or a seasoned maker pushing creative boundaries, your studio must evolve to match your ambitions. The right upgrades not only boost efficiency and workflow but also ensure safety, comfort, and professional results. This in-depth guide dives into essential workshop upgrades tailored specifically for specialty DIY projects, offering practical, actionable advice for transforming your craft space into a powerhouse of creativity and innovation. From custom ventilation for resin artists to precision lighting for miniature sculptors, learn how to make your studio work as hard as you do—and discover the investments that truly make a difference.
Assessing Your Specialty Project Requirements
Understanding Your Medium
Every creative medium has its own set of requirements. Before investing in upgrades, identify the unique demands of your favorite specialty crafts. Resin art, for example, necessitates robust ventilation due to fumes, while miniature painting calls for high-precision lighting and magnification. Metal clay, glass fusing, and polymer clay each bring specific temperature, airflow, and safety considerations. Make a list of your primary activities and any planned expansions to ensure your studio remains adaptable.
Evaluating Your Current Space
- Square Footage: Do you have enough room for new equipment or designated work zones?
- Electrical Capacity: Can your wiring handle additional lighting, ventilation, or kilns?
- Surface Materials: Are your tables, counters, and floors suited to withstand spills, heat, or sharp tools?
- Access & Organization: How easy is it to move, store, and access specialty materials and tools?
Document your current setup with photos and measurements. This will help you plan upgrades efficiently and avoid costly mistakes.
Priority Upgrade #1: Ventilation and Air Quality Solutions
Why It Matters
Many specialty crafts use materials that emit fumes, particulates, or odors—epoxy resin, spray paints, alcohol inks, and soldering flux, to name a few. Poor air quality isn’t just unpleasant; it poses serious health risks. Upgrading your studio’s ventilation is crucial for both safety and comfort.
Effective Ventilation Upgrades
- Local Exhaust Hoods: Install an adjustable fume hood or downdraft table above your primary work zone. These capture fumes directly at the source.
- Window Fans & Airflow: If possible, position box fans or window-mounted exhaust fans to pull contaminated air outdoors. Pair with a fresh air intake for balanced circulation.
- HEPA & Carbon Filtration: Invest in an air purifier with both HEPA and activated carbon filters to trap particulates and absorb odors. This is especially useful for enclosed or windowless spaces.
- DIY Ducting Solutions: Flexible ductwork can be routed from your workbench to a window or wall vent. Seal leaks with metal foil tape for efficiency.
Pro Tip
Always check the safety data sheets (SDS) for your materials to determine the specific ventilation and filtration needs for your projects. Some mediums require more intensive upgrades than others.
Priority Upgrade #2: Task Lighting for Precision Work
The Lighting Challenge
Specialty crafts often involve fine detail—think miniature painting, jewelry assembly, or intricate paper art. Poor lighting leads to mistakes, eye strain, and subpar results.
Lighting Solutions for Specialty Studios
- Adjustable LED Task Lamps: Choose lamps with variable brightness and color temperature settings. Flexible arms allow you to direct light exactly where needed.
- Magnifying Lamps: Combine illumination with 2x–5x magnification for enhanced detail work. Essential for miniatures, beadwork, or model building.
- Overhead Panel Lights: Install high-CRI (color rendering index) LED panels for even, shadow-free illumination across your workspace.
- Under-Shelf Lighting: Strip LEDs mounted beneath shelves or cabinets add targeted light to work surfaces without clutter.
Lighting Placement Tips
- Avoid harsh shadows by combining ambient and task lighting.
- Place lights on both sides of your work area to minimize eye fatigue.
- Opt for 5000K–6500K (‘daylight’) bulbs for true-to-color work.
Priority Upgrade #3: Specialized Work Surfaces
Choosing the Right Surface
The wrong work surface can spell disaster for specialty projects. Resin can permanently bond to porous materials, hot metal can scorch laminate, and sharp tools will gouge soft wood. Upgrade with surfaces tailored to your craft:
- Epoxy-Resistant Mats: Silicone or Teflon mats protect tables from sticky spills and are easy to clean.
- Heatproof Tiles: Install ceramic or tempered glass tiles in soldering or torchwork zones.
- Self-Healing Cutting Mats: Essential for paper crafting, model making, and leatherwork.
- Stainless Steel Benchtops: Durable, chemical-resistant, and easy to sanitize—ideal for mixed-media artists.
Custom Modular Solutions
Consider modular workstations with interchangeable surfaces. This lets you quickly adapt your studio for different specialty projects without a full remodel.
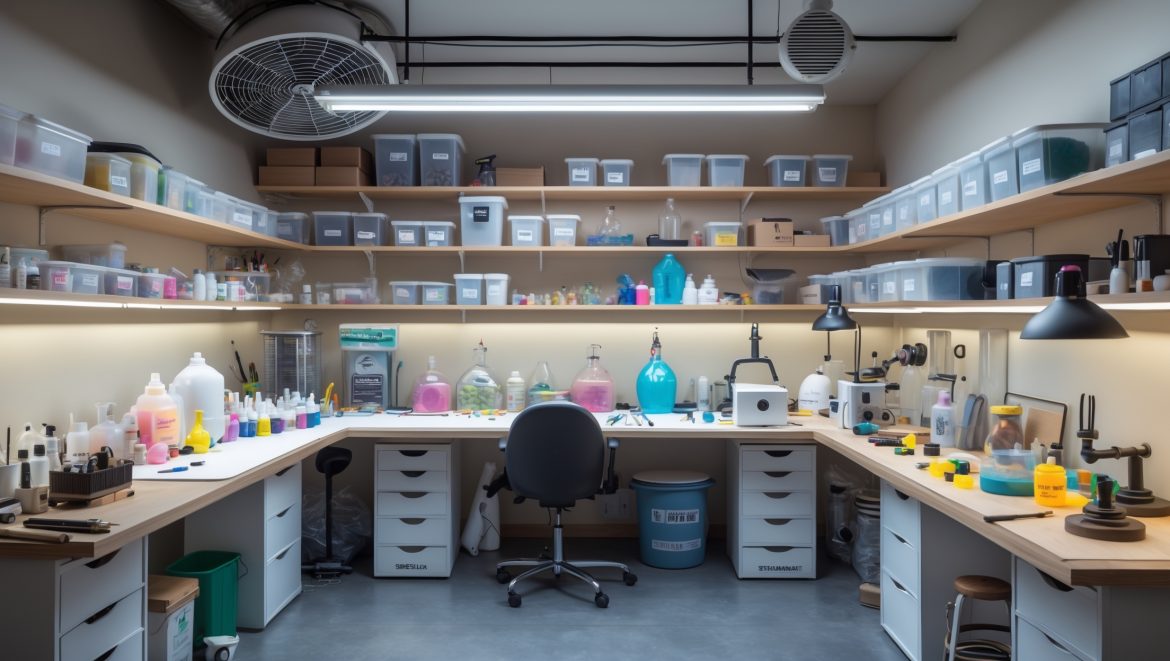
Priority Upgrade #4: Material Storage for Specialty Supplies
Tailored Storage Systems
Specialty crafts often require temperature-sensitive, light-sensitive, or fume-producing supplies. Standard bins and cabinets may not suffice. Upgrade your material storage with these solutions:
- UV-Proof Cabinets: Store resins, paints, and inks in opaque, UV-resistant containers or cabinets to extend shelf life.
- Climate-Controlled Storage: For polymer clay or certain adhesives, mini-fridges or small wine coolers maintain consistent temperatures.
- Ventilated Chemical Lockers: Safely store solvents, alcohols, and flammable materials in metal lockers with built-in vents.
- Drawer Dividers & Bins: Use modular dividers and clear bins for beads, findings, and tiny components. Label everything for quick access.
Organization Hacks
- Mount pegboards with hooks for hanging specialty tools and accessories.
- Use stackable trays or carts for project-specific kits and in-progress work.
- Track inventory with a simple spreadsheet or mobile app to prevent overbuying and waste.
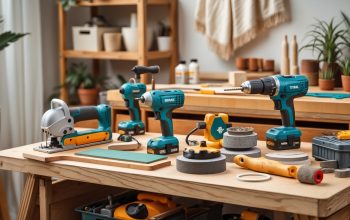
Priority Upgrade #5: Precision Tools and Equipment
Investing in the Right Tools
Upgrading your tool arsenal is a game-changer for specialty projects. Focus on quality and specificity:
- Resin Artists: Silicone mixing tools, bubble removal heat guns, digital scales, and pressure pots.
- Miniature Painters: Fine-tipped brushes, airbrush systems, and rotary tools for sculpting and finishing.
- Metal & Glass Artists: Kilns with programmable controllers, ring mandrels, precision files, and safety shields.
- Mixed Media Crafters: Dual-temp glue guns, specialty punches, and digital cutting machines.
Maintenance and Calibration
- Schedule regular cleaning and calibration for all specialty tools.
- Keep manuals and spare parts organized in labeled folders or bins.
- Dedicate a zone for tool maintenance, separate from your main work area to prevent cross-contamination.
Priority Upgrade #6: Safety Enhancements for Specialty Media
Personal Protective Equipment (PPE)
Specialty crafts may introduce new hazards. Upgrade your safety gear accordingly:
- Respirators: NIOSH-approved masks for fumes, dust, or fine particulates.
- Heat-Resistant Gloves: For soldering, glass fusing, or kiln work.
- Protective Eyewear: Side-shielded goggles for cutting, grinding, or chemical use.
- Aprons and Sleeves: Chemical-resistant or flame-retardant options for messy or high-heat projects.
Fire Safety and Emergency Prep
- Install a multi-class fire extinguisher within arm’s reach of your primary work zones.
- Keep a first aid kit stocked and easily accessible.
- Post emergency contact numbers and safety procedures prominently.
- Install smoke and carbon monoxide detectors, especially if using kilns or torches.
Priority Upgrade #7: Workspace Flexibility & Workflow Optimization
Mobile and Modular Fixtures
- Rolling Carts: Move tools and supplies wherever needed.
- Folding Workbenches: Expand or compact your workspace based on project size.
- Swivel Stools: Easily shift between stations without disrupting your workflow.
Dedicated Zones for Multi-Stage Projects
- Allocate separate areas for prep, assembly, finishing, and drying/curing.
- Use color-coded mats or trays to keep project components organized during different stages.
- Install wall-mounted shelves above each zone for frequently used tools and supplies.
Budgeting for Specialty Studio Upgrades
Cost Breakdown Strategies
Specialty upgrades can add up, but strategic planning keeps your budget in check:
- Prioritize upgrades by safety and workflow impact—ventilation and lighting usually come first.
- Research both new and gently used equipment; many artists upgrade and sell high-quality tools at a discount.
- DIY some upgrades, like custom work surfaces or modular storage, to save money.
- Track all expenses in a spreadsheet to monitor your investment and avoid overspending.
Sample Budget Table
| Upgrade | Estimated Cost |
|---|---|
| Ventilation (window fan & ducting) | $120–$300 |
| LED Lighting Upgrade | $80–$250 |
| Specialized Work Surfaces | $50–$200 |
| Material Storage Solutions | $40–$180 |
| Precision Tools | $100–$600 |
| Safety Gear | $60–$200 |
| Mobile Workstations | $90–$300 |
Adjust these figures to fit your local market and the specific needs of your craft.
Step-By-Step: Planning and Executing Your Specialty Studio Upgrade
1. Define Your Project Priorities
List your top specialty crafts and identify the upgrades that will have the biggest impact on safety and workflow.
2. Map Your Studio Layout
Sketch your space, marking where each upgrade will go. Consider access to power, ventilation, and natural light.
3. Source Materials and Tools
Research suppliers for specialty equipment, surfaces, and storage. Look for local deals or online marketplaces for bargains.
4. Implement Upgrades in Phases
Tackle one upgrade at a time—start with ventilation and lighting, then move to surfaces, storage, and tools. This minimizes disruption and lets you adjust plans as needed.
5. Test and Refine
After installing each upgrade, test it with real projects. Gather feedback from your own workflow and make adjustments for efficiency and comfort.
Conclusion: Transforming Your Studio for Creative Excellence
Specialty projects take your creative journey to exciting new heights—but they also bring unique demands that challenge the limits of a generic craft space. By strategically upgrading your studio with targeted ventilation, precision lighting, custom work surfaces, and tailored storage, you’ll create a workspace that supports your craft at every level. These investments are more than just conveniences; they are safeguards for your health, catalysts for creative breakthroughs, and foundations for professional-quality results. Remember, an optimized studio is a living space—adapt it as your skills grow and your interests evolve. Start with the upgrades that matter most for your specialty, and build from there. The result? A DIY craft studio that doesn’t just house your projects, but actively enhances every creative session. Whether you’re pouring resin, sculpting miniatures, or fusing glass, your upgraded workshop will empower you to craft with confidence, safety, and joy. Happy making!


Could you share suggestions for increasing electrical capacity safely in an older house if I want to add a kiln for metal clay work to my studio?
To safely increase electrical capacity for a kiln in an older home, start by consulting a licensed electrician. They can assess your current panel and wiring, recommend any necessary upgrades, and install a dedicated circuit for the kiln. This ensures your equipment runs safely and helps prevent overloading your system.
If I want to try new mediums like polymer clay or glass but am not sure how much space or equipment I’ll need, is there a process you suggest for expanding gradually without overwhelming my studio workflow?
Start by dedicating a small, clearly defined area for each new medium—like a tray or portable table—for all your materials and tools. Try the basics first, using minimal equipment, and only invest in more gear once you know what you enjoy and have space for. This way, you can explore new crafts without disrupting your existing setup.
Could you provide more details on what kind of custom ventilation setup works best for a small space when working with resin or other materials that produce fumes?
For a small space, a fume extraction system with an activated carbon filter is a good option when working with resin or similar materials. Installing a window exhaust fan can also help pull fumes outside. Always position your work surface close to the ventilation source to ensure effective air flow and consider using a portable air purifier as an extra precaution.
For someone planning to take on multiple specialties like metal clay and miniature painting, how would you suggest organizing work zones to keep the space adaptable without feeling crowded?
To keep your studio adaptable, try using mobile workstations or carts that can be easily moved and reconfigured as needed. Assign each specialty a dedicated storage area with labeled containers, then use a central clear workspace for projects in progress. This way, you can switch between metal clay and miniature painting without clutter, and your space remains flexible for new projects.
When it comes to upgrading electrical capacity for specialty tools like kilns or ventilation systems, do you recommend hiring an electrician, or are there safe DIY options for small studio spaces?
For specialty tools like kilns or heavy-duty ventilation systems, it’s safest to hire a licensed electrician, even in small studio spaces. These upgrades usually require dedicated circuits, higher voltage, or advanced wiring that go beyond basic DIY skills. This ensures safety and helps you meet any local building codes.
I noticed you mentioned evaluating electrical capacity before adding new equipment. Are there any specific safety guidelines or upgrades you recommend for running kilns or high-powered tools in a home studio?
For kilns and high-powered tools, it’s best to have dedicated circuits with the correct amperage as recommended by the manufacturer. Use grounded outlets and avoid using extension cords for these tools. Consulting a licensed electrician to install proper wiring and circuit breakers adds an important layer of safety and helps prevent electrical overload or fire risks.
Do you have any recommendations for affordable ways to boost electrical capacity in an older workshop, especially if I want to add both new lighting and a small kiln for metal clay work?
Upgrading electrical capacity in an older workshop can be affordable if you plan carefully. Start by using dedicated circuits for high-draw equipment like a kiln. LED lighting upgrades save energy and reduce electrical load. You might also benefit from adding a subpanel just for your studio area, which an electrician can install fairly economically. Always check local codes and consult a licensed electrician for safety.
I noticed you mention evaluating square footage before adding new equipment. What strategies would you suggest for efficient zoning in a small workshop?
For efficient zoning in a small workshop, try grouping tools and supplies by project type or function. Use vertical storage, wall-mounted racks, and mobile carts to maximize space. Designate specific areas for cutting, assembly, and finishing. Keeping pathways clear and frequently used items accessible helps workflow stay smooth even in tight quarters.
For someone interested in both resin art and glass fusing, do you have any tips on how to set up ventilation that is effective for both without taking up too much space in a smaller studio?
For a small studio handling both resin art and glass fusing, a portable fume extractor with a HEPA and activated carbon filter is a space-saving solution. Position it close to your work area, and make sure it vents outside if possible. Also, consider a compact window exhaust fan to further improve airflow while keeping your setup minimal.
If I might want to switch between metal clay and miniature painting in the same space, what kind of organization systems would make transitioning between projects smoother without constantly having to move stuff around?
Consider using modular storage like rolling carts or stackable bins to keep supplies for each craft separate and easy to move. A dedicated work surface with removable mats or trays can help switch between projects quickly. Labeling containers and using drawer organizers will also make finding and storing materials for each activity much simpler.
How long does it typically take to transform a basic craft room into a studio capable of handling specialty projects like those mentioned? I’m curious about realistic timelines since I can only tackle upgrades on weekends.
If you’re upgrading just on weekends, expect the full transformation to take anywhere from four to eight weekends, depending on the scope of specialty projects and your starting point. Tasks like reorganizing, adding storage, improving lighting, and setting up new workstations each take a weekend or more. Breaking it down into smaller projects will help keep progress steady without feeling overwhelming.
If my home’s electrical setup is kind of old, how can I figure out if it can handle new equipment like better lighting and a small kiln? Are there warning signs I should look for?
To check if your electrical system can handle new equipment, look for warning signs like flickering lights, frequently tripped breakers, or outlets that feel warm. If you notice any of these, it’s wise to consult a licensed electrician before adding upgrades like new lighting or a kiln, as these can put extra strain on older wiring.