Introduction: Why Sharp Tools Matter in the DIY Craft Studio
Every creative project, from intricate papercraft to rugged woodwork, relies on the precision of your tools. Dull blades can turn a joyful crafting session into a frustrating struggle—leaving ragged edges on fabric, crushed fibers in paper, or splintered wood. Worse, a blunt tool is more likely to slip, increasing the risk of injury. Yet, many crafters underestimate the importance of regular tool sharpening, or they’re intimidated by the process. Sharpening isn’t just for seasoned woodworkers; it’s a vital skill for anyone who values their craft, equipment, and safety. This guide demystifies tool sharpening for the creative DIYer, offering practical techniques, tool-by-tool advice, and essential safety tips. Whether you wield scissors, rotary cutters, X-acto knives, carving tools, or chisels, you’ll learn how to restore a razor edge—maximizing your tools’ performance and extending their lifespan. Sharpening doesn’t require fancy gadgets or years of practice. With a few affordable supplies, a bit of patience, and this step-by-step guide, you’ll master the basics and keep your creative momentum going strong.
Understanding Sharpening: The Basics for Crafters
What Does ‘Sharp’ Really Mean?
A sharp tool isn’t just about being able to cut—it’s about having a finely honed edge with minimal micro-serrations or chips. For crafters, this means cleaner cuts, less hand fatigue, and greater control. The goal is to create a consistent bevel (the angled surface at the edge) that meets in a crisp apex.
Common Craft Studio Tools That Need Sharpening
- Scissors & Shears: For fabric, paper, or thread.
- Rotary Cutters: Used in quilting, leatherwork, and papercraft.
- Craft/Utility Knives: X-acto, snap-off, and hobby blades.
- Chisels & Gouges: For wood carving, linocut, and clay sculpting.
- Needlework Tools: Thread snips, seam rippers.
Sharpening vs. Honing vs. Polishing
- Sharpening: Removing metal to form a new edge.
- Honing: Realigning the edge for keener performance, typically with a fine stone or strop.
- Polishing: Smoothing the bevel further to reduce friction and enhance sharpness.
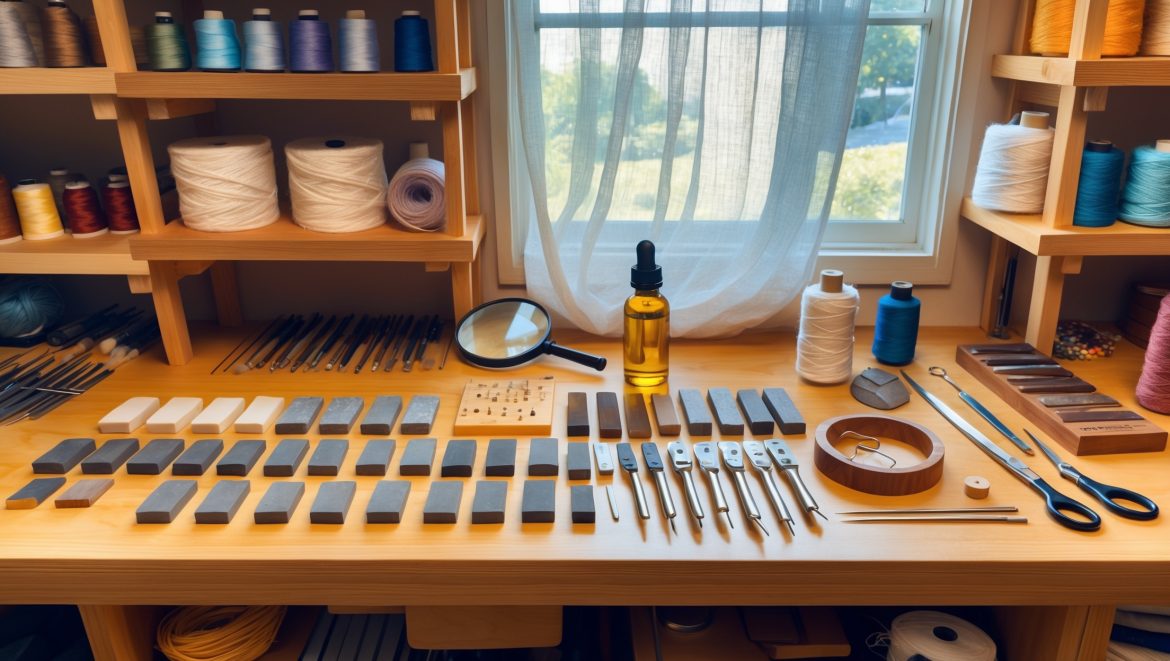
Essential Sharpening Tools & Supplies for the DIY Craft Studio
Basic Sharpening Equipment
- Sharpening Stones: Water stones, oil stones, or diamond plates in coarse, medium, and fine grits.
- Sharpening Rods: Ceramic or diamond rods for quick touch-ups on scissors and knives.
- Honing Strop: Leather or synthetic strop loaded with honing compound for polishing.
- Rotary Blade Sharpener: Specialized device for circular blades.
- Fine Sandpaper (600–2000 grit): For improvised sharpening or polishing.
Accessory Supplies
- Honing Oil or Water: Lubricates stones and prevents clogging.
- Magnifying Glass: To inspect edges for nicks and burrs.
- Protective Gloves: For safely handling blades.
- Safety Glasses: Especially when working with power sharpeners.
- Non-slip Mat: Stabilizes stones and protects work surfaces.
- Rags or Paper Towels: For cleanup and drying tools.
Sharpening Techniques for Popular Craft Studio Tools
1. Scissors & Shears
Step 1: Clean your scissors thoroughly.
Step 2: Open scissors fully; place the bevel flat on a medium grit sharpening stone.
Step 3: Following the original angle, slide the blade across the stone from base to tip, maintaining even pressure.
Step 4: Repeat 5–10 times, then flip and repeat for the other blade.
Step 5: Progress to a fine grit stone for final honing.
Step 6: Remove burrs by closing and opening the scissors several times, then wipe clean.
2. Rotary Cutter Blades
Step 1: Remove the rotary blade per manufacturer instructions.
Step 2: Use a rotary blade sharpener or sandwich blade between two fine-grit diamond plates.
Step 3: Rotate carefully, applying light pressure and lubricating as needed.
Step 4: Rinse, dry, and reassemble the cutter.
3. Craft and Utility Knives
Step 1: If using snap-off blades, snap to a fresh segment. For refillable blades, proceed to sharpening.
Step 2: Place the blade at a 20° angle on a fine sharpening stone.
Step 3: Draw the blade edge across the stone, moving from heel to tip in a sweeping motion.
Step 4: Flip and repeat on the other side, if double-beveled.
Step 5: Finish with a few passes on a leather strop.
4. Wood Carving Chisels & Gouges
Step 1: Secure the chisel in a honing guide or hold steady by hand.
Step 2: Start with a coarse stone to set the bevel, maintaining the factory angle (typically 25–30°).
Step 3: Work up through medium and fine stones, keeping strokes consistent.
Step 4: For gouges, use slip stones or rounded ceramic rods to follow the curve.
Step 5: Polish the edge with a strop for a mirror finish.
5. Needlework Tools (Snips, Seam Rippers)
Step 1: Use a superfine ceramic rod, moving the tool gently along the rod at the existing bevel angle.
Step 2: For tiny tips, fold fine sandpaper around a toothpick to reach tight curves.
Step 3: Wipe clean and check with magnification.
Sharpening Safety: Best Practices for DIYers
- Always cut away from your body and keep fingers clear of the edge.
- Secure tools and sharpening stones on a non-slip surface.
- Wear gloves if you’re new to sharpening or working with small blades.
- Use a magnifying glass to inspect for chips or burrs after sharpening.
- Clean and thoroughly dry tools after sharpening to prevent rust.
- Store blades in protective cases or covers when not in use.
- Dispose of metal filings and used water or oil responsibly.
DIY Sharpening Station: Setting Up Your Craft Studio Workspace
Choosing the Right Spot
Select a well-lit, ventilated corner of your studio. Place a non-slip mat on your work surface to catch debris and protect the table.
Organizing Your Sharpening Tools
- Use a shallow drawer or small toolbox for stones and rods.
- Hang a magnetic strip nearby for scissors and knives.
- Keep a spray bottle of water or bottle of honing oil at hand.
- Dedicate a small container for collecting metal shavings and cleaning rags.
Sharpening Schedule: How Often Should You Sharpen?
- Heavy use (daily): Hone weekly, sharpen monthly.
- Moderate use (weekly): Hone monthly, sharpen every 3–6 months.
- Light use (occasional): Hone as needed, sharpen 1–2 times a year.
Inspect blades regularly. If you notice fraying, tearing, or increased resistance, it’s time to sharpen.
Sharpening Troubleshooting: Fixing Common Issues
Blade Not Getting Sharp
- Check your angle: Maintaining the correct bevel is crucial.
- Use a coarser grit if the edge is badly damaged.
- Ensure the entire blade is contacting the stone evenly.
Edge Feels Rough or Jagged
- Finish with a finer stone or strop to polish the edge.
- Remove any burrs by lightly running the edge along the strop or a piece of hardwood.
Uneven Bevel
- Mark the bevel with a permanent marker before sharpening to track your progress.
- Practice slow, controlled strokes, and check your work frequently.
Sharpening Myths Busted: What Every Crafter Should Know
- Myth: Only professionals should sharpen tools.
Fact: Most crafters can safely sharpen their own tools with basic guidance. - Myth: Sharpening stones are expensive and hard to use.
Fact: Quality starter stones are affordable and intuitive with practice. - Myth: You need a high-tech sharpener for good results.
Fact: Manual sharpening is often more precise and less likely to damage delicate craft blades. - Myth: Sharpening wears out blades faster.
Fact: Proper sharpening extends tool life by preventing excessive damage and breakage.
Pro Tips to Extend The Life of Your Edges
- Use tools only for their intended materials (e.g., fabric scissors stay sharp longer if never used on paper).
- Wipe blades clean after each session, especially if cutting adhesives or resin-coated materials.
- Store tools in a dry, protected environment.
- Invest in blade guards or sheaths for extra protection.
- Keep your sharpening stones flat—lap them occasionally with coarse sandpaper or a flattening plate.
Conclusion: Sharpening as Creative Self-Care
Sharpening your craft studio tools isn’t a tedious chore—it’s a form of creative self-care that pays dividends in project quality, efficiency, and personal satisfaction. Every sharp edge you restore brings your creative vision to life with less force and more finesse. You’ll notice neater cuts, faster progress, and fewer mistakes. Regular maintenance also protects your hands and wrists from strain, while minimizing the risk of slips and injuries. Most importantly, sharpening empowers you as a maker: instead of replacing dull blades or struggling with lackluster results, you take ownership of your craft and your tools.
As you integrate sharpening into your routine, the process will become second nature—an essential ritual that keeps your creative flow uninterrupted. Start small, stay consistent, and don’t be afraid to experiment with new techniques or tools as your confidence grows. Remember, a well-sharpened tool is an extension of your skill and passion. By investing a little time in learning and caring for your edges, you’ll not only save money but also elevate every project you touch. So clear a spot on your workbench, gather your supplies, and let the satisfying art of sharpening transform your DIY experience—one razor-sharp blade at a time.


How often should I realistically be sharpening my craft tools like thread snips and seam rippers if I use them a few times a week? I’m never sure if I’m waiting too long.
If you use your thread snips and seam rippers a few times a week, sharpening every 2 to 3 months is usually enough. Keep an eye on how they cut—if they start snagging or require more force, it’s a good sign they’re due for sharpening sooner.
I always struggle with getting a consistent bevel when sharpening my craft knives. Do you have any tips or specific techniques for beginners to achieve that crisp apex you described?
Achieving a consistent bevel can be tricky at first. Try using a sharpening guide or jig to keep your angle steady while you work. Marking the bevel with a permanent marker before sharpening helps you see where you’re removing material. Take slow, controlled strokes and check your progress regularly to maintain that crisp apex.
You mention that sharpening doesn’t require fancy gadgets. Can you recommend some specific affordable sharpening tools or materials that would work well for beginners in a home craft studio?
Absolutely! For beginners, a set of basic sharpening stones—such as a dual-grit water stone or an inexpensive diamond plate—works very well and is easy to find. You can also use fine-grit sandpaper (around 600–2000 grit) placed on a flat surface for sharpening. A simple honing guide can help you keep a consistent angle if you’re sharpening blades or chisels. These options are all affordable and effective for most craft studio needs.
Do you have any tips for sharpening scissors that are specifically used for delicate fabrics like silk or chiffon? I want to avoid damaging the blades or creating rough edges that might snag the material.
For scissors used on delicate fabrics like silk or chiffon, use a fine-grit sharpening stone or a dedicated scissor sharpener to keep the edge smooth. Always sharpen gently and maintain the original blade angle. After sharpening, wipe the blades clean and test on scrap fabric to ensure there are no burrs or rough spots that could snag.
How often should I be sharpening tools like X-acto knives or rotary cutters if I use them a couple times a week? Is there a sign to look for besides just feeling dull?
If you use X-acto knives or rotary cutters a couple of times a week, sharpening every 2–4 weeks usually keeps them in top shape. Besides feeling dull, watch for rough or ragged edges on your cuts, needing more pressure than usual, or skipping and dragging rather than slicing smoothly—these are all signs it’s time to sharpen or replace the blade.
If I have a basic craft studio setup at home, what are the most affordable sharpening supplies I can get started with, especially if I’m on a tight budget?
For a basic craft studio on a budget, you can start with a set of inexpensive whetstones or a combination sharpening stone, which works for most craft blades. A leather strop (or even an old belt) helps finish the edge. Honing oil or water can be used depending on your stone type. These supplies are affordable and cover most sharpening needs.
Can you recommend affordable sharpening tools for a beginner who doesn’t want to invest in specialized gadgets yet?
For beginners, a simple dual-grit sharpening stone is a budget-friendly and versatile choice. You can also use a basic honing guide to keep consistent angles. Wet/dry sandpaper on a flat surface is another affordable method for sharpening craft tools without special gadgets.
If I don’t have specialized sharpening gadgets, are there any safe, affordable household items I can use to sharpen my craft studio tools effectively?
You can absolutely use some common household items to sharpen your craft tools safely and affordably. A ceramic mug turned upside down gives you a fine edge for honing blades—just use the unglazed ring on the bottom. Fine-grit sandpaper, wrapped around a flat surface, also works well for sharpening. Always move the blade away from your hand and use light, steady strokes to stay safe.
When sharpening fabric scissors versus carving chisels, do I need different types of sharpening stones or equipment? I’d like to keep my kit affordable but effective across various tools.
You can use a medium-grit sharpening stone for both fabric scissors and carving chisels, making it cost-effective. However, chisels often benefit from a finer grit or a strop for an ultra-sharp edge. If you’re on a budget, start with a dual-sided stone (medium and fine grit) and add a leather strop later if needed.
When sharpening craft knives or chisels, how long should it typically take before I notice an improvement in performance? Is this something that can be done quickly, or should I plan for a longer session?
You should notice an improvement in your craft knives or chisels almost immediately after sharpening—usually after just a few minutes of careful work. For basic touch-ups, a quick session of 5 to 10 minutes is often enough. However, if your tools are very dull or damaged, plan for a longer session of 20 to 30 minutes to restore the edge properly.
You mention that dull blades are more likely to slip and cause injuries. Are there particular warning signs that a tool is getting dangerously dull, aside from just not cutting well?
Yes, there are a few warning signs beyond poor cutting performance. You might notice the blade requires more pressure than usual, produces rough or uneven cuts, or leaves burn marks on materials. If you see chips or nicks along the edge, that’s another clear sign. Keeping an eye out for these indicators can help you stay safe in your workspace.
I’m on a tight budget and mostly use basic hand tools for fabric and paper crafts. What’s the bare minimum sharpening setup you’d recommend for a small studio without spending much?
For a budget-friendly sharpening setup, you only need a basic combination sharpening stone (medium and fine grit), some honing oil or water (depending on the stone), and a leather scrap for stropping. This will keep scissors, rotary cutters, and craft knives sharp without taking up much space or money.
When sharpening scissors and shears, is it better to use a whetstone or one of those handheld sharpeners? The article mentions affordable supplies, and I’m trying to figure out which will give a consistent bevel for fabric work.
For fabric scissors and shears, a whetstone generally offers more control and can produce a consistent bevel, which is important for clean cuts. Handheld sharpeners are convenient and affordable but may not match the precision of a whetstone. If you’re willing to spend a bit more time learning proper technique, a fine-grit whetstone is usually the better choice for quality results.
Could you elaborate on how often different craft studio tools, like X-acto knives versus fabric shears, should ideally be sharpened to maintain their performance and safety?
Absolutely, the frequency depends on how often you use each tool and the materials you cut. X-acto knives should be sharpened or have their blades replaced after every few hours of regular use, as they dull quickly. Fabric shears, on the other hand, generally need sharpening every few months with steady use. Always check for signs of dullness—like dragging or frayed cuts—and sharpen sooner if needed to keep both safety and precision high.
The article mentions that sharpening doesn’t require fancy gadgets. Are there any specific affordable supplies you’d recommend for someone just starting out, especially for tools like X-acto knives and carving chisels?
For beginners, a basic sharpening stone (medium grit) is both affordable and versatile for X-acto knives and carving chisels. A leather strop or even a piece of cardboard with polishing compound can help refine the edge. For small blades, fine-grit sandpaper on a flat surface also works well. These supplies are inexpensive and easy to find at most hardware or craft stores.
I noticed you mentioned rotary cutters for quilting and leatherwork. Is there a specific sharpening method or tool you recommend for rotary blades since their shape is so different from scissors or knives?
Rotary blades do require a different approach from scissors or straight knives. There are rotary blade sharpeners made specifically for these round blades, which usually involve rolling the blade back and forth between abrasive surfaces. Alternatively, some people use fine-grit sandpaper or a whetstone, gently rotating the blade to maintain its edge. Always handle with care, as rotary blades are very sharp.
Is there a safe way to check if a tool edge is sharp enough, without risking injury? I work with kids in my studio and want to avoid accidents.
A safe method to check sharpness is to gently glide the tool’s edge over a scrap piece of paper or soft wood—if it slices cleanly with light pressure, it’s sharp. Avoid testing with your fingers. In a kids’ environment, always supervise and store sharpened tools securely.