Introduction: The Overlooked Importance of Craft Studio Security
For creative entrepreneurs and hobbyists alike, the craft studio is more than just a workspace—it’s a sanctuary for inspiration, productivity, and valuable tools and materials. Yet, security is too often an afterthought for DIYers, despite the increasing risks of theft, vandalism, and accidental damage. Whether your studio is a dedicated room at home, a converted garage, or a rented commercial space, the investment in specialized tools, finished goods, and irreplaceable materials can be substantial. Losing them to a break-in or disaster is not just a financial setback, but an emotional blow to your creative journey.
This comprehensive guide will walk you through actionable steps to safeguard your craft studio. We’ll cover physical security enhancements, smart layouts for risk reduction, affordable tech-based solutions, insurance considerations, and creating a recovery plan—ensuring your creative haven remains protected, so you can focus on what you do best: making, designing, and crafting.
Assessing Your Craft Studio’s Security Risks
Inventory: What’s at Stake?
Before enhancing security, take stock of what’s inside your studio. Consider:
- Tools and Equipment: Sewing machines, power tools, computers, specialty cutters, printers.
- Materials: Rare fabrics, paints, wood, precious metals, or custom supplies.
- Finished Projects: Completed crafts ready for sale or delivery.
- Personal Data: Customer information, business records, design files.
Document everything with photos and serial numbers. This not only helps assess risk but is critical for recovery and insurance claims.
Identifying Vulnerabilities
Next, perform a walk-through to spot vulnerable entry points and weak spots:
- Are windows or doors easily accessible or hidden from street view?
- Does your studio have a visible security presence?
- Are expensive items visible from outside?
- Is your workspace isolated or within a shared building?
Make a checklist of every potential risk for targeted improvements.
Physical Security Upgrades for Craft Studios
Doors and Locks: Your First Line of Defense
Invest in solid-core exterior doors with deadbolt locks. For interior studios (like spare rooms), upgrade basic doorknobs to keyed entry locks. Reinforce hinges and add metal strike plates to resist forced entry. Consider:
- Keyless locks: Convenient for shared spaces or quick access, but choose models with strong security ratings.
- Padlocks: Use heavy-duty padlocks for tool chests, storage cabinets, and exterior sheds.
Windows: Fortifying the Weak Spots
Windows are common break-in points. Secure them with:
- Window locks: Install quality locks on all accessible windows.
- Security film: Apply shatter-resistant film to deter break-ins and protect from flying glass in storms.
- Reinforced glass or bars: For high-risk areas, consider laminated glass or decorative security bars (maintaining a creative studio aesthetic).
- Blinds or curtains: Keep valuables out of sight, especially after hours.
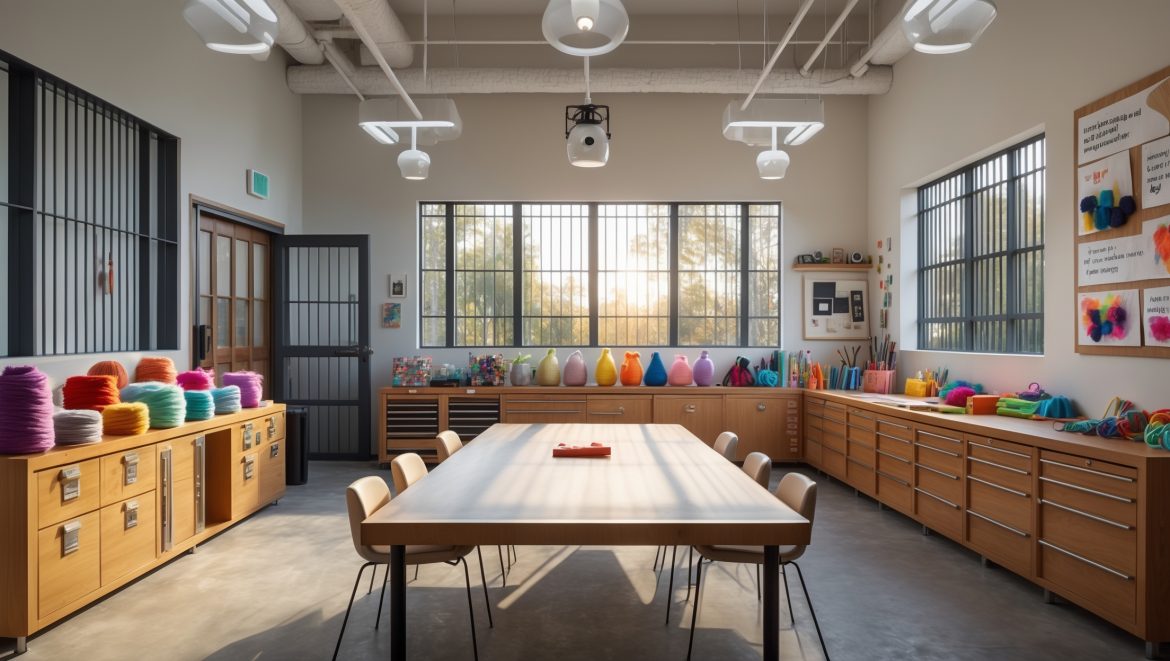
Studio Layout: Designing for Security
Arrange your studio so tools and finished goods aren’t visible from outside. Place workstations and storage away from windows. If possible, use interior rooms for the most valuable and portable items. Limit entry points and keep them monitored. For shared or commercial spaces, use locked interior cabinets or cages for your tools and materials.
Lighting and Visibility
Ample lighting is a powerful deterrent. Install motion-activated LED lights outside doors and windows. Inside, use timers or smart bulbs to simulate activity when the studio is empty. Trim shrubs or trees near windows to eliminate hiding spots for intruders.
Tech-Based Security for DIY Studios
Security Cameras: Choosing the Right System
Modern security cameras are affordable, easy to install, and can record high-definition footage. Look for:
- Wireless connectivity: For easy setup and remote monitoring via smartphone.
- Cloud storage: Ensures footage is safe even if the camera is stolen.
- Night vision: Crucial for exterior or dimly lit studios.
- Motion alerts: Get notified instantly of suspicious activity.
Place cameras at all entry points, and consider a visible camera as a deterrent, with a hidden backup in case of tampering.
Alarms and Sensors
Install door/window sensors that trigger loud alarms when breached. Many DIY systems allow you to monitor and control alarms from your phone. For higher-value studios, consider monitored security services that alert authorities automatically.
Smart Sensors: Fire, Flood, and Environmental Hazards
Besides theft, environmental hazards can devastate a studio. Install:
- Smoke and carbon monoxide detectors: Essential for any workspace, especially if you use soldering irons, heat guns, or flammable materials.
- Water leak sensors: Place near sinks, storage areas, and under windows to catch leaks before they ruin supplies.
- Temperature/humidity monitors: For studios storing paper, textiles, or artworks sensitive to climate.
Remote Access and Alerts
Modern security systems let you monitor your studio from anywhere. Set up alerts for unusual activity, and check camera feeds in real-time from your phone or computer. Many systems even allow you to arm/disarm alarms and lock doors remotely.
Low-Tech and Budget-Friendly Security Measures
Simple Deterrents
Not every security measure requires a big investment. Consider:
- Warning signs: Even a visible “Security Camera in Use” or “Alarmed Premises” sign can deter opportunistic thieves.
- Dummy cameras: Place realistic fake cameras to supplement real ones.
- Neighborhood watch: Get to know your neighbors and share contact info for emergencies.
Safe Storage for High-Value Items
Lock away expensive tools and materials in a secure cabinet or safe, especially overnight or when you’re away for extended periods. Anchor large safes or storage units to the floor or wall to prevent removal.
Routine Security Habits
- Always lock up, even for quick errands.
- Mark tools and equipment with your contact info or a unique identifier.
- Keep an up-to-date inventory list and store a backup copy off-site or in the cloud.
Insurance and Legal Considerations
Craft Studio Insurance Essentials
Even with the best security, losses can occur. Review your insurance options:
- Homeowner’s or renter’s insurance: May not cover business property or tools used for income. Check your policy and add a business endorsement if needed.
- Business property insurance: Covers tools, materials, inventory, and equipment in case of theft, fire, or vandalism.
- Off-premises coverage: If you sell at markets or fairs, make sure your insurance covers items in transit or at events.
Keep detailed records and receipts for all purchases, and photograph your studio regularly for documentation.
Permits for Security Upgrades
Most security improvements won’t require permits, but installing exterior cameras, bars, or alarms in rental or shared spaces may need landlord or HOA approval. For commercial spaces, check local codes for signage or lighting restrictions.
Creating a Craft Studio Recovery Plan
Preparing for the Worst
If the unthinkable happens, a recovery plan helps you bounce back quickly. Here’s what to include:
- Inventory backup: Store an updated inventory list with photos and receipts in the cloud.
- Emergency contacts: List local police, fire, insurance agent, and trusted neighbors.
- Incident checklist: Outline steps to take: secure the scene, call authorities, document damage, contact insurance, and notify clients if orders are delayed.
Data Security
Don’t forget digital security. Back up important files off-site or in the cloud. Use strong passwords for design files, business records, and customer data. Consider encrypting sensitive information.
Security for Shared and Mobile Craft Studios
Co-Working and Shared Spaces
If you use a co-working craft studio or rent a booth, additional precautions are necessary:
- Use portable locking toolboxes or rolling cabinets for your supplies.
- Never leave valuables unattended, even for a few minutes.
- Label all equipment clearly with your name and contact info.
- Clarify the facility’s security policies and insurance coverage for tenants.
Pop-Up and Event Security
For crafters who attend fairs or markets, keep close tabs on your goods:
- Use lockable displays and cash boxes.
- Keep your mobile payment devices secure when not in use.
- Arrange booths with visibility and minimize blind spots.
- Work with a team or neighboring vendors to watch each other’s spaces during busy periods.
Maintaining and Reviewing Your Security Plan
Regular Security Audits
Schedule quarterly walk-throughs to check for new vulnerabilities. Test all alarms, sensors, and cameras monthly. Review your insurance policy annually and update inventory records with new purchases or disposals.
Adapting to Changing Risks
Stay alert to changes in your neighborhood or building. If there’s an uptick in local break-ins or a new construction site nearby, assess whether you need extra precautions. When upgrading tools or expanding your studio, revisit your security plan to ensure it scales with your growth.
Conclusion: Peace of Mind for Creative Freedom
Securing your craft studio isn’t about building a fortress—it’s about creating a safe, resilient environment that lets your creativity flourish without nagging worries. From sturdy locks to smart tech, practical storage to thoughtful insurance, each layer of security adds peace of mind. The steps outlined in this guide empower you to protect not just your investments, but your time, your energy, and your passion projects.
Remember, the best security plan is proactive and ever-evolving. Make security part of your regular studio routine: lock up, review your systems, and keep your records current. Encourage a culture of vigilance among your studio mates or market neighbors. Should the unexpected happen, your preparation ensures you’ll recover quickly and continue crafting with confidence.
Ultimately, a secure studio is a foundation for creative living. With thoughtful planning and a few smart upgrades, you can enjoy your DIY sanctuary—and the fruits of your imagination—knowing you’ve taken every reasonable step to keep them safe.


For studios located in shared buildings, what specific steps would you prioritize to minimize the risk of theft or unauthorized access, especially when it’s harder to control the overall environment?
In shared buildings, secure your studio with a high-quality lock and consider installing a door alarm or smart lock system. Use lockable storage for valuable tools and materials. Limit access by only providing keys or codes to trusted people, and label your space clearly to deter wandering visitors. Security cameras inside your studio can also help monitor activity.
Do you have any tips for organizing and documenting my craft supplies for insurance purposes? I’m overwhelmed by how many tools and finished projects I have in my home studio.
Start by grouping your supplies and finished projects by type, then take clear photos of each group and any valuable individual items. Create a simple inventory list in a notebook or spreadsheet, noting descriptions, purchase dates, and estimated values. Keep receipts if possible, and update your list regularly. This documentation will be helpful if you ever need to file an insurance claim.
For a home-based craft studio that’s part of a shared household, what are some low-cost security measures that won’t disrupt daily family routines but still protect specialty tools and materials?
You can use lockable storage cabinets or toolboxes to secure specialty tools without inconveniencing others. Label your supplies and keep an inventory list to quickly spot anything missing. Motion-sensor lights and simple door alarms add extra security without being disruptive. Consider setting up your workspace in a room with a lockable door if possible.
When documenting tools and materials for insurance, do you have any tips on how detailed the photos and records need to be? I’m not sure if just snapping quick pics with my phone is enough.
It’s best to be as detailed as possible. Take clear photos showing each tool and material, including serial numbers, brand names, and any unique features. Record purchase dates, receipts, and current condition if you can. Quick phone photos are a good start, but organizing them with descriptions will make your records much stronger for insurance purposes.
When evaluating entry points and visibility, how do you balance keeping your workspace inspiring and well-lit without making expensive materials easy to spot from outside?
One practical way is to use sheer or frosted window coverings that let in natural light but obscure the view from outside. You can also arrange shelves or screens to block direct sight lines to valuable materials, while still keeping your workspace open and bright inside.
How do you suggest documenting serial numbers or unique features for handmade tools or materials that don’t have any identification marks?
For handmade tools or unique materials without serial numbers, take clear, detailed photos from multiple angles, highlighting unique marks or features. Keep a written description of each item’s size, materials used, and any distinguishing characteristics. Store this documentation in both a secure digital location and a physical file for easy reference if needed.