Introduction: Why Eco-Friendly Flooring Matters in Your Craft Studio
Choosing the right flooring for your DIY craft studio is a decision that impacts both the functionality of your creative space and its environmental footprint. With the rising popularity of sustainable living and conscious crafting, more makers are seeking ways to incorporate eco-friendly materials into every aspect of their studios—including what’s underfoot. Eco-friendly flooring not only reduces your studio’s impact on the planet but also offers practical benefits such as improved indoor air quality, durability, and ease of maintenance. Whether you’re building a studio from scratch, remodeling a spare room, or upgrading your current workspace, understanding the available sustainable flooring options can help you make an informed, budget-conscious choice that supports both your creative process and the environment.
This comprehensive guide will walk you through the best eco-friendly flooring materials for craft studios, including their pros, cons, and costs. You’ll learn step-by-step installation basics for DIYers, essential maintenance routines, and key factors to consider for a safe, comfortable, and inspiring craft environment. Let’s transform your studio from the ground up—responsibly, beautifully, and practically.
Understanding Eco-Friendly Flooring: What Makes a Material Sustainable?
Eco-friendly flooring isn’t just a buzzword. To qualify as truly sustainable, a flooring material should meet several criteria:
- Renewable or recycled content: The material is made from rapidly renewable resources (like bamboo) or recycled inputs (such as reclaimed wood or recycled rubber).
- Low environmental impact manufacturing: Production processes minimize energy consumption and toxic emissions.
- Non-toxic and low-VOC: The flooring does not release harmful volatile organic compounds (VOCs), which can impact indoor air quality—a critical factor in enclosed craft spaces.
- Durable and long-lasting: Sustainable flooring should withstand the rigors of crafting, reducing the need for frequent replacement.
- End-of-life recyclability or biodegradability: Ideally, the flooring can be recycled or safely decomposed at the end of its lifespan.
Let’s dive into the most popular eco-friendly flooring types and see how they compare for craft studio use.
Top Eco-Friendly Flooring Options for Craft Studios
Bamboo Flooring
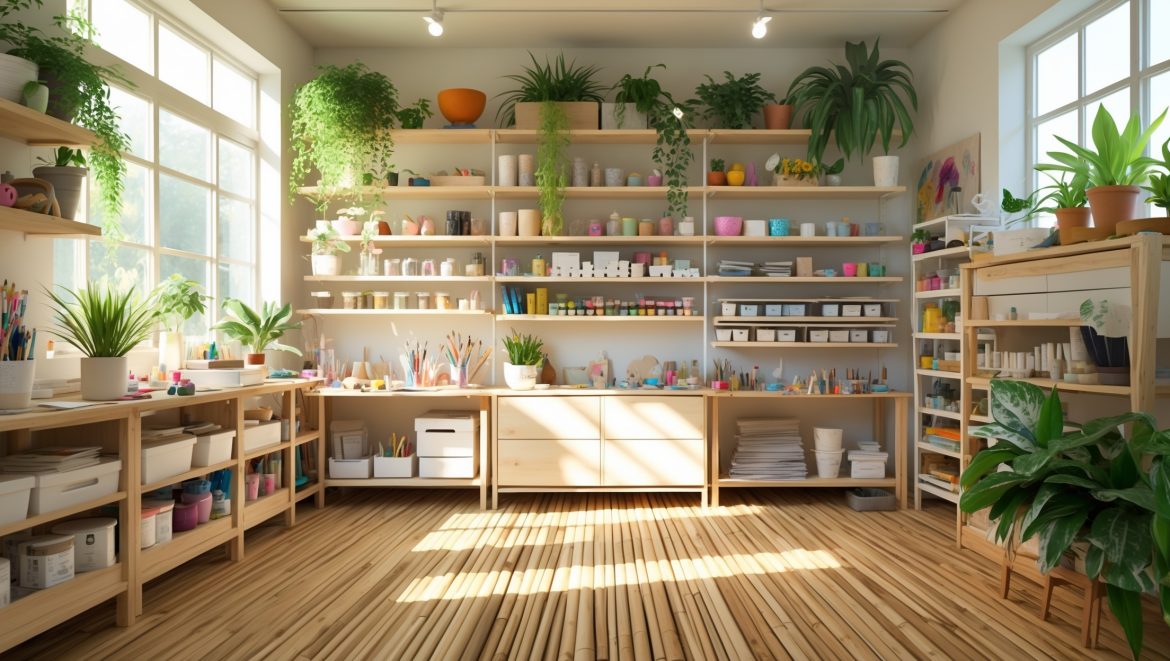
Overview: Bamboo is a fast-growing grass, harvested sustainably and manufactured into planks or tiles. It has a similar look and feel to hardwood but is often more affordable and environmentally friendly.
- Pros: Rapid renewability, durable, easy to clean, available in a range of finishes, generally low-VOC.
- Cons: Susceptible to moisture damage if not properly sealed, quality varies by manufacturer.
- Cost: $3–$8 per square foot (materials only).
Cork Flooring
Overview: Cork is harvested from the bark of cork oak trees without harming the tree, making it a renewable resource. It offers a soft, cushioned feel—ideal for long crafting sessions.
- Pros: Comfortable underfoot, excellent sound absorption, antimicrobial, hypoallergenic, renewable.
- Cons: Can be dented by heavy furniture, sensitive to moisture, requires sealing.
- Cost: $4–$10 per square foot.
Linoleum (Natural Linoleum, not Vinyl)
Overview: Made from linseed oil, cork dust, wood flour, and natural pigments, linoleum is biodegradable and has been used for over a century as a resilient, sustainable flooring.
- Pros: Biodegradable, naturally antimicrobial, wide color selection, durable, easy to clean.
- Cons: Needs careful installation, can yellow with age (“ambering”), may require waxing.
- Cost: $4–$8 per square foot.
Reclaimed Wood Flooring
Overview: Salvaged from old buildings, barns, or industrial sites, reclaimed wood flooring gives new life to existing materials and adds unique character to your studio.
- Pros: Reduces demand for new lumber, each plank is unique, strong and durable, can be refinished.
- Cons: Can be expensive, may require more prep and finishing, possible presence of old finishes or nails.
- Cost: $8–$20+ per square foot.
Recycled Rubber Flooring
Overview: Made from post-consumer tires and other recycled materials, rubber flooring is resilient and ideal for spaces that require both comfort and durability.
- Pros: Shock-absorbing, slip-resistant, durable, easy to clean, often made from up to 100% recycled content.
- Cons: Distinct smell at first, limited aesthetic options, may not suit all decor styles.
- Cost: $2–$10 per square foot.
Polished Concrete (with Eco-Friendly Sealers)
Overview: If your space already has a concrete slab, polishing and sealing it with low-VOC or natural sealers is an economical and sustainable choice.
- Pros: Utilizes existing material, extremely durable, low-maintenance, can be stained for color.
- Cons: Hard underfoot, cold without rugs, professional polishing can be costly.
- Cost: $3–$8 per square foot for polishing and sealing.
Comparing Flooring Options: Practical Criteria for Craft Studios
When selecting flooring for your craft studio, consider the following factors:
- Durability: Will the floor withstand dropped tools, rolling chairs, and frequent foot traffic?
- Comfort: Do you spend hours standing or moving around? Cushioned floors like cork or rubber may reduce fatigue.
- Cleanability: Can you easily sweep up threads, paint spills, or glitter?
- Moisture Resistance: Is your studio prone to spills, or is it in a basement or garage?
- Budget: What is your material and installation budget?
- Aesthetics: Does the flooring complement your creative style?
Here’s a quick reference table comparing the main options:
| Material | Durability | Comfort | Cleanability | Eco Score | Avg Cost |
|---|---|---|---|---|---|
| Bamboo | High | Medium | Easy | Excellent | $$ |
| Cork | Medium | High | Easy | Excellent | $$$ |
| Linoleum | Medium-High | Medium | Easy | Excellent | $$ |
| Reclaimed Wood | High | Medium | Medium | Good | $$$$ |
| Recycled Rubber | High | High | Easy | Good | $$ |
| Polished Concrete | Very High | Low | Very Easy | Good | $ |
Step-by-Step Installation Guide for DIYers
While some sustainable flooring options are best handled by professionals, many can be installed by a confident DIYer. Here’s a general overview for floating floors, which are popular due to their ease of installation:
Preparation
- Measure your space to calculate square footage and order 10% extra for cuts and waste.
- Acclimate new flooring by letting planks or tiles sit in your studio for 48–72 hours to adjust to temperature and humidity.
- Prepare the subfloor: Ensure it is clean, dry, and level. Remove old flooring if necessary.
Tools & Materials Needed
- Utility knife or saw (for cutting planks/tiles)
- Tapping block and pull bar
- Measuring tape and pencil
- Underlayment (if required for sound or moisture control)
- Flooring spacers
- Protective gear (gloves, mask, knee pads)
Installation Steps (Floating Floor Example: Bamboo, Cork, Linoleum Tiles)
- Lay underlayment if needed; trim to fit.
- Begin in a corner, placing spacers along the wall to allow for expansion.
- Lay the first row of planks or tiles, clicking or gluing them together as directed.
- Stagger joints for stability and appearance.
- Continue row by row, trimming pieces as needed for fit.
- Remove spacers, install baseboards or trim to cover expansion gaps.
- Clean up, wipe the floor, and allow adhesive (if used) to cure.
For polished concrete or reclaimed wood, professional installation is often advised unless you have experience with these materials and tools.
Maintenance Best Practices for Sustainable Craft Studio Floors
Maintaining your eco-friendly floor preserves both its looks and its longevity. Here’s how to care for each type:
General Maintenance Tips
- Sweep or vacuum regularly to remove debris that can scratch or dull the surface.
- Wipe spills immediately to prevent staining or water damage.
- Use mats or rugs at entryways and under rolling chairs to protect high-traffic areas.
- Avoid harsh chemicals; opt for pH-neutral or manufacturer-recommended cleaners.
Material-Specific Care
- Bamboo: Clean with a damp mop and mild soap; re-seal as needed if the finish shows wear.
- Cork: Use only damp cleaning (not soaking wet), reseal every few years to maintain moisture resistance.
- Linoleum: Sweep frequently; damp mop with a diluted neutral cleaner; periodic buffing or waxing keeps it looking fresh.
- Reclaimed Wood: Dust mop, clean with wood-safe products, and re-finish or seal every few years.
- Recycled Rubber: Sweep or vacuum, mop with a mild detergent; avoid oil-based cleaners.
- Polished Concrete: Dust mop regularly; damp mop with water and a pH-neutral cleaner; reseal every 2–3 years.
Budget Breakdown: Materials, Installation, and Hidden Costs
Here’s how to estimate the full cost of an eco-friendly floor for a typical 150 sq. ft. craft studio:
- Materials: $300–$3,000 depending on your choice.
- Underlayment: $50–$150 (if needed).
- Adhesives, sealers, or finishes: $30–$200.
- Tools rental or purchase: $40–$120.
- Professional installation (optional): $3–$8 per sq. ft. extra.
- Disposal of old flooring: $0–$200 (may be free if you donate or recycle materials).
Tip: Always get multiple quotes if hiring installation pros, and check for local rebates or incentives for sustainable renovations.
Frequently Asked Questions About Eco-Friendly Craft Studio Flooring
- Can I install eco-friendly flooring over existing tile or vinyl?
In many cases, yes—especially with floating floors—but check for level, moisture, and compatibility. Remove any loose or damaged flooring first. - Is eco-friendly flooring safe for people with allergies or asthma?
Yes, options like cork, linoleum, and bamboo are hypoallergenic and emit fewer VOCs than standard carpeting or vinyl. - How can I make existing floors more sustainable?
Use non-toxic finishes, add natural fiber rugs, or refinish rather than replace whenever possible. - What about area rugs?
Choose rugs made from natural fibers (cotton, wool, jute) with natural rubber backings. Avoid synthetic or chemically treated rugs.
Conclusion: Building a Greener Foundation for Your Creative Journey
Eco-friendly flooring is more than a trend—it’s a practical investment in the health, comfort, and sustainability of your craft studio. By choosing renewable, recycled, and low-impact materials, you’re not only reducing your environmental footprint but also creating a safer, more inspiring place to create. Each sustainable flooring option offers its own unique blend of benefits: bamboo’s clean lines and resilience, cork’s cushioned comfort, linoleum’s timeless practicality, reclaimed wood’s history and charm, rubber’s toughness, and concrete’s industrial chic. The right choice for your space will depend on your crafting style, budget, and personal aesthetic.
Remember, installation doesn’t have to be intimidating—many eco-friendly floors are designed for DIYers. With careful preparation, the right tools, and ongoing maintenance, your new floor can serve as the foundation for countless creative projects. Beyond the environmental benefits, an eco-conscious floor makes your studio healthier by minimizing exposure to allergens and toxins, allowing your creativity to flourish in a space that truly supports you. As you set foot in your transformed studio, you’ll not only enjoy the beauty and practicality of your flooring choice but also the peace of mind that comes from crafting with care for the world around you. Your sustainable studio journey starts from the ground up—step in and create!