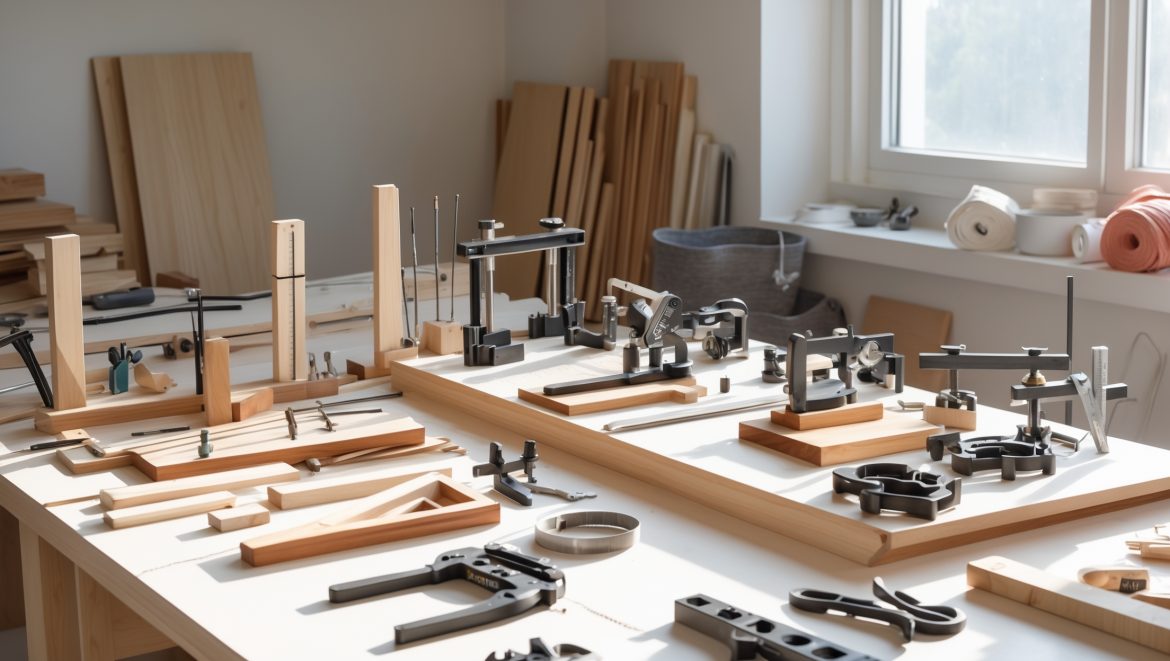
Introduction: Why Every Craft Studio Needs DIY Workshop Jigs
Whether you’re a hobbyist or a seasoned maker, running a productive craft studio is about more than having the right tools—it’s about getting the most from them. Enter the world of workshop jigs: clever, custom-made aids that can transform how you cut, glue, sand, paint, and assemble your projects. While often associated with woodworking, jigs are invaluable for a range of crafts, from fabric arts to jewelry making, model building, and beyond.
Jigs improve precision, save time, and boost safety by guiding materials and tools in controlled ways. Yet, many crafters overlook their potential, thinking they’re only for advanced pros or specialized shops. In truth, building your own jigs is one of the most practical upgrades you can make to your studio, regardless of your skill level or preferred medium. With a few common materials and a little DIY spirit, you can tailor jigs to your workflow, solve persistent frustrations, and open new creative possibilities.
This guide dives deep into essential DIY workshop jigs every creative studio should consider. We’ll cover what they are, why they matter, and step-by-step instructions for building versatile options that fit your space, tools, and projects. You’ll find material lists, setup tips, upgrade ideas, and maintenance advice—everything you need to start working smarter, not harder.
What is a Workshop Jig? The Basics Explained
A jig is a custom device that holds, supports, or guides your material or tool during a specific task. Jigs differ from fixtures in that they often guide a tool (like a saw or drill) rather than just holding the workpiece. Common workshop jigs include:
- Cutting jigs – Ensure repeatable, straight, or angled cuts.
- Drilling jigs – Guide drill bits for consistent holes.
- Sanding/finishing jigs – Hold pieces for steady sanding or painting.
- Assembly/positioning jigs – Align parts for gluing, stapling, or sewing.
Jigs are often made from wood, MDF, acrylic, or even scraps. A good jig is durable, accurate, and easy to use—and the best ones are tailored to your preferred projects and tools.
Top 7 Essential Jigs for Your Craft Studio
Let’s break down seven workshop jigs that offer massive benefits to crafters of all stripes. For each, you’ll get a use case, material list, and build guide.
1. Crosscut Sled for Table Saws and Hand Saws
- Purpose: Makes perfectly straight, square cuts in wood, foam board, or plastics.
- Materials: Plywood or MDF (at least 3/4″ thick), hardwood runners, wood glue, screws, measuring tape, square.
- Build Steps:
- Cut a base panel wider than your saw’s table.
- Attach hardwood runners that fit your saw’s miter slots (or make guides for hand saws).
- Glue and screw a front fence (square to the blade path) and a rear fence for rigidity.
- Test for square, adjust as needed, and wax the runners for smooth sliding.
- Tips: Mark a “danger zone” where the blade passes. Add a stop block for repeat cuts.
2. Adjustable Angle Jig
- Purpose: Cut or sand precise angles (miters, bevels) for frames, boxes, or inlays.
- Materials: Plywood, adjustable protractor hinge, knobs/bolts, non-slip tape.
- Build Steps:
- Cut two panels: one as a base, one as a movable fence.
- Join with a protractor hinge so the fence can swing to any angle.
- Add slots and knobs to lock the angle in place.
- Apply non-slip tape to hold workpieces steady.
- Tips: Use for cutting mats, fabric, or wood with consistent accuracy.
3. Drill Guide Block
- Purpose: Drill perfectly straight holes with a hand drill—no drill press needed.
- Materials: Hardwood block, drill bits, square, clamps.
- Build Steps:
- Mark and drill guide holes of common diameters through the hardwood block using a drill press or at a hardware store.
- Label each hole with its size.
- Clamp the block to your workpiece and use the guide holes to direct your drill bit.
- Tips: Make angled versions for dowel joinery or pocket holes.
4. Right Angle Assembly Jig
- Purpose: Hold parts at a perfect 90° during assembly—ideal for boxes, frames, and panels.
- Materials: Hardwood or MDF triangles, clamps, screws.
- Build Steps:
- Cut triangles with true 90° corners.
- Glue and screw two triangles together for stability.
- Clamp to your workpieces during gluing or nailing.
- Tips: Add slots for clamp clearance or integrate quick-release clamps.
5. Repetitive Stop Block System
- Purpose: Make multiple identical cuts or drilled holes without measuring each time.
- Materials: Wood strips, T-track (optional), T-bolts/knobs, adhesive ruler.
- Build Steps:
- Fix a ruler or measuring tape to your saw or drill base.
- Mount a wood strip or T-track parallel to the cutting/drilling edge.
- Attach a sliding stop block that locks at any measurement.
- Tips: Perfect for batch-producing craft parts or kits.
6. Sanding Station Jig
- Purpose: Hold small or delicate items securely for hand or power sanding, minimizing finger fatigue or risk.
- Materials: Scrap wood, rubber padding, clamps, toggle clamps (optional).
- Build Steps:
- Mount a padded surface to a stable base.
- Add adjustable wood blocks and clamps to hold various shapes.
- Upgrade with toggle clamps for fast securing and release.
- Tips: Use for sanding jewelry, models, or small craft components.
7. Paint and Finish Drying Rack
- Purpose: Maximize space, prevent smudges, and speed up drying of painted or glued pieces.
- Materials: Dowels or rods, plywood, screws, spacers.
- Build Steps:
- Cut two upright panels with evenly spaced holes.
- Insert dowels or rods through the holes to create multiple drying levels.
- Stabilize with a wide base and optional side supports.
- Tips: Make racks stackable for batch projects or add mesh panels for small items.
How to Choose the Right Jigs for Your Craft Studio
Not every studio needs every jig. Consider:
- Your main crafts: Woodworkers may want more cutting and drilling jigs; fabric crafters might prioritize angle or pressing jigs.
- Space: Compact, multi-use jigs are best for small studios. Wall-mounted or foldable jigs save space.
- Tool compatibility: Build jigs to fit your actual tools—measuring carefully for blade paths, drill sizes, or workspace dimensions.
- Workflow bottlenecks: Where do you lose time or make errors? The best jigs solve your pain points.
Upgrading and Customizing Your Jigs
Once you’ve built the basics, consider:
- Adding scales and stops: Adhesive rulers, sliding stops, and angle indicators improve repeatability.
- Material upgrades: Use hardwood or phenolic resin for longer-lasting, high-use jigs.
- Quick-release mechanisms: Toggle clamps, cam levers, or magnets speed up setup and teardown.
- Dust collection ports: For drilling or sanding jigs, add shrouds or ports to attach a shop vac.
- Safety enhancements: Non-slip tape, blade guards, and finger shields protect you during tricky operations.
Maintenance and Best Practices for Workshop Jigs
Keep Jigs Accurate and Reliable
- Inspect for wear after each use—especially fence alignment and sliding parts.
- Clean off glue, paint, or sawdust to prevent buildup and ensure smooth operation.
- Check for squareness and recalibrate as needed using a reliable square or digital angle gauge.
- Lubricate sliding parts with paste wax or dry lubricant.
- Store jigs flat or hang them to prevent warping.
When to Rebuild or Upgrade
- If a jig becomes loose, unreliable, or unsafe, rebuild it—don’t risk your project or safety.
- As your skills and projects grow, revisit your jig designs for efficiency improvements.
- Document your builds with notes or photos for easy reproduction or troubleshooting.
Real-World Examples: Jigs in Action
Here are a couple of quick case studies from real crafters:
Batch-Cutting Quilt Squares
Sarah, an avid quilter, built a simple angle jig for her rotary cutter. By setting the fence to 45°, she produced dozens of perfect triangles in a fraction of the time, with no wasted fabric from misaligned cuts.
Effortless Box Assembly for Small Business
Marcus, who makes custom wooden boxes, uses right-angle assembly jigs and repetitive stop blocks to streamline production. His glue-ups are always square, and his parts fit together with minimal sanding or adjustment, drastically reducing returns and rework.
Safety Considerations When Using Jigs
- Never put your hands near cutting or drilling areas—use push sticks, clamps, or hold-downs.
- Mark blade paths and danger zones clearly on your jigs.
- Wear eye and ear protection, especially when using power tools with jigs.
- Secure your jigs and workpieces firmly before use—unexpected movement is a leading cause of accidents.
- Test new jigs with scrap material before working on your actual project.
Conclusion: Start Small, Work Smarter
DIY workshop jigs aren’t just for pro woodworkers with fancy shops—they’re practical, accessible upgrades that can make any craft studio safer, more efficient, and far more enjoyable. Whether you’re cutting, drilling, sanding, or assembling, a well-designed jig eliminates guesswork and fatigue, letting you focus on creativity and quality.
Start by identifying the tasks you repeat most or the errors that frustrate you. Choose a simple jig from this guide, gather your materials, and give building one a try. Each jig you add is an investment in smoother workflow, greater consistency, and professional-looking results. And as your confidence grows, you’ll find yourself inventing custom jigs tailored to your unique projects and style.
Remember: a great craft studio isn’t defined by how many tools you have, but by how cleverly you use them. With a handful of essential jigs, you’ll turn your workspace into a true creative powerhouse—one that works for you, not against you. Happy making!


Could you clarify if there are certain materials that work best for building jigs for fabric arts versus woodworking, or are the suggestions here meant to be universal across different craft types?
The article highlights jigs that are generally adaptable, but material choice should match your craft. For woodworking jigs, sturdy materials like hardwood or quality plywood are best to handle tools and pressure. For fabric arts, lighter materials such as smooth plastic or MDF work well since they don’t snag or damage fabric. Feel free to tailor materials based on your specific needs.
How much does it typically cost to gather the materials needed for the basic jigs you list? I’m trying to put together a small setup and want to keep the budget low if possible.
For the basic jigs mentioned in the article, you can usually gather all the materials for around $30 to $60 if you use affordable plywood, MDF, or scrap wood, plus common hardware like screws and clamps. Shopping at local hardware stores and reusing leftover materials from other projects can keep your costs even lower.
Can you provide more details on any safety considerations to keep in mind when building and using these DIY jigs, particularly for someone who’s not very experienced with power tools?
Absolutely. Always wear safety glasses and hearing protection when working with power tools. Keep your hands away from blades and moving parts, and never remove safety guards. Secure your workpieces and check that your jigs are firmly clamped before use. Take your time with measurements and assembly to avoid mistakes, and don’t hesitate to ask an experienced friend for guidance if you’re unsure about a step.
What’s a good starting jig project for someone with only basic tools like a hand saw and drill? I want to avoid anything too complex for my first build.
A simple and useful jig to start with is a basic crosscut guide. With just a hand saw and a drill, you can make a straightedge out of scrap wood that helps keep your cuts square. It’s easy to build, improves accuracy, and is a great confidence booster for future projects.
Could you explain how to adapt workshop jigs designed for woodworking to other crafts like jewelry making or fabric arts? Are there any major modifications you’d recommend when working with smaller or more delicate materials?
To adapt woodworking jigs for jewelry making or fabric arts, scale down the jig’s size for better control with small or delicate materials. Use softer, less abrasive surfaces—like felt or smooth plastics—to prevent scratches. For precision tasks, add finer adjustment features such as small clamps or micro-adjustment screws. Always ensure the jig holds materials gently but securely to avoid damage.
Do you have advice on organizing or storing multiple jigs in a limited space so they’re easily accessible but not in the way?
One effective way to store multiple jigs in a small space is to use wall-mounted pegboards or slat walls. Hang each jig with labeled hooks so you can see and grab what you need quickly. Alternatively, dedicate a drawer with dividers or a rolling cart to keep jigs sorted and easy to move around your workspace.
Could you provide some tips for choosing the right materials when building your own jigs, especially if you want them to be durable yet affordable for different types of crafts beyond woodworking?
When picking materials for DIY jigs, consider using plywood or MDF for affordability and versatility—they work well for many crafts, not just woodworking. For added durability, reinforce high-wear areas with hardwood strips or aluminum angle. For crafts involving moisture or glue, use plastic laminate or seal surfaces with varnish to prevent warping and make cleanup easier.
When building your own jigs, how do you know which materials to choose? Are there certain woods or hardware that hold up better over time for frequent use?
When building jigs for frequent use, it’s best to choose hardwoods like birch, maple, or oak because they resist wear and stay stable over time. For hardware, opt for quality metal components such as steel or brass fasteners and hinges. Avoid softwoods and cheap hardware, as they can wear out or loosen quickly with regular use.
I’m a beginner with mostly fabric and light wood projects. Which type of jig would you recommend building first to see the biggest improvement in accuracy without needing a lot of expensive materials?
For fabric and light wood projects, a simple adjustable miter jig would be a fantastic first build. It helps you cut accurate angles and straight edges with minimal tools and materials, making your work cleaner and more precise. You can easily customize it for your small projects, and it doesn’t require expensive parts to put together.
If I want to start with just one versatile jig for a tiny workspace, which type would you suggest based on your guide, and how long might it take to build as a beginner?
Based on the guide, a crosscut sled is the most versatile jig you can start with for a small workspace. It helps with accurate, repeatable cuts on a table saw and is useful for many projects. As a beginner, expect to spend about 2–3 hours building one, depending on your pace and available tools.
For someone with a small workspace, which jig designs from your guide offer the most versatility without taking up a lot of room or requiring specialty tools?
For a compact workspace, the crosscut sled and the adjustable stop block are excellent choices from the guide. Both are compact, easy to build with basic tools, and can be used for a wide range of tasks, such as making precise cuts and repeatable measurements on your projects.
If I run into issues with a homemade jig not giving accurate results, what are some troubleshooting steps or common mistakes to check for when building them?
Check that your jig is assembled square and level, as even slight misalignments can throw off accuracy. Ensure all joints are tight and nothing shifts during use. Double-check your measurements and markings when building, and verify that the materials you used haven’t warped. Also, see if guides or stops are slipping—sometimes adding clamps or tightening fasteners helps.
I’m not totally clear on the difference between a jig and a fixture. Is it just about guiding the tool, or are there cases where the line blurs between the two?
A jig mainly guides the tool as you work, ensuring accuracy and repeatability, while a fixture holds your workpiece steady in a set position. Sometimes, the line can blur—some shop-made devices do both jobs. But in general, jigs move the tool, fixtures secure the work.
I’m a little confused about the difference between a jig and a fixture when it comes to cutting and assembly tasks. Could you explain how you decide which to build for a project?
A jig is designed to guide your tools during cutting or drilling, helping you achieve consistent results, while a fixture holds your workpiece securely in place for assembly or machining. If your project needs precise tool movement, build a jig. If you mainly need to stabilize parts, a fixture is the better choice.
After building a jig following your instructions, how often do you find you need to maintain or upgrade it to keep it effective?
Typically, basic jigs built from sturdy materials require only minor maintenance, like tightening bolts or checking for wear, every few months with regular use. Upgrades or significant repairs are usually needed only if your projects change or if you notice accuracy slipping due to repeated heavy use.
The guide talks about jigs improving safety, which really interests me. Are there any particular safety issues to watch out for when building or using homemade jigs, especially as a beginner?
When building or using homemade jigs, always make sure they’re sturdy and securely attached to your tools or workbench. Avoid loose parts that could shift during use. Double-check that your hands and fingers stay clear of blades or moving parts, and never bypass safety features on your equipment. As a beginner, take your time to test the jig with scrap material first to ensure it works safely.
What’s the best way to troubleshoot if a homemade jig isn’t delivering the precision or repeatability described? Are there common mistakes beginners make when building or setting up these jigs?
If your homemade jig isn’t as precise or repeatable as expected, first double-check measurements and ensure all joints are square and secure. Common beginner mistakes include using warped material, misaligning parts, or not fastening everything tightly. It also helps to test the jig with scrap material and make small adjustments as needed to improve accuracy.
For someone who mostly works with fabric instead of wood, could you give some examples of jigs that work well for sewing or quilting projects? I’m wondering how versatile these DIY jigs are outside of woodworking.
DIY jigs can be very useful for sewing and quilting projects, not just woodworking. For example, you can build fabric cutting guides, seam allowance rulers, or a simple pressing jig for consistent hems. Adjustable templates for patchwork shapes or quilt blocks also help with accuracy and speed. Many woodworking jig concepts can be adapted for fabric crafts with a few tweaks.
Could you share how long it typically takes to build some of the simpler jigs in your guide, especially for someone new to DIY projects?
For someone new to DIY, building the simpler jigs like a crosscut sled or a bench hook usually takes about 1 to 2 hours each. This includes time for measuring, cutting, assembly, and basic finishing. If you’re extra careful or want to sand and finish them neatly, it might take a little longer, but most beginners can complete these in an afternoon.