Introduction: Why Dust Control Matters in Every DIY Craft Studio
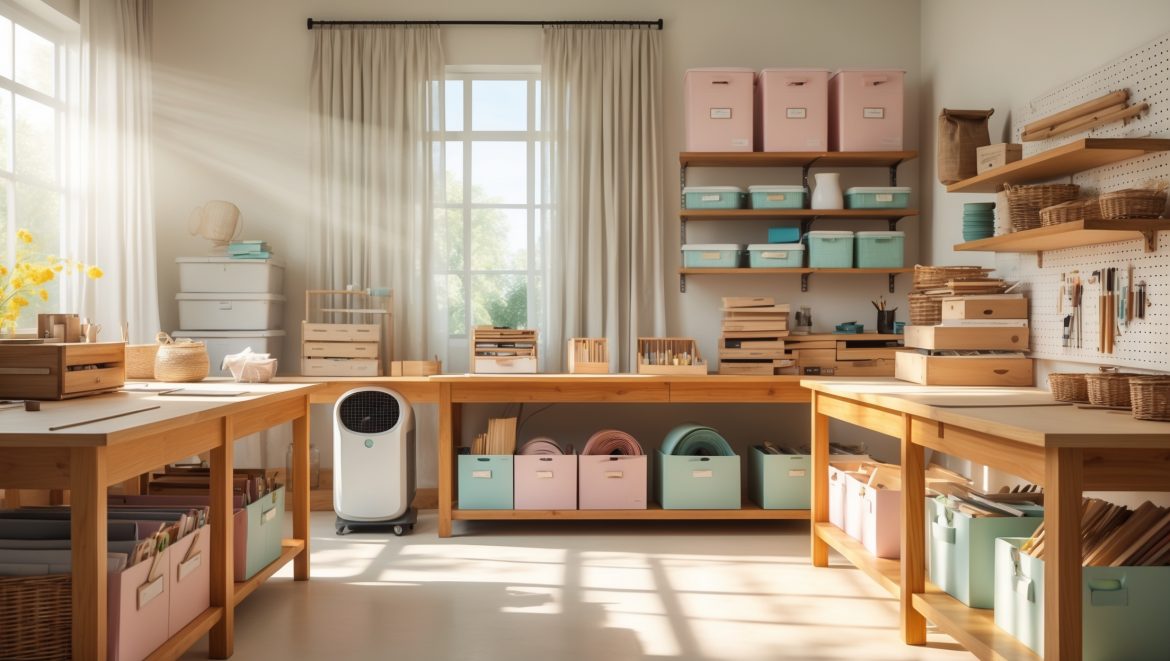
For any passionate DIYer or creative entrepreneur, a craft studio is more than just a workspace—it’s a sanctuary for inspiration and productivity. But there’s a persistent, often overlooked enemy lurking in even the tidiest studios: dust. Whether you work with wood, fabric, paper, or mixed media, airborne particles can quickly accumulate, compromising air quality, damaging equipment, and even posing health risks. From the fine sawdust of woodworking to fabric fibers and glitter, dust impacts every creative process. Without effective dust control, not only do your tools and materials degrade faster, but your studio becomes less inviting and more hazardous over time.
In this comprehensive guide, you’ll discover practical, actionable strategies for maintaining a dust-free craft studio. We’ll explore how to identify the sources of dust, choose and set up the best dust collection systems, implement smart cleaning routines, and protect both your health and your beloved tools. Whether you’re setting up your first studio or looking to upgrade your current space, this guide will help you transform your creative environment into a cleaner, healthier, and more productive haven.
Understanding Dust: Types, Sources, and Risks
Common Types of Dust in Craft Studios
- Wood Dust: Generated by sawing, sanding, and shaping wood. Contains fine particulates that can linger in the air.
- Fabric Fibers: From cutting and handling textiles, felt, and yarn. Lightweight and prone to static cling.
- Paper Particles: Created during paper cutting, folding, or sanding edges for crafts like scrapbooking or card making.
- Metal Shavings: Less common, but present in jewelry making or mixed media projects involving metalwork.
- Miscellaneous: Glitter, sanding dust from clay or resin, and even pet hair if your studio is pet-friendly.
Health and Equipment Risks
- Respiratory Issues: Inhalation of fine particulates can aggravate allergies, asthma, or cause long-term respiratory conditions.
- Tool Wear: Dust infiltrates moving parts, reducing the lifespan and accuracy of tools like sewing machines, sanders, and power saws.
- Fire Hazard: Accumulated dust, especially wood and fabric fibers, increases the risk of fire.
- Surface Contamination: Dust settles on workpieces, affecting paint, finish, or adhesive performance.
Identifying Studio Dust Sources
Workflow Analysis
Begin by mapping out your typical craft projects. Identify steps that generate the most dust—sanding, cutting, drilling, or even unrolling fabrics. Observe where dust tends to settle: around power tools, near fabric storage, or under workbenches. Take note of:
- Which tools or materials create the most visible dust clouds
- Areas of your studio that stay dusty despite cleaning
- Airflow patterns from heating/cooling vents or open windows
Hidden Dust Traps
- Behind large equipment or storage shelves
- Inside machine housings (e.g., sewing machines, power tools)
- On top of light fixtures and window frames
- Within HVAC filters and ductwork
Essential Dust Collection Systems for DIY Craft Studios
Central Dust Collection Units
For studios with stationary power tools (table saws, sanders), consider a central dust collector. These systems use a motorized fan and filters to capture dust directly from the source. Key features to look for:
- HEPA filtration for fine particulates
- Flexible hose connections compatible with multiple tools
- Sealed canisters or bags for easy emptying
- Noise ratings below 80 dB for comfort
Tool-Attached Vacuums and Extractors
Smaller studios or portable tools benefit from shop vacuums or dedicated dust extractors. Choose models with high suction and replaceable filters. Attach these directly to sanders, scroll saws, or rotary tools to minimize mess at the source.
Air Filtration and Purifiers
- Install an air purifier with a true HEPA filter to remove airborne dust particles that escape collection systems.
- Position units strategically—near dust-producing zones and in areas with stagnant airflow.
- Replace filters on schedule to maintain optimal performance.
DIY Dust Collection Solutions
- Attach a shop vacuum to a homemade cyclone separator for improved efficiency and easier debris disposal.
- Create a downdraft table for sanding or painting—holes in the tabletop connect to a vacuum below, pulling dust downward as you work.
- Use box fans fitted with furnace filters as budget-friendly air scrubbers for small spaces.
Optimizing Studio Layout for Dust Control
Zone-Based Organization
Divide your studio into clean and dirty zones. Reserve one area for messy operations (cutting, sanding), and another for finishing or assembly. Use movable partitions or curtains to contain dust. Store sensitive electronics and finished projects away from high-dust zones.
Airflow Management
- Orient workstations so dust is drawn away from you and toward collection units.
- Seal gaps around doors and windows to limit dust migration.
- Install exhaust fans to expel airborne dust outside (check local codes for venting requirements).
Workbench Upgrades
- Install rubber mats on benches to trap debris and simplify cleaning.
- Use easy-to-wipe surfaces like sealed wood or laminate for worktops.
- Add under-bench storage bins with lids to keep supplies dust-free.
Cleaning Routines and Maintenance Schedules
Daily Cleaning Habits
- Vacuum work surfaces after each project session, starting with the tool and moving outward.
- Wipe down tools and machines with a microfiber cloth to remove fine dust.
- Empty dust collection bins and clean filters as needed to prevent clogs.
Weekly and Monthly Deep Cleans
- Move equipment to vacuum underneath and behind every week.
- Wash or replace air purifier filters monthly.
- Clean window sills, light fixtures, and ceiling fans where dust settles unnoticed.
- Check and clean HVAC filters to improve overall studio air quality.
Tool-Specific Maintenance
- Open and vacuum inside tool housings (as per manufacturer guidelines) every few months.
- Lubricate moving parts after cleaning to protect against dust-induced wear.
Protecting Yourself: Personal Safety and Air Quality
Personal Protective Equipment (PPE)
- Wear a NIOSH-approved dust mask or respirator during dusty operations.
- Use safety goggles to prevent eye irritation from airborne particulates.
- Wear coveralls or a dedicated apron to keep dust off clothing.
Monitoring Air Quality
- Invest in an indoor air quality monitor to track particulate levels and humidity.
- Maintain relative humidity between 40–60%—too dry, and dust becomes airborne more easily.
- Ventilate the studio regularly, especially after high-dust activities.
Protecting Your Tools and Materials
Storage Solutions
- Use sealed cabinets or plastic bins for sensitive materials like fabric, paper, and paints.
- Install dust covers on idle machines and power tools.
- Store finished projects in lidded boxes or display cases to prevent dust buildup.
Tool Longevity Tips
- Regularly clean and oil moving parts to prevent dust-induced corrosion or jamming.
- Keep blades, bits, and needles sharp—dull tools create more dust and heat.
- Replace worn-out filters and seals to maintain dust collection efficiency.
Budget-Friendly Dust Control Upgrades
DIY Air Scrubbers
Create a homemade air scrubber using a box fan and a high-quality furnace filter. Secure the filter to the intake side of the fan and run it during and after dusty activities. This setup captures airborne particles at a fraction of the cost of commercial units.
Repurposed Containers for Dust Collection
Use five-gallon buckets or large plastic bins as dust collectors for portable tools. Fit lids with hose adapters to connect to shop vacuums. This approach is both cost-effective and easy to empty.
Thrifted Storage Solutions
Look for used filing cabinets, food storage containers, or even kitchen drawers at thrift stores to create dust-proof storage for tools and supplies.
Evaluating and Upgrading Your Dust Strategy Over Time
Track Problem Areas
- Keep a log of where dust accumulates most frequently, and adjust your cleaning and collection systems as needed.
- Solicit feedback from anyone sharing your studio—others may notice dust issues you’ve missed.
Scale Up as Needed
- Upgrade to more powerful dust collectors or air purifiers if you expand your studio or add new tools.
- Stay current with filter technology—HEPA and activated carbon filters are continually improving.
Conclusion: Cleaner Air, Happier Creativity
Dust control isn’t just about keeping your craft studio looking tidy—it’s an investment in your health, creativity, and the longevity of your tools and materials. By understanding the sources and risks of dust in your workspace, adopting effective collection and filtration systems, and maintaining disciplined cleaning routines, you can dramatically improve both your environment and your results. Cleaner air fosters clearer thinking and more enjoyable creative sessions, free from the distractions of coughing, sneezing, or constantly wiping down surfaces.
Remember, no dust control system is “set and forget.” Regularly evaluate your studio’s needs, upgrade your equipment as your skills and projects evolve, and stay vigilant about both personal safety and tool maintenance. The benefits extend beyond your studio walls: better air quality, fewer tool repairs, and a safer space for family, clients, or workshop guests. Ultimately, a dust-free craft studio is a more welcoming, inspiring place to nurture your creative pursuits—and that’s something every maker deserves.


Do you have any recommendations for budget-friendly dust collection systems that actually work well for small studios? I’m mostly dealing with sawdust and fabric fibers and want to keep the setup affordable.
For small studios, shop vacuums with HEPA filters are a cost-effective way to collect sawdust and fabric fibers. You can also pair a shop vac with a cyclone dust separator to capture more debris before it reaches the filter. DIY air purifiers made from box fans and furnace filters are another affordable option to help with airborne dust.
I have pets that sometimes hang out in my craft room, and I noticed the article includes pet hair as a source of dust. Do you have any tips on minimizing pet-related dust without having to ban them from the studio completely?
To minimize pet-related dust in your craft room, try grooming your pets regularly to reduce shedding and use washable covers on chairs or work surfaces they frequent. Vacuum the space frequently with a HEPA filter, and consider placing a small air purifier in the room. Keeping a lint roller handy also helps quickly remove hair from fabrics and tools.
The article touches on health risks from dust exposure. Are there any particular respirators or masks you suggest for crafts like resin or metalwork, where the dust might be especially hazardous?
For crafts like resin or metalwork, a standard cloth or surgical mask isn’t enough. Choose a NIOSH-approved respirator, such as an N95 or P100, which can filter out fine dust and particulates. For resin work, ensure the mask also protects against organic vapors if fumes are present. Always check the mask’s specifications to match your specific craft materials.
Have you dealt with static cling from fabric fibers making cleanup harder? Any practical tips for reducing this, especially in dry climates or during the winter?
Static cling is definitely a challenge, especially in dry climates or during winter when heating dries out the air. Using a humidifier can help reduce static buildup. Lightly misting surfaces with water before sweeping or vacuuming can also help fibers settle. Wearing natural fiber clothing and grounding yourself before cleaning can further minimize static issues.
If my studio has a mix of woodworking and fabric crafts, how can I prevent cross-contamination of dust between these areas? Should I separate work zones or is there an all-in-one dust collection setup that handles both types?
To prevent cross-contamination, it’s best to separate woodworking and fabric areas as much as possible. Physical barriers or even curtains can help. For dust collection, use dedicated vacuums or dust extractors for each area, since wood and fabric dust behave differently. An all-in-one system is possible, but you’ll need proper filtration and regular cleaning to avoid spreading fine particles between zones.
If I’ve already noticed my tools wearing out faster, what should I do first to control dust and prevent further damage? Should I focus more on cleaning routines or invest in equipment upgrades immediately?
If your tools are already wearing out, start by boosting your regular cleaning routines—wipe down surfaces, vacuum, and remove dust daily. This gives immediate results. You can then assess if upgrades like better air filtration or dust extraction equipment are needed for long-term dust control and tool protection.
If I’m just starting out and don’t have a big budget, are there any affordable dust collection systems or DIY solutions you recommend for keeping dust from woodworking or paper crafts under control?
If you’re on a tight budget, you can start with simple DIY solutions like using a shop vac with a HEPA filter to collect dust at the source. For paper crafts, a small portable air purifier and regular vacuuming work well. You can also create a basic dust collection hood using a plastic storage bin and flexible ducting connected to your vacuum.
You mention that glitter and fabric fibers are tough to control. Are there specific cleaning routines or tools you’ve found especially effective for dealing with these in areas with limited ventilation?
For spaces with limited ventilation, using a HEPA-filter vacuum or a handheld vacuum with fine filtration works well for picking up glitter and fabric fibers. Tack cloths or microfiber wipes also help trap stray particles. Try to wipe surfaces daily and vacuum regularly, focusing on corners and under work tables where fibers and glitter tend to accumulate.
Can you clarify how to identify whether dust is coming mostly from fabric fibers versus sawdust? I’m trying to figure out which source is causing the most issues in my studio.
To tell whether dust is mostly from fabric fibers or sawdust, look closely at the dust’s appearance and where it settles. Fabric dust tends to be lighter, fluffier, and often gathers near sewing machines or ironing areas. Sawdust is heavier, grittier, sometimes yellowish or tan, and usually piles up around woodworking tools. Tracking which activities produce more visible dust can also help pinpoint the source.