Introduction: Why Deep Cleaning Matters in DIY Craft Studios
If you’re passionate about DIY, crafts, and creative living, your craft studio is more than just a workspace—it’s a sanctuary for inspiration, productivity, and joy. But over time, even the most organized studios accumulate dust, debris, hidden spills, and neglected corners. Routine tidying isn’t enough. A seasonal deep cleaning blueprint is essential to maintain a healthy, functional, and safe environment for your creative pursuits. Neglecting this process can lead to cross-contamination of materials, damage to tools, and even health risks from allergens and chemical residues. In this comprehensive guide, you’ll learn how to develop a seasonal deep cleaning schedule, what supplies you truly need, and professional strategies to ensure every inch of your studio remains as inspiring as your imagination. Whether you’re a hobbyist or a full-time maker, these actionable steps will transform your workspace into a cleaner, safer, and more efficient haven year-round.
Understanding the Unique Cleaning Needs of Craft Studios
Why Craft Studios Get Dirtier, Faster
Unlike standard living spaces, craft studios are high-activity areas with frequent material handling, open shelving, and the use of paints, adhesives, and specialty tools. Sawdust, fabric fibers, glitter, paper scraps, and chemical residues build up quickly and can settle in unexpected places. These materials are not just unsightly—they can pose safety hazards, attract pests, and compromise your projects.
Key Problem Areas in DIY Studios
- Work Surfaces: Glue drips, paint splatters, ink stains, and fabric lint accumulate over time.
- Floors: Dust, small sharp objects, and spilled liquids can hide in corners and under furniture.
- Shelving & Storage: Open shelves collect dust, while bins may hide mold or spilled supplies.
- Tools & Equipment: Hand and power tools can gather dust and residue, impacting performance and longevity.
- Ventilation & Lighting Fixtures: These often-overlooked areas trap airborne particles and cobwebs.
- Sink Areas: Paint, clay, and adhesives can clog drains and cause mildew if not cleaned regularly.
Seasonal Deep Cleaning Schedule: Timing & Planning
Why Clean Seasonally?
Seasonal deep cleaning aligns with natural transitions in temperature, humidity, and project cycles. It’s the best way to stay ahead of mess, prevent damage from environmental factors, and reset your workflow for the coming months. For most studios, a thorough deep clean four times a year—at the start of each season—strikes the right balance between upkeep and practicality.
Sample Deep Cleaning Calendar
- Spring: Post-winter dust, check for humidity damage, prep for fresh projects.
- Summer: Address pest risk, manage heat/humidity buildup, reorganize supplies as needed.
- Fall: Clear clutter from busy summer crafting, prep for holiday project surge.
- Winter: Deep dusting, review stored materials, check for condensation or mold.
Pre-Cleaning Checklist
- Block off time in your calendar (aim for 4-6 hours per session depending on studio size).
- Gather all cleaning supplies (see next section).
- Open windows for ventilation if possible.
- Wear gloves and a dust mask, especially if you have allergies or use chemicals.
- Set up bins for trash, recycling, and donations.
- Take “before” photos for motivation and progress tracking.
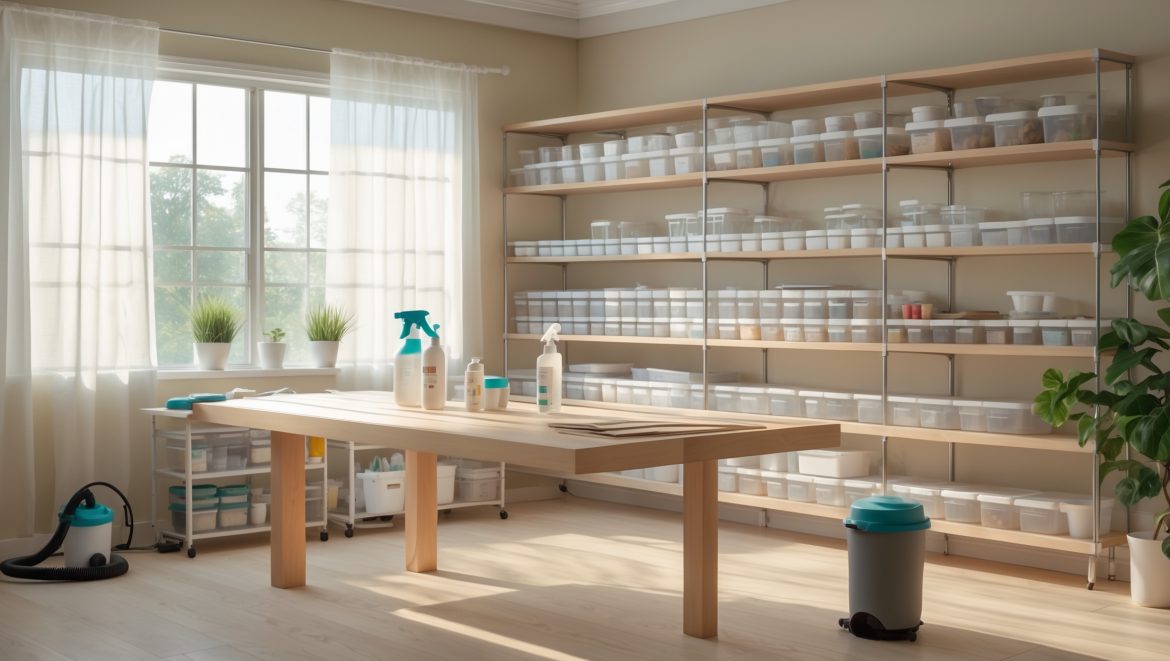
Deep Cleaning Supplies: What You Really Need
Essential Tools & Materials
- Vacuum cleaner (preferably with HEPA filter and attachments for crevices and upholstery)
- Microfiber cloths (trap dust and fibers, washable and reusable)
- Soft-bristled brushes (for delicate surfaces and tool cleaning)
- All-purpose cleaner (DIY or store-bought, ensure it’s safe for your surfaces)
- Disinfectant spray (especially for high-touch areas and shared studios)
- Bucket and mop (for hard flooring)
- Lint roller or sticky tape (great for fabric scraps and glitter)
- Compressed air canister (for keyboards, electronics, and tight spaces)
- Old toothbrush (detail cleaning of tools and tight corners)
- Non-abrasive scrub pad (for sinks and stubborn stains)
- Rubber gloves (protect hands from harsh cleaners and residues)
- Mask (for dust and fumes)
- Large garbage bags (for disposing of debris and unwanted items)
Eco-Friendly Alternatives
- Baking soda and vinegar for natural stain lifting and deodorizing
- Castile soap for surfaces and hands
- Reusable, washable cleaning pads
- Repurposed jars and containers for organizing supplies mid-clean
Room-by-Room Deep Cleaning Blueprint
This section breaks down your cleaning strategy into actionable steps, area by area. Tackle one section at a time to avoid overwhelm and ensure thoroughness.
1. Work Surfaces & Tables
- Clear all items and sort into keep, relocate, or discard piles.
- Vacuum or wipe away loose debris.
- Clean surfaces with all-purpose cleaner, paying special attention to dried glue, paint, or ink. Use a plastic scraper for stubborn spots.
- Disinfect high-touch areas, like table edges and handles.
- Inspect for damage (splinters, warping) and make minor repairs as needed.
- Replace protective mats or table coverings if worn out.
2. Storage & Shelving
- Take everything off shelves—don’t skip this step!
- Dust shelves from top to bottom with microfiber cloths or a vacuum attachment.
- Wipe with a damp cloth and mild cleaner; dry completely before restocking.
- Sort through bins and boxes: discard expired supplies, donate unused items, and wipe out any spills or residue.
- Group materials by type or frequency of use before returning to shelves.
- Label bins for easier future access.
3. Tools & Equipment
- Unplug all electric tools before cleaning.
- Remove dust and debris with a brush, vacuum, or compressed air.
- Clean tool handles and surfaces with a damp cloth; disinfect if shared.
- Check for rust, dullness, or damage—sharpen, oil, or repair as needed.
- Organize tools in racks, drawers, or pegboards; keep regularly used tools easily accessible.
- Calibrate or test power tools for safety after cleaning.
4. Floors
- Clear the floor of all items, including rugs and mats.
- Vacuum thoroughly, especially around baseboards and under furniture.
- Mop with a floor-appropriate cleaner. For stubborn stains, use a non-abrasive pad.
- Let floors dry before moving items back.
- Shake out, wash, or replace rugs and mats as needed.
5. Sinks & Wet Areas
- Remove all items around the sink.
- Scrub sink basin and faucet with a non-abrasive pad and cleaner.
- Pour boiling water or a baking soda/vinegar mix down the drain to clear minor blockages and odors.
- Check for leaks or mold under the sink.
- Wipe down backsplash and surrounding walls.
6. Ventilation & Lighting Fixtures
- Turn off power before cleaning fixtures.
- Dust and wipe light covers, bulbs, and fan blades.
- Clear out vent covers with a vacuum or brush.
- Replace filters in air purifiers or HVAC systems as needed.
- Check for cobwebs and wipe around windows and ceiling corners.
7. Electronics & Office Equipment
- Unplug devices before cleaning.
- Use compressed air for keyboards and vents.
- Wipe screens and surfaces with a soft, barely damp cloth (avoid direct spray).
- Organize cords and cables; use cable ties or holders to prevent tangling.
- Back up important files and check for outdated equipment to recycle.
Specialty Materials: Deep Cleaning Tips
Paints, Solvents, and Chemicals
- Store tightly sealed and upright in well-ventilated, designated areas.
- Wipe containers to remove drips and residue.
- Dispose of expired or unknown substances safely according to local regulations.
- Clean up any spills immediately using appropriate absorbents.
Fabrics & Textiles
- Shake out dust and lint outdoors before folding or storing.
- Launder washable fabrics at least seasonally, especially if stored open.
- Check for pests, mildew, or stains and treat promptly.
Papers & Art Media
- Store in dry, sealed containers to prevent moisture or bug damage.
- Dust off papers and sort by size or type.
- Recycle scraps or donate to local schools or art programs.
Organizational Reset: Post-Cleaning Strategies
Deep cleaning is the perfect opportunity to rethink your studio layout and storage. As you return items to their places, consider these best practices:
- Adopt a “first in, first out” strategy for consumables to prevent waste.
- Use clear bins for frequently accessed materials so you can see when supplies run low.
- Group tools and supplies by project type or frequency of use.
- Label everything clearly for effortless maintenance and inventory tracking.
- Keep a notepad or digital list handy to jot down items that need replenishing or repair.
Pro Tips for Maintaining Cleanliness Between Deep Cleans
- Set a five-minute timer at the end of each session for a quick tidy-up.
- Keep a mini vacuum or handheld duster nearby for daily spot cleaning.
- Wipe spills and splatters immediately to prevent stains and sticky residues.
- Incorporate a regular weekly “reset” of work surfaces and high-traffic areas.
- Encourage all studio users to clean as they go, especially in shared spaces.
Safety and Health Considerations
Deep cleaning isn’t just about aesthetics—it’s crucial for safety and well-being. Always ventilate your studio when using chemical cleaners, and wear gloves when handling irritants. Store hazardous materials out of reach of children and pets, and never mix cleaning products unless you’re certain they’re compatible. If you discover signs of mold, pest infestation, or serious damage, address them immediately—don’t wait for the next scheduled clean.
Conclusion: A Cleaner Studio, A Clearer Mind
Committing to a seasonal deep cleaning blueprint is one of the smartest investments you can make in your DIY craft journey. Not only does it prolong the lifespan of your tools and materials, but it also creates a healthier environment where creativity can truly flourish. With each deep clean, you gain a clearer understanding of your inventory, catch small problems before they escalate, and rediscover the joy of working in a space that supports your ambitions. Remember, the goal isn’t perfection—it’s progress. With the right supplies, a realistic schedule, and a step-by-step plan, deep cleaning becomes less of a chore and more of a ritual that honors your craft. So mark your calendar, gather your tools, and enjoy the satisfaction of a sparkling, organized studio. Your future creative self will thank you, season after season.

You mentioned that open shelves tend to collect a lot of dust in craft studios. Is it better to switch to closed storage, or do you have any cleaning tips that make open shelving more manageable between deep cleans?
Switching to closed storage will definitely reduce dust buildup, but if you like displaying supplies on open shelves, you can keep them manageable by dusting weekly with a microfiber cloth, using clear containers to store items, and rotating what you display. Regularly decluttering shelves also helps minimize dust and makes cleaning quicker.
Do you have any recommendations for specific deep cleaning products that are safe to use around paints and adhesives commonly found in craft studios?
For deep cleaning around paints and adhesives in craft studios, opt for mild, non-abrasive cleaners like diluted dish soap and warm water for surfaces. Microfiber cloths are great for dusting without leaving fibers behind. If you need something stronger, look for all-purpose cleaners labeled non-toxic and solvent-free to avoid damaging art supplies or causing unwanted chemical reactions.
Do you have any suggestions for cleaning up stubborn glue drips on work surfaces without damaging them? I always seem to end up scratching my tables when I try to remove dried adhesive.
To remove stubborn glue drips without scratching your work surfaces, try softening the glue first with a little rubbing alcohol or warm soapy water on a cloth. Let it sit for a few minutes, then gently scrape with a plastic scraper or an old credit card rather than metal tools. This should lift most adhesives safely.