Introduction: Why Climate Control Matters in Your DIY Craft Studio
Dreaming of a craft studio that’s comfortable no matter the season? You’re not alone. Whether you’re cutting fabric, pouring resin, or painting for hours, maintaining the right temperature and humidity is essential—not just for your own comfort, but for the longevity of your tools, safety of your materials, and the quality of your finished projects. Extreme heat can warp wood and dry out paints, while cold can stiffen adhesives and make your workspace unbearable. Humidity swings can harm paper, fabrics, and even your electronics. Yet, many DIYers overlook climate control until they’re sweating through a summer afternoon or shivering in the middle of a winter project. This comprehensive guide dives deep into practical, budget-friendly ways to heat, cool, and regulate your DIY craft studio for peak comfort and creativity. We’ll explore effective insulation, portable climate solutions, smart thermostats, dehumidifiers, and more—plus, how to balance comfort with energy efficiency and safety. Let’s transform your studio into a haven that inspires, protects your investments, and keeps you productive all year long.
Understanding Your Studio’s Climate Challenges
Studio Types and Their Unique Needs
No two craft studios are exactly alike. The challenges—and solutions—for a converted garage differ from those for a basement nook or a sunroom addition. Consider:
- Detached Garages and Sheds: Often lack insulation, have little airflow, and are vulnerable to temperature extremes.
- Basement Studios: Tend to be cooler, prone to dampness and condensation.
- Attic or Loft Spaces: Heat up quickly in summer, can be drafty in winter.
- Sunrooms or Enclosed Porches: Experience wide temperature swings and solar gain.
Start by assessing your studio’s location, construction quality, and existing climate control (if any). Do you have drafty windows? Is your insulation up to par? Are there existing vents or ductwork to leverage?
The Consequences of Poor Climate Control
Neglecting temperature and humidity management in your studio can lead to:
- Warped or damaged materials (wood, paper, canvas, adhesives)
- Mold growth and musty odors
- Rust on tools and machinery
- Increased risk of fire or electrical hazards
- Lower productivity and reduced creative enjoyment
Addressing these issues up front saves money, preserves your supplies, and makes your workspace a place you actually want to be.
Insulation: Your First Line of Defense
Assessing and Upgrading Studio Insulation
Before you plug in any heater or air conditioner, tackle insulation. Insulation helps keep hot air out in summer and traps warmth inside in winter, dramatically reducing energy costs and maintaining stable temperatures.
- Walls: If your studio is unfinished, consider installing batt or rigid foam insulation. For finished walls, blown-in cellulose can be added with minimal disruption.
- Ceilings and Floors: Insulate attic spaces with fiberglass batts or spray foam. For sheds or garages, consider insulating beneath the floor or adding insulating mats.
- Windows: Upgrade to double-glazed panes or add insulating window film. Thermal curtains or cellular shades also help.
- Doors: Use weatherstripping and door sweeps to seal gaps. Consider insulated exterior doors for detached studios.
DIY Insulation Projects
Simple, cost-effective projects can make a big difference:
- Seal drafts with caulk or foam sealant.
- Install foam gaskets behind outlet and switch plates.
- Add reflective insulation or radiant barriers in attic studios to reduce summer heat gain.
Heating Solutions for Every Budget
Portable Electric Heaters
For most small to medium craft studios, portable electric heaters are an affordable and flexible solution. Popular options include:
- Ceramic Heaters: Fast to heat up, with built-in safety features.
- Oil-Filled Radiators: Silent, provide consistent heat, safer for overnight use.
- Infrared Heaters: Heat objects directly, not the air—great for targeted comfort.
Always choose models with tip-over and overheat protection. Never leave space heaters unattended in your studio.
Permanent Heating Options
- Electric Baseboard Heaters: Easy to install along walls, provide steady warmth.
- Mini-Split Heat Pumps: Highly efficient, provide both heating and cooling, and don’t require ductwork.
- Radiant Floor Heating: Ideal for new builds or major renovations; keeps your feet (and materials) warm.
For detached studios, avoid using propane or kerosene heaters unless you have proper ventilation. Carbon monoxide is a real danger in enclosed spaces.
Heating Tips for Energy Efficiency
- Warm up the studio 15-30 minutes before you plan to work.
- Use a programmable thermostat or smart plug for scheduled heating.
- Wear layers and keep cozy rugs underfoot to minimize heater use.
Cooling Strategies to Beat the Heat
Fans and Ventilation
Fans are your first defense against summer heat and stuffiness:
- Ceiling Fans: Circulate air and can be reversed for winter to push warm air down.
- Oscillating Floor/Table Fans: Direct airflow where you need it most.
- Exhaust Fans: Essential for removing hot air, especially in attics or sunrooms. Install near the ceiling for best results.
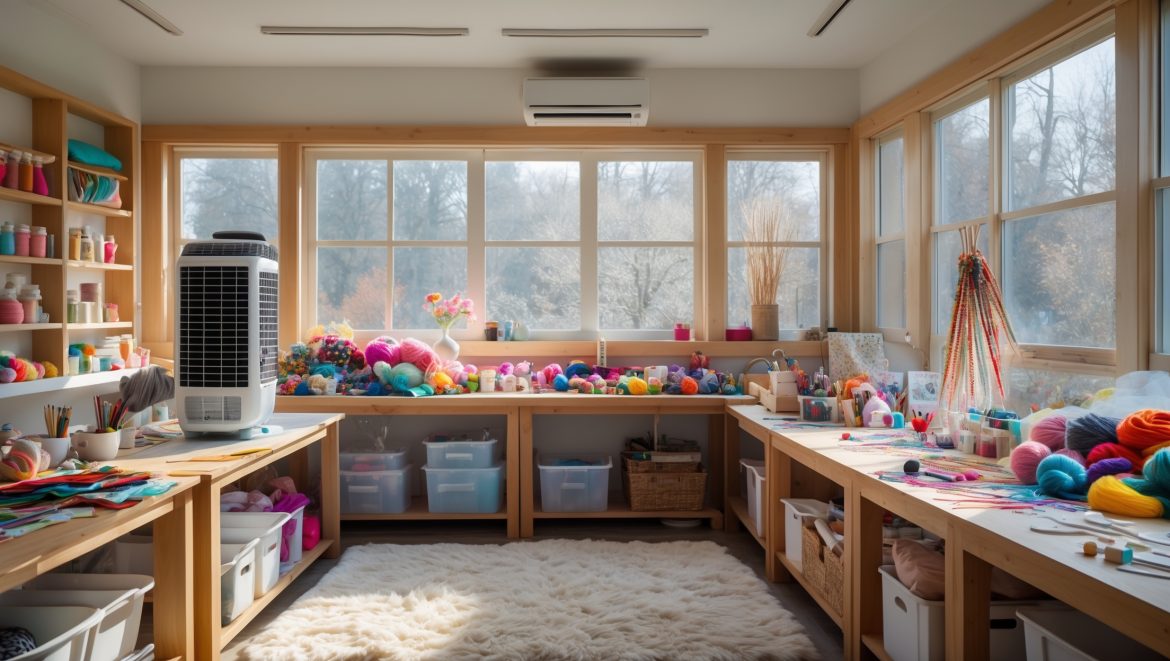
Portable and Window Air Conditioners
- Window AC Units: Efficient if you have a suitable window; choose the right BTU rating for your space size.
- Portable ACs: Easy to move between rooms, require venting through a window or door.
- Mini-Split Systems: Quiet, efficient, and offer year-round climate control if you can invest in installation.
Combine cooling with blackout curtains or reflective window film to block solar gain.
Passive Cooling Hacks
- Work early or late in the day when it’s cooler.
- Keep blinds closed during peak sun hours.
- Open windows at night for cross-ventilation, then close them during the day.
- Use light-colored or reflective roofing for detached studios.
Humidity Control: Protecting Materials and Comfort
Dehumidification
High humidity can warp wood, curl paper, and foster mold. In damp climates or basement studios:
- Use a portable dehumidifier with a built-in humidistat.
- Empty water tanks regularly or connect to a floor drain if possible.
- Monitor humidity levels (ideal: 35-50%) with a digital hygrometer.
Humidification
Winter air can become dry, causing static, cracking, and discomfort. Solutions include:
- Small tabletop humidifiers for targeted moisture.
- Evaporative humidifiers for larger spaces.
- Keep an eye on humidity—too much can lead to condensation and mold.
Smart Climate Control Upgrades
Thermostats and Remote Monitoring
Smart thermostats and WiFi-enabled plugs allow you to schedule and monitor your studio’s climate from anywhere. Features to look for:
- Custom schedules for heating and cooling cycles.
- Remote temperature and humidity alerts to prevent surprises.
- Energy use tracking to identify savings opportunities.
Zone Control and Automation
- Set up multiple zones if your studio has separate work and storage areas.
- Automate fans and dehumidifiers based on real-time sensor readings.
- Integrate with voice assistants for hands-free adjustments while you work.
Safety Considerations for Climate Control Devices
Electrical Safety
- Avoid overloading outlets—use dedicated circuits for high-wattage heaters or AC units.
- Regularly inspect cords and plugs for wear or damage.
- Install surge protectors for sensitive electronics and climate equipment.
Fire and Ventilation Safety
- Keep heaters away from flammable materials and clutter.
- Don’t block vents or airflow from AC units or dehumidifiers.
- Test smoke and carbon monoxide detectors monthly.
Budgeting for Comfort: Costs and Savings
Initial Investment vs. Long-Term Savings
Upgrading insulation and investing in efficient climate control pays off over time. Consider:
- Insulation: $100-$1000+ depending on studio size and DIY skills.
- Portable Heater or AC: $40-$400 per unit.
- Mini-Split Heat Pump: $1500-$3000 installed, but can halve your energy use.
- Dehumidifier: $50-$300 depending on capacity.
Factor in local energy prices and how often you use your studio. Simple upgrades like draft-sealing and using smart plugs can pay for themselves in a single season.
DIY vs. Professional Installation
Many insulation and climate control upgrades are DIY-friendly. However, for tasks like installing mini-splits or electrical circuits, weigh the cost and safety benefits of hiring a pro. Always check local codes and permit requirements before major work.
Climate Control for Specialty Materials and Projects
Material-Specific Needs
- Paper Crafts: Require stable humidity to prevent warping or curling.
- Resin and Epoxy: Sensitive to temperature swings, which affect curing time and finish quality.
- Textiles and Yarn: Store in breathable containers, away from vents and direct airflow to avoid dust and static.
- Paints and Adhesives: Keep within manufacturer-recommended temperature and humidity ranges for best results.
Label storage areas with ideal conditions, and use small climate monitors to spot issues early.
Maintaining Your Studio’s Comfort Year-Round
Seasonal Climate Checklist
- Spring: Test dehumidifiers and clean AC filters before first use.
- Summer: Check window seals, clean fans, and prep blackout curtains.
- Fall: Inspect heaters, flush humidifiers, and check insulation for gaps.
- Winter: Reverse ceiling fans, monitor humidity, and keep heaters clear of clutter.
Keep a maintenance log so you don’t miss key tasks.
Quick Fixes for Sudden Weather Changes
- Use a draft stopper or rolled towel for doors/windows in a cold snap.
- Open windows briefly during mild weather to air out musty spaces.
- Adjust portable fans as sun angles shift throughout the year.
Conclusion: Crafting Comfort for Creative Success
Your craft studio should be a retreat—a place where creative energy flows unimpeded by stuffy air, freezing floors, or stifling heat. By prioritizing climate control, you’re not just protecting your materials and tools—you’re investing in your own well-being and productivity. Insulation forms the backbone, keeping temperatures stable and energy bills in check. Thoughtfully chosen heaters and coolers, paired with fans, humidity control, and smart technology, keep your studio comfortable and ready for anything the weather brings. Remember, comfort and safety go hand-in-hand: always follow best practices for electrical devices and ventilation. Small, consistent upgrades—like sealing a drafty window, scheduling a dehumidifier, or adding a smart thermostat—add up to a workspace you’ll love year-round. Don’t let climate challenges sap your creative spirit. With the strategies in this guide, your DIY craft studio can become a cozy, inspiring haven every season, letting you focus on what you do best: bringing your creative visions to life.
