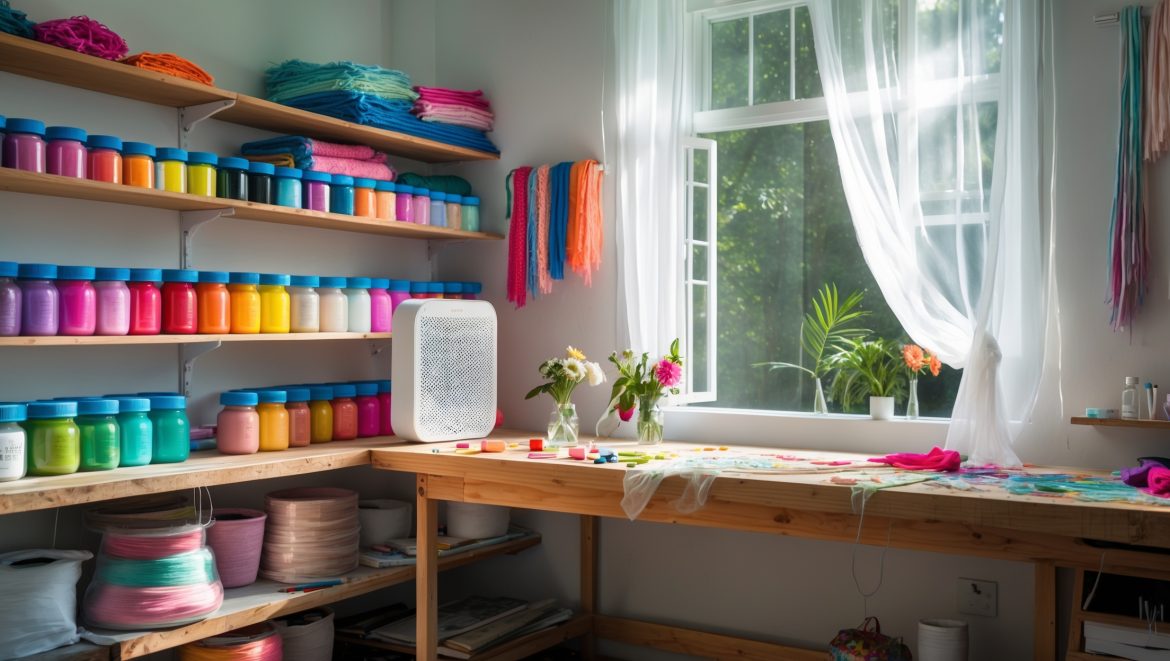
Introduction: Why Air Quality Matters in Your DIY Craft Studio
As a DIY enthusiast or professional crafter, you spend countless hours immersed in creative projects. But while you focus on paints, glues, fabrics, resins, and other inspiring materials, have you ever considered the air you’re breathing in your craft studio? Indoor air quality is a crucial—yet often overlooked—aspect of a healthy, productive creative space. Many crafting supplies emit volatile organic compounds (VOCs), fine particulate matter, and even allergens, all of which can affect your health, creativity, and the longevity of your projects. Whether you’re working with spray adhesives, soldering electronics, or simply cutting paper, effective air quality management is essential. In this comprehensive guide, you’ll learn how to monitor air quality in your studio, select the right purification methods, and establish smart daily habits for fresher, safer air. Let’s make your space as inspiring and healthy as your creations!
Understanding Common Air Quality Hazards in Craft Studios
Typical Pollutants and Their Sources
- Volatile Organic Compounds (VOCs): Released by paints, solvents, adhesives, and many finishing products.
- Fine Particulate Matter (PM2.5 and PM10): Generated by sanding, cutting, burning, or even from textiles and paper dust.
- Fumes and Off-Gassing: From hot glue guns, soldering, resin curing, and certain plastics.
- Allergens: Dust mites, mold spores (especially in humid studios), and fibers from yarns or fabrics.
- Odors: Lingering chemical or organic smells from cleaning agents, paints, or craft supplies.
Health Effects of Poor Air Quality
- Headaches and dizziness
- Respiratory irritation or allergies
- Asthma exacerbation
- Fatigue and reduced concentration
- Long-term exposure risks (e.g., respiratory illness, chemical sensitivities)
Recognizing these hazards is the first step to creating a safer, more enjoyable crafting environment.
DIY Air Quality Monitoring: Tools and Techniques
Types of Air Quality Monitors
- PM Monitors: Detect fine dust and particles. Essential for studios where sanding, cutting, or burning occurs.
- VOC Sensors: Measure chemical emissions from paints, glues, and other materials.
- CO2 Monitors: Indicate ventilation effectiveness. High CO2 can signal poor fresh air exchange.
- Humidity & Temperature Sensors: Control mold risk and comfort.
Recommended DIY Monitors
- Budget-friendly: Temtop M10, Awair Element, or similar multi-sensor devices.
- Advanced: Airthings View Plus, IQAir AirVisual Pro, or DIY Arduino/Raspberry Pi-based kits for tech-savvy makers.
Placement Tips
- Place monitors at breathing height (about 4–6 feet off the ground).
- Avoid direct proximity to windows or vents for accurate readings.
- Consider multiple monitors in larger studios or near specific workstations (e.g., paint area, soldering bench).
Interpreting Results
- PM2.5 should ideally be under 12 µg/m³ (EPA standard).
- VOC levels vary; aim for under 0.5 mg/m³ when not actively using chemicals.
- Relative humidity: 40–55% to prevent mold and static.
Track readings over several days to spot trends and identify problem activities or materials.
Purification Solutions: Choosing the Right Air Cleaners
HEPA Air Purifiers
- What they do: Capture 99.97% of particles ≥0.3 microns—ideal for dust, fibers, and most allergens.
- Best for: General particulate control, especially useful for fabric, paper, and sanding studios.
- Key features: Look for CADR (Clean Air Delivery Rate) ratings that match your studio’s square footage.
Activated Carbon Filters
- What they do: Absorb VOCs, odors, and some airborne chemicals.
- Best for: Studios using paints, solvents, adhesives, or resin.
- Combination units: Many HEPA purifiers also include activated carbon stages for dual protection.
DIY Air Purifiers: The Box Fan Filter Hack
- Materials needed: 20″ box fan, 20×20″ MERV-13 furnace filter, bungee cords or duct tape.
- Assembly: Attach the filter to the intake side of the fan. Secure tightly; ensure the airflow direction matches the arrows on the filter.
- Effectiveness: Great for particulate matter; less effective for VOCs unless using a carbon-infused filter.
- Cost: Approx. $30–$50, filter replaced every 3–6 months depending on studio use.
Specialty Filters (For Advanced Needs)
- Photo-catalytic oxidation (PCO): Breaks down some VOCs; useful for heavy chemical use but more expensive.
- UV-C lamps: Can deactivate some germs, but not a replacement for filtration.
Purifier Placement and Usage Tips
- Position air purifiers near main work areas, away from walls for optimal airflow.
- Run purifiers continuously during and for several hours after crafting sessions.
- Replace filters as indicated by the manufacturer or when air quality readings worsen.
Source Control: Practical Steps to Minimize Indoor Pollution
Smart Material Choices
- Use water-based, low-VOC paints, glues, and finishes whenever possible.
- Store solvents, sprays, and strong-smelling products in airtight containers.
- Choose natural fibers and untreated woods to reduce off-gassing.
Safe Work Practices
- Work with chemicals near a window or exhaust fan.
- Limit the amount of open containers on your work surface.
- Clean up spills promptly and dispose of rags or paper towels in sealed bags.
Routine Cleaning
- Wet-wipe surfaces and vacuum with a HEPA filter to capture dust.
- Wash reusable masks, aprons, and any air-permeable studio textiles regularly.
- Minimize clutter to reduce dust and make cleaning easier.
Ventilation: Boosting Fresh Air Exchange
Natural Ventilation
- Open windows and doors on opposite sides of the room for cross-ventilation.
- Use a box fan in one window (blowing out) and open another window for intake.
- Schedule regular “airing out” sessions, especially after projects involving fumes.
Mechanical Options
- Install a window exhaust fan or inline duct fan for targeted fume removal.
- Consider portable air exchangers (ERV/HRV units) if possible in your climate.
- Seal gaps and weatherstrip doors to control airflow paths and prevent unwanted drafts or outdoor pollutants.
Climate Considerations
- In humid climates, ventilate during drier parts of the day to avoid mold risk.
- In cold climates, air out in short bursts to refresh air without overcooling the space.
Maintaining Your Air Quality System
Filter Replacement Schedules
- HEPA/carbon filters: Replace every 6–12 months, or as indicated by usage and monitor data.
- DIY filters: Mark your calendar for quarterly checks—replace sooner if visibly dirty or monitor readings spike.
Monitor Calibration and Maintenance
- Reset and recalibrate digital monitors every 6 months, following the manufacturer’s guidelines.
- Dust sensors with a can of compressed air to prevent false readings.
General Cleaning
- Vacuum and mop floors weekly to remove dust and tracked-in particles.
- Clean air purifier intakes and pre-filters monthly for optimal efficiency.
- Keep windowsills and vents free of debris.
Real-World Case Study: Upgrading Air Quality in a Home Craft Studio
Meet Alex, a mixed-media artist who transformed a spare room into a thriving craft studio. Initially, Alex noticed frequent headaches and a musty smell after painting sessions, despite regular cleaning. After setting up a basic air quality monitor, Alex discovered high PM2.5 levels and moderate VOC spikes during project work.
Alex implemented the following changes:
- Installed a HEPA+carbon air purifier near the main workbench.
- Switched to low-VOC paints and adhesives.
- Adopted the box fan filter hack for extra dust control during sanding projects.
- Established a twice-daily window ventilation routine.
Within a week, air quality readings improved dramatically. Headaches vanished, and even the musty odor dissipated. Alex now enjoys longer, more productive studio sessions and feels confident inviting friends and clients into the creative space.
Advanced DIY: Building a Custom Air Quality Dashboard
For Tech-Savvy Crafters
- Use an Arduino or Raspberry Pi microcontroller.
- Add sensors: PMS5003 (particulate), CCS811 (VOC/CO2), DHT22 (humidity/temperature).
- Display live readings on an LCD or transmit data to your phone or computer.
This setup lets you automate reminders for filter changes, ventilation breaks, and even control smart plugs for air purifiers. Open-source software like Home Assistant can log trends and trigger alerts if air quality dips during certain projects.
Conclusion: Breathe Easy and Create More
Your craft studio should be a haven where creativity flows freely—not a source of hidden health risks or distractions. By actively monitoring and improving air quality, you safeguard your well-being and ensure your projects remain vibrant and uncontaminated. Investing in a reliable air purifier, adopting smart work habits, and tracking air quality with modern sensors are all practical, affordable steps that pay off in the long run. Remember, good air quality isn’t just about avoiding discomfort; it supports sharper focus, longer creative sessions, and peace of mind knowing you’re protecting yourself and anyone who shares your space. Start with simple changes—like opening a window, switching to safer materials, or building a quick DIY filter. Over time, you’ll notice the difference not just in the air, but in your energy and inspiration. Here’s to breathing easy, crafting boldly, and enjoying every moment in your creative sanctuary!

When choosing between different air purification methods mentioned in the article, how can I determine whether a HEPA filter, activated carbon filter, or ventilation system is best for mitigating fumes from resin and solvent use?
To address fumes from resin and solvent use, focus on filtration that targets chemicals and odors. Activated carbon filters are most effective for absorbing volatile organic compounds (VOCs) present in these fumes. HEPA filters mainly trap particles, not gases. A good ventilation system, ideally with exhaust to the outside, is also important to remove fumes at the source. Combining activated carbon filtration with proper ventilation offers the best protection.
When monitoring air quality in a small space, how often should I check for things like PM2.5 and VOC levels? Is there a certain schedule you recommend for home craft studios?
For a home craft studio, it’s a good idea to check PM2.5 and VOC levels at least once per day when you’re actively using the space, especially during or after activities that create dust or fumes. If you use automated sensors, set them to log data continuously or at regular intervals like every 15–30 minutes for the most accurate picture. Periodically review the data to spot trends and adjust ventilation or purification as needed.
If my craft studio is in a basement with limited ventilation, are there special steps or equipment I should consider beyond standard air purifiers to control mold spores and fumes?
Since your studio is in a basement with limited ventilation, it’s important to address both humidity and airflow. Besides using high-quality air purifiers with HEPA and activated carbon filters, consider using a dehumidifier to keep humidity below 50% and discourage mold growth. Installing an exhaust fan or creating some form of mechanical ventilation can also help remove fumes and bring in fresh air. Regularly cleaning surfaces and materials will further reduce potential mold and dust buildup.
If my studio has a lingering ‘chemical’ smell even after cleaning and opening windows, does that mean there’s still a lot of VOCs in the air? What’s the best first step to address this before investing in advanced purifiers?
A lingering chemical smell can indicate that volatile organic compounds (VOCs) are still present, even after cleaning and airing out the studio. Before purchasing advanced purifiers, try increasing natural ventilation by using fans to help push air out, and remove or tightly seal any products that could be off-gassing. This can significantly reduce VOC levels before investing further.
I’m curious how often you should monitor the air quality in your craft studio, especially if you use materials like paints and adhesives every day. Are there specific times you find it’s more important to check, like after using spray paint?
If you use paints and adhesives daily, it’s wise to check your craft studio’s air quality before you start working and right after activities that release fumes, such as spray painting or using strong adhesives. Monitoring during and after these projects helps you spot any air quality drops so you can ventilate or purify as needed.
If I mostly use paints and adhesives, should I be more concerned about VOCs or particulate matter? And does your guide suggest which type of air purifier tackles these best?
If your craft studio use mostly involves paints and adhesives, VOCs (volatile organic compounds) are typically the bigger concern, as these materials can release a lot of fumes. The guide recommends using air purifiers with activated carbon filters for VOCs. For particulate matter, especially from sanding or spraying, HEPA filters are effective. Many air purifiers combine both filter types, giving you broader protection.
When it comes to managing fine particulate matter generated from sanding or cutting, is a standard household air purifier enough, or should I look for something specialized for craft studios?
A standard household air purifier may help some, but for craft studios where fine particles from sanding or cutting are common, it’s better to choose a purifier with a HEPA filter rated for capturing very fine dust. Additionally, consider units designed for workshop or studio use, as they usually handle higher dust loads and are more durable.
How long does it usually take to notice improvements in symptoms like headaches or fatigue after upgrading air quality measures in the studio? I’d like to know what kind of timeframe to expect before feeling a difference.
Many people start to notice improvements in symptoms such as headaches or fatigue within a few days to a week after upgrading air quality measures, especially if the changes address the main sources of poor air in your studio. However, the exact timeframe can vary depending on factors like the severity of prior air quality issues and individual sensitivity.